| Week 12 Photoshop | |
|---|---|
| Course | Arch 100b |
| Date | 2014/04/18 |
| Learning Objectives | This workshop will give you an advanced post processing skills with Photoshop |
| Agenda |
|
| Uses Tool(s) | [[Photoshop|]] |
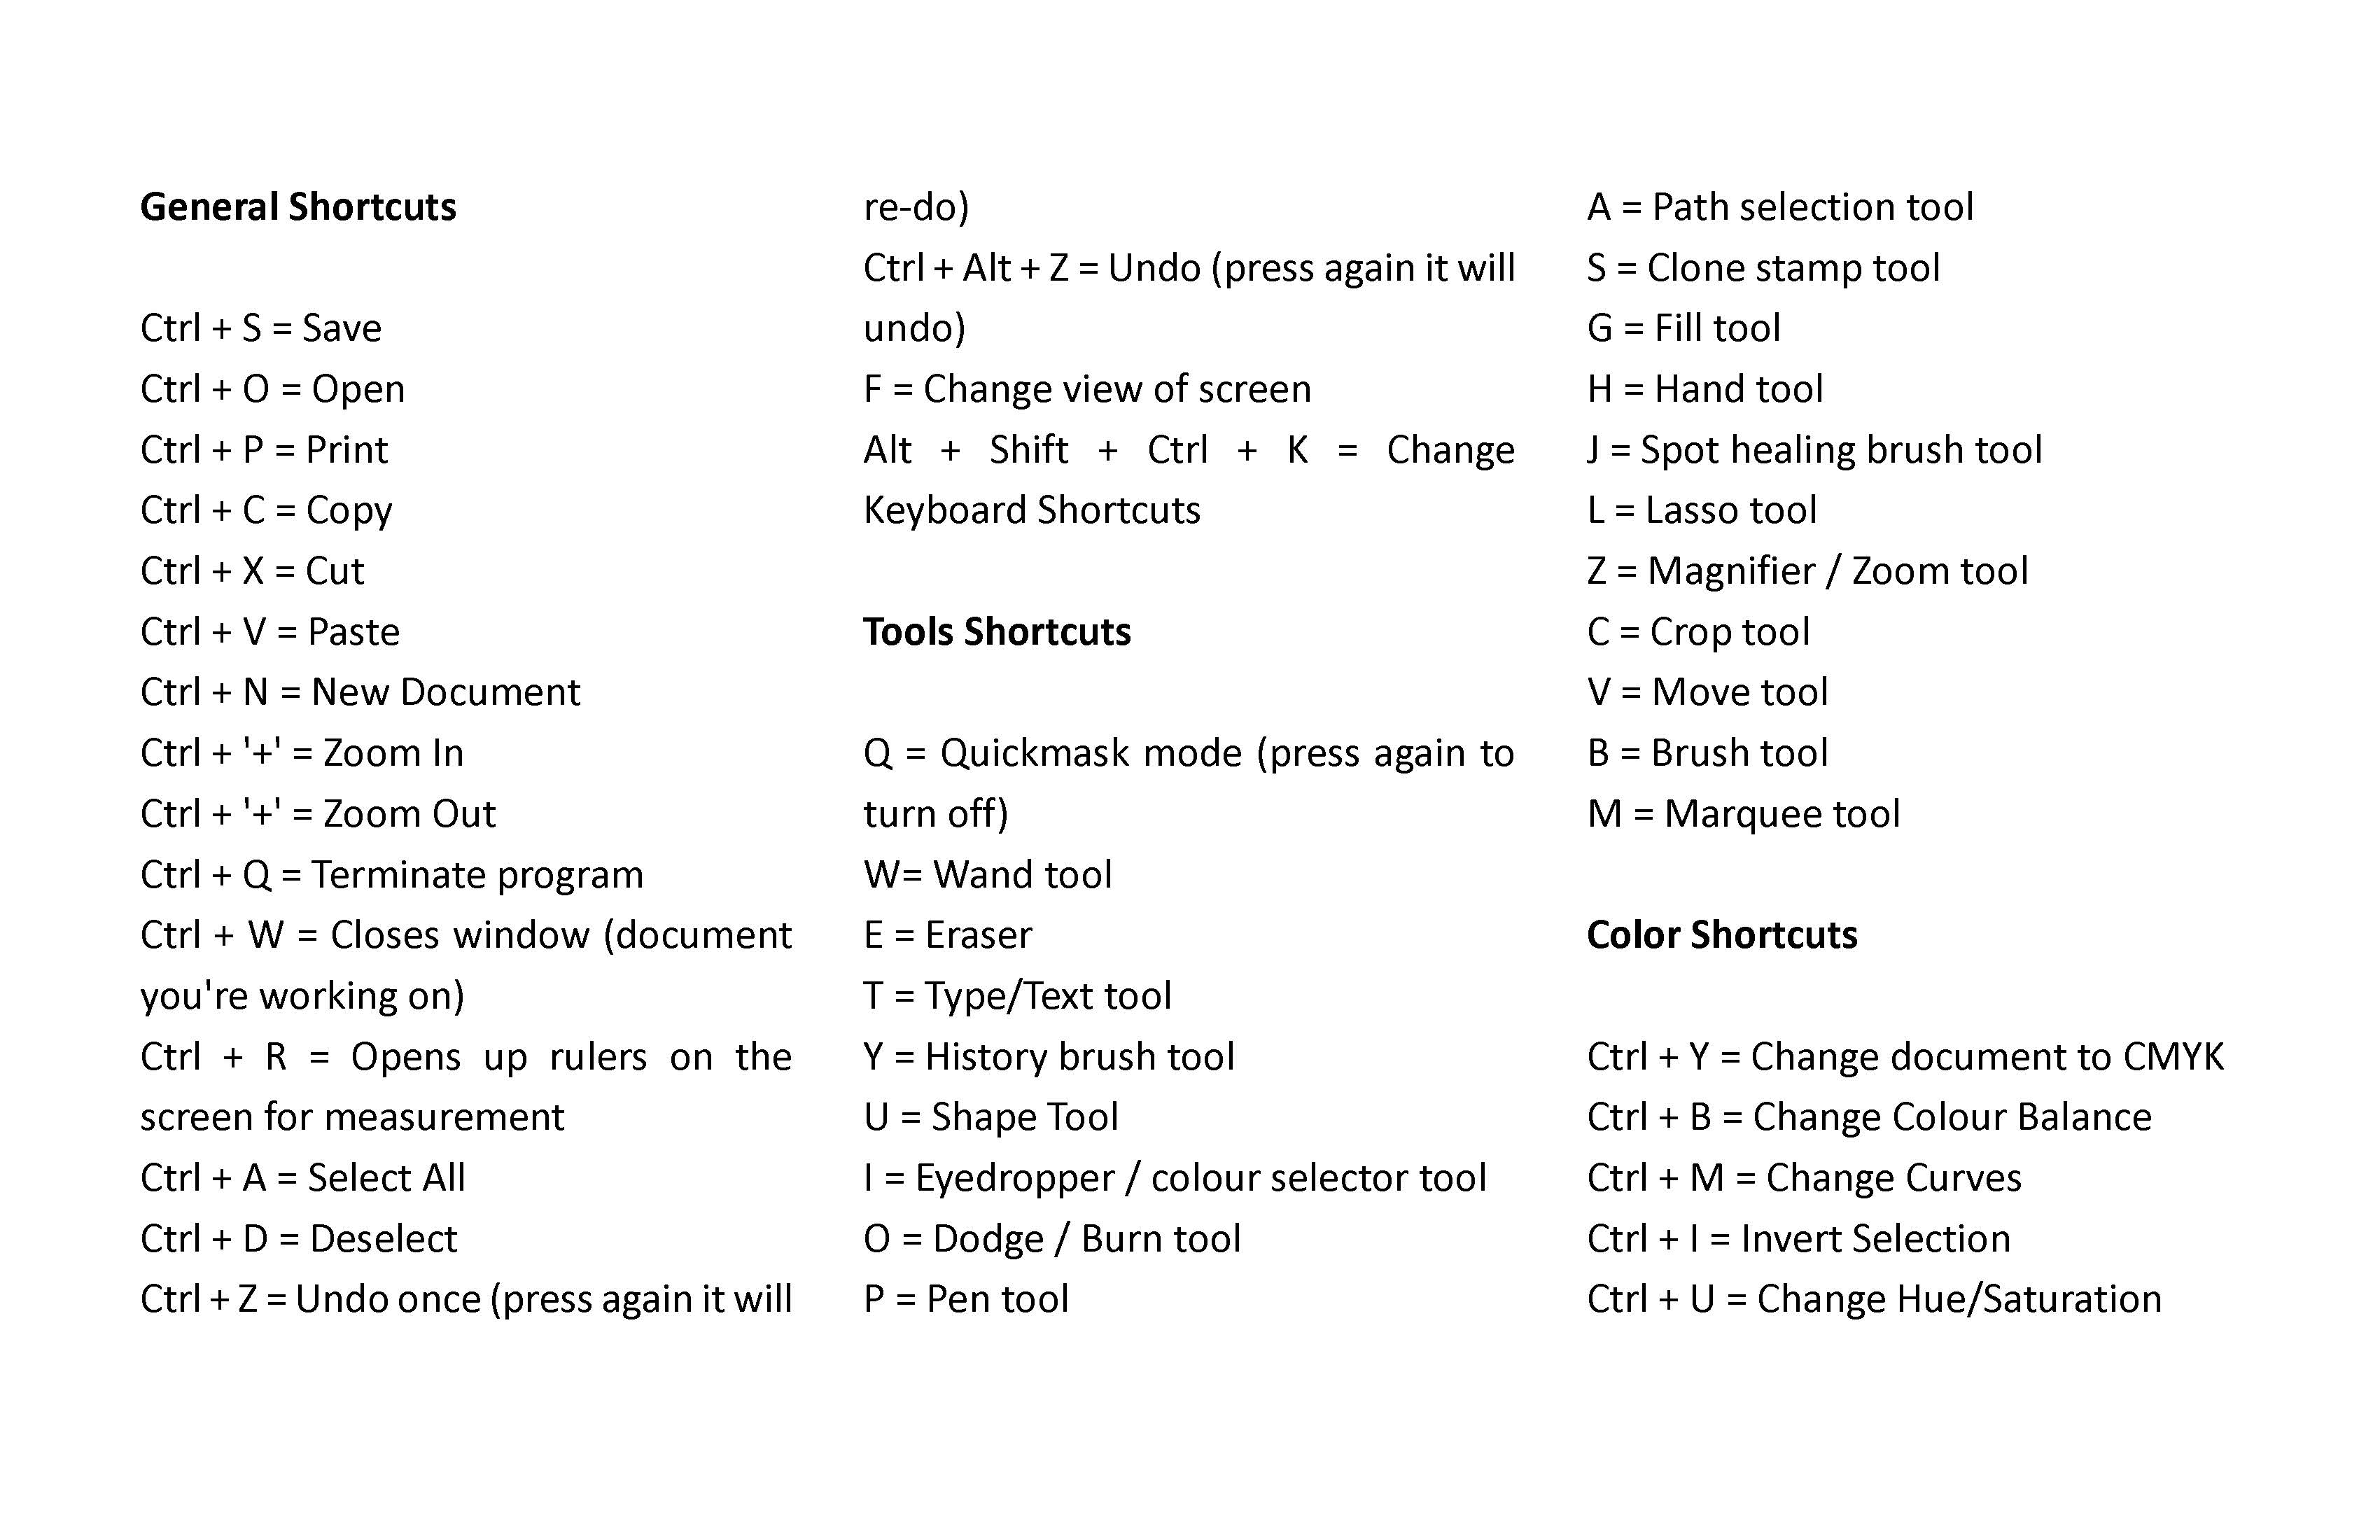
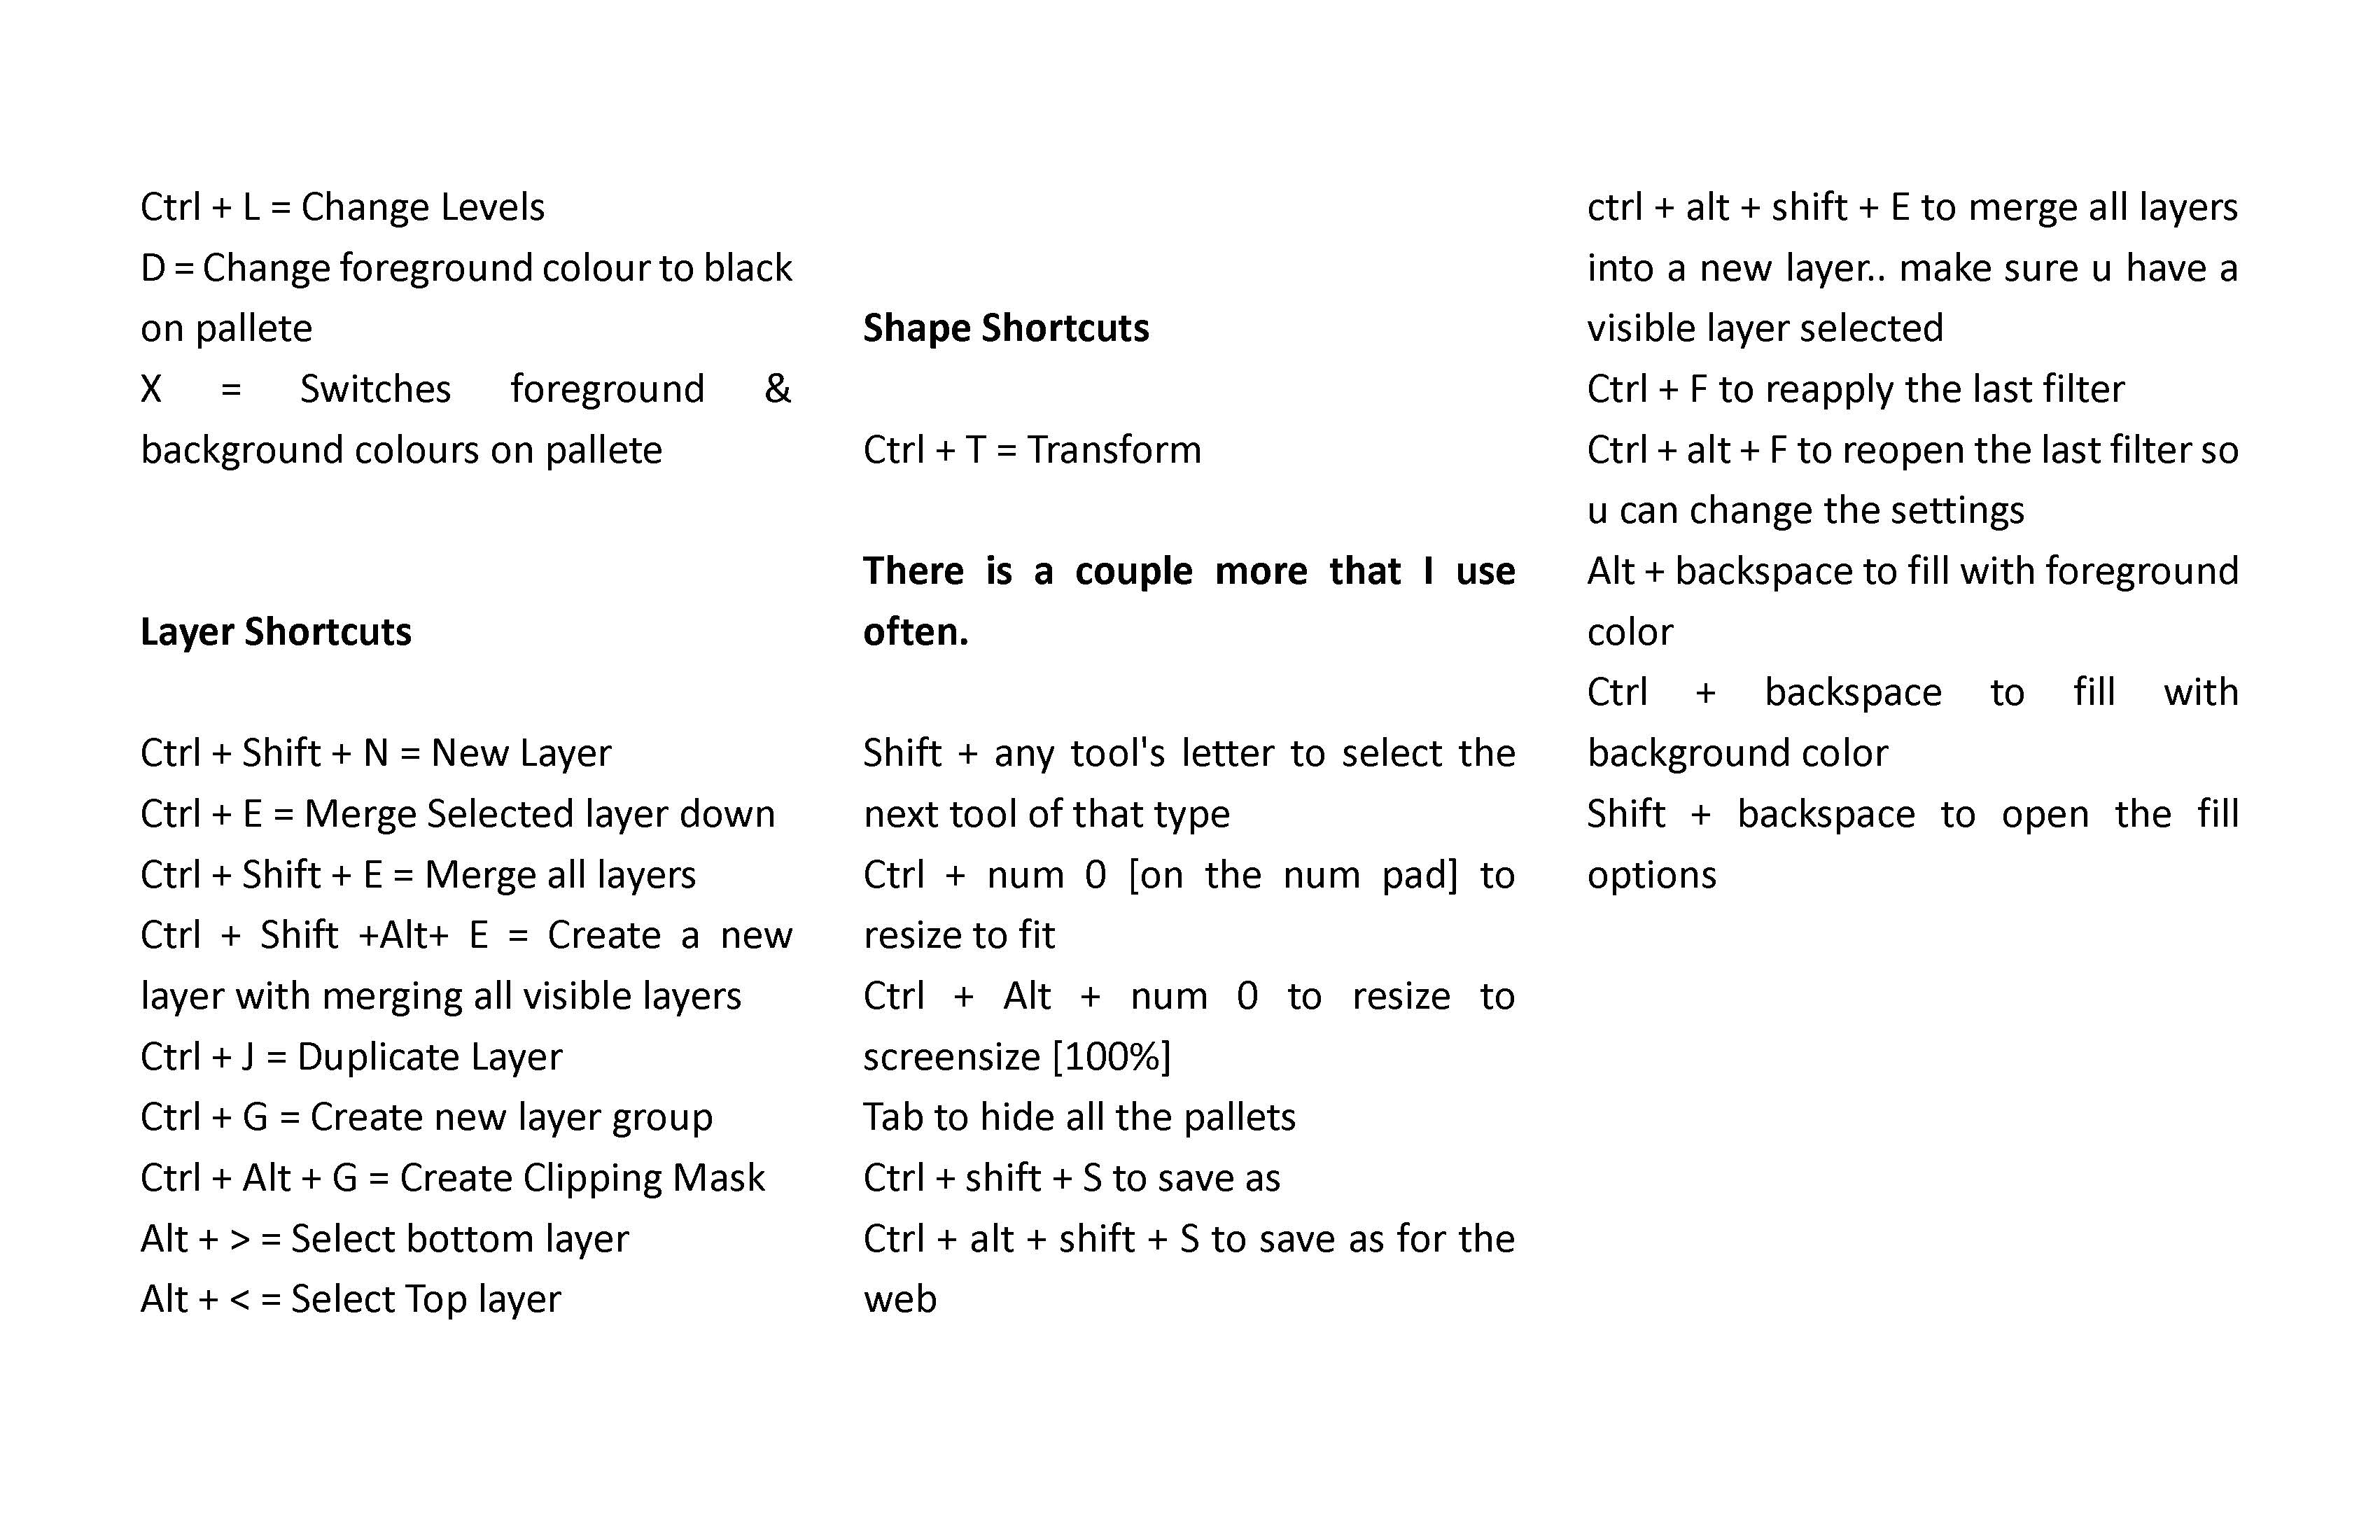
HOTKEYS
 Open the raw rendering that you produced in V-Ray. This is a 3-point perspective. This is not what you will be doing, this is simply a workflow on the processes and steps to take in order to achieve a good rendering through photoshop.
 We now want to place the rendering in a context, here we will use a field. It is important when photoshoping grass or any type of greenery that you get an image at a perspective. I usually just google what I need in images and find a high quality file, download, and open into photoshop.
 Move the field layer below the raw rendering
 Crop the image to get rid of the watermark.
 Adjust the levels of the field layer to match the raw rendering with the image you have selected. Remember try to get close, but it does not have to match perfectly at this moment as it will change as you layer more textures and effects on the image.
 Use the polyline selection tool to select the ground of the raw rendering. Make sure you close off the polyline to be able to fill with black.
 Once you fill in the selected area with black, you are now able to select the inverse and create a mask for the desired layer. The usage of masks is important because it allows the alteration of the image without effecting the original image.
 To integrate the field with the raw rendering, use the clone stamp tool and change the paintbrush to the grass icon.
 By clicking the folder next to the brush style it opens a options menu that allows for the rotation of the brush and the amount of spacing inbetween each stroke.
 Use the clone stamp to soften the edges of the rendering and make the render and field more cohesive. Change the size of the brush according to the perspective. Deeper into the perspective the smaller the brush, as opposed to the front which will be bigger. To easily change the size of the brushes you can use the square bracket key on the keyboard.
 Use the clone stamp tool with a round brush to integrate the rendering into the hill of the field.
 Now the background image is too vibrant and distracting to the actual project. Add an effects on the field layer to alter the image without actually affecting the original image. The icon is demarcated by a half circle shape at the bottom of the layers menu.
 Once you get the levels correct hit “ctrl+alt+g” to apply the effect on only the layer below. You can also alt+click to copy the effect to another layer. Just place it above the layer that you want to have the same effect.
 To soften the sky, delete the existing sky from the field texture using the polyline selection tool, and import a lighter, less intense sky.
 Find secondary details that give a sense of depth (background, middle-ground, foreground). Here we will add trees in the backdrop to ground the project.
 Place the image of the trees on the bottom layer behind the field. Apply the same effect to this layer to match the levels of the field. Use the eraser tool as needed to soften the edges of the image.
 Repeat the tree texture across the horizon.
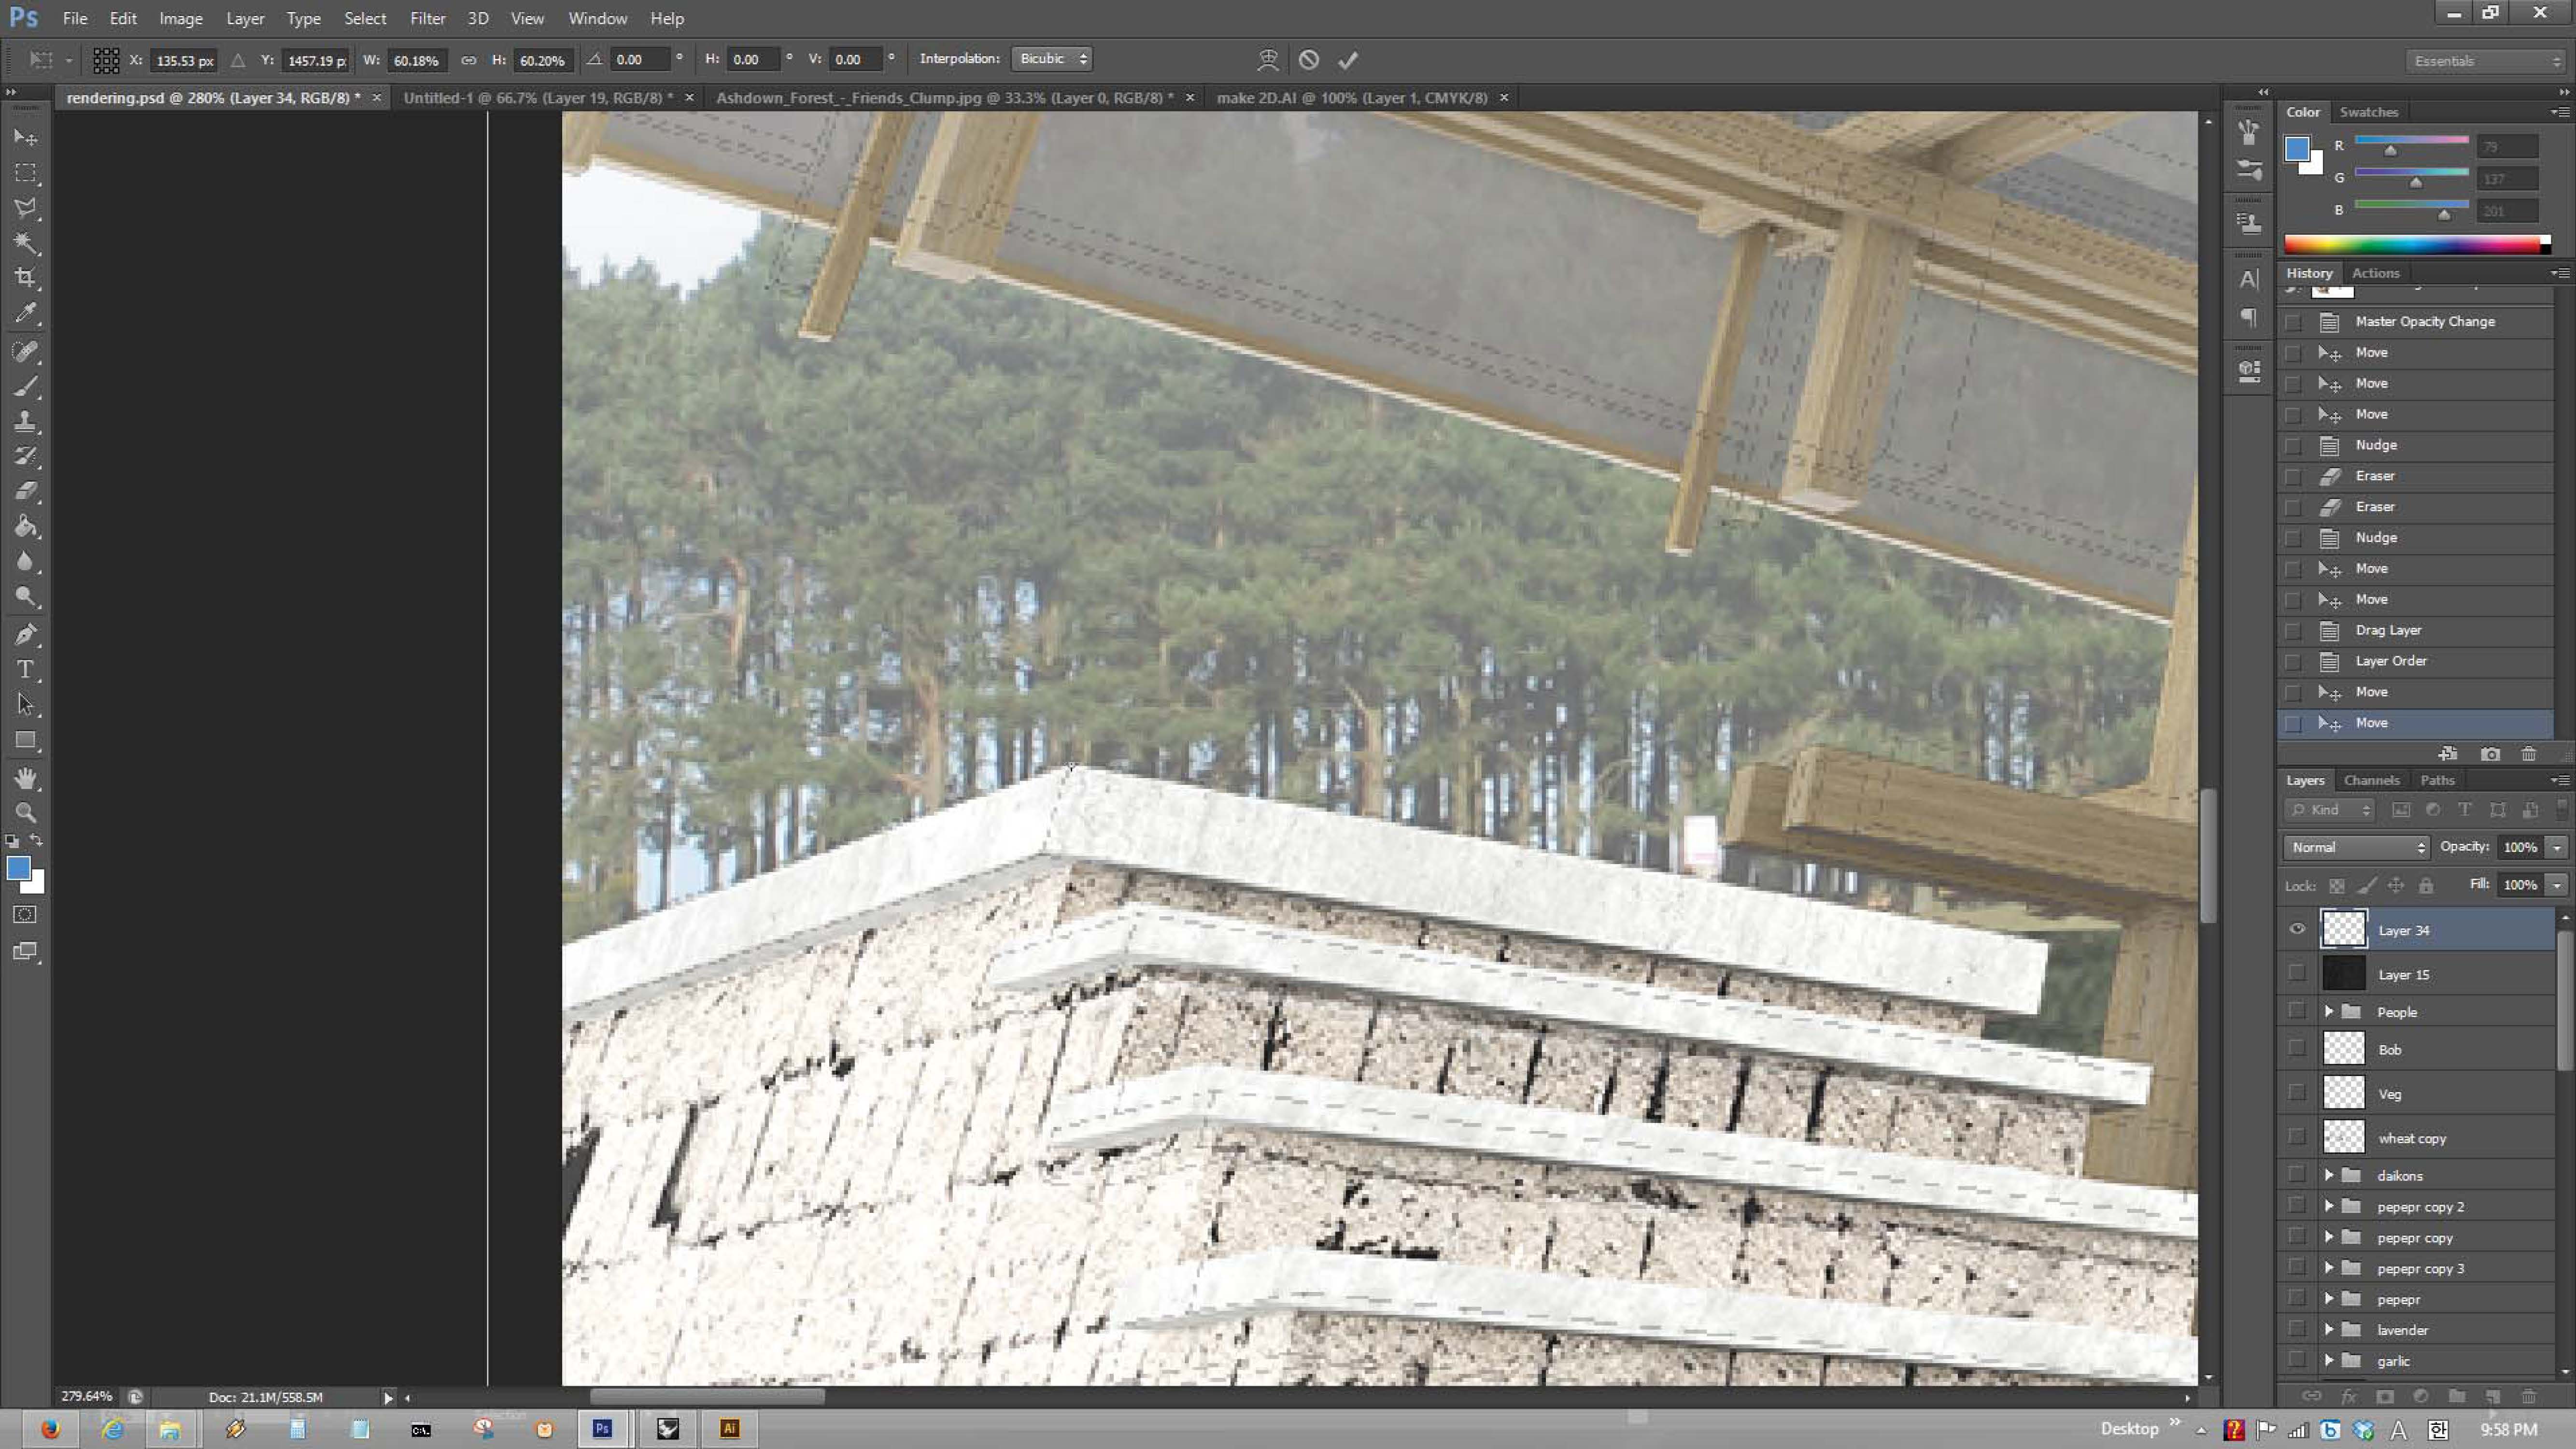
 Import the make 2d lines into the rendering to give another level of detail. The 2D lines allow the drawing to move away from a hyper-realistic style of rendering. You can use the make 2-d lines to specify parts in your projects that are more important.
 When placing the make 2d lines into the rendering, align a point in the rendering that you know matches the line. Add an anchor to the point by clicking alt+left-click. This allows you to scale the drawing without moving the make 2d lines consistently.
 Duplicate the make 2D layers to darken the lines.

 Lower the opacity of the entourage to avoid blocking off details of the buildings. The entourage is used to give a sense of scale, not to overpower the image itself.
 To add shadow, use the burn tool and carefully brush in the shadows for the entourage.
 Now that the image is placed in the context and the entourage is placed, we can start enhancing the different types of materiality in the project. First, as previously discussed, remember to render the image with material ID as an option.
 Using google images again, type in the type of material you want. Here the material can be a repetitive flat texture because we will manually change the perspective of the material swatch to match the perspective of the rendering.
 With the area selected click back on the layer of the material swatch and add a mask to hide the rest of the image.
 Test out different layer effects. Each rendering is different and will use slightly different layer effects. Pick an effect that speaks about your project and portrays what you want to show.
 Apply the other side and keep in mind the perspective.
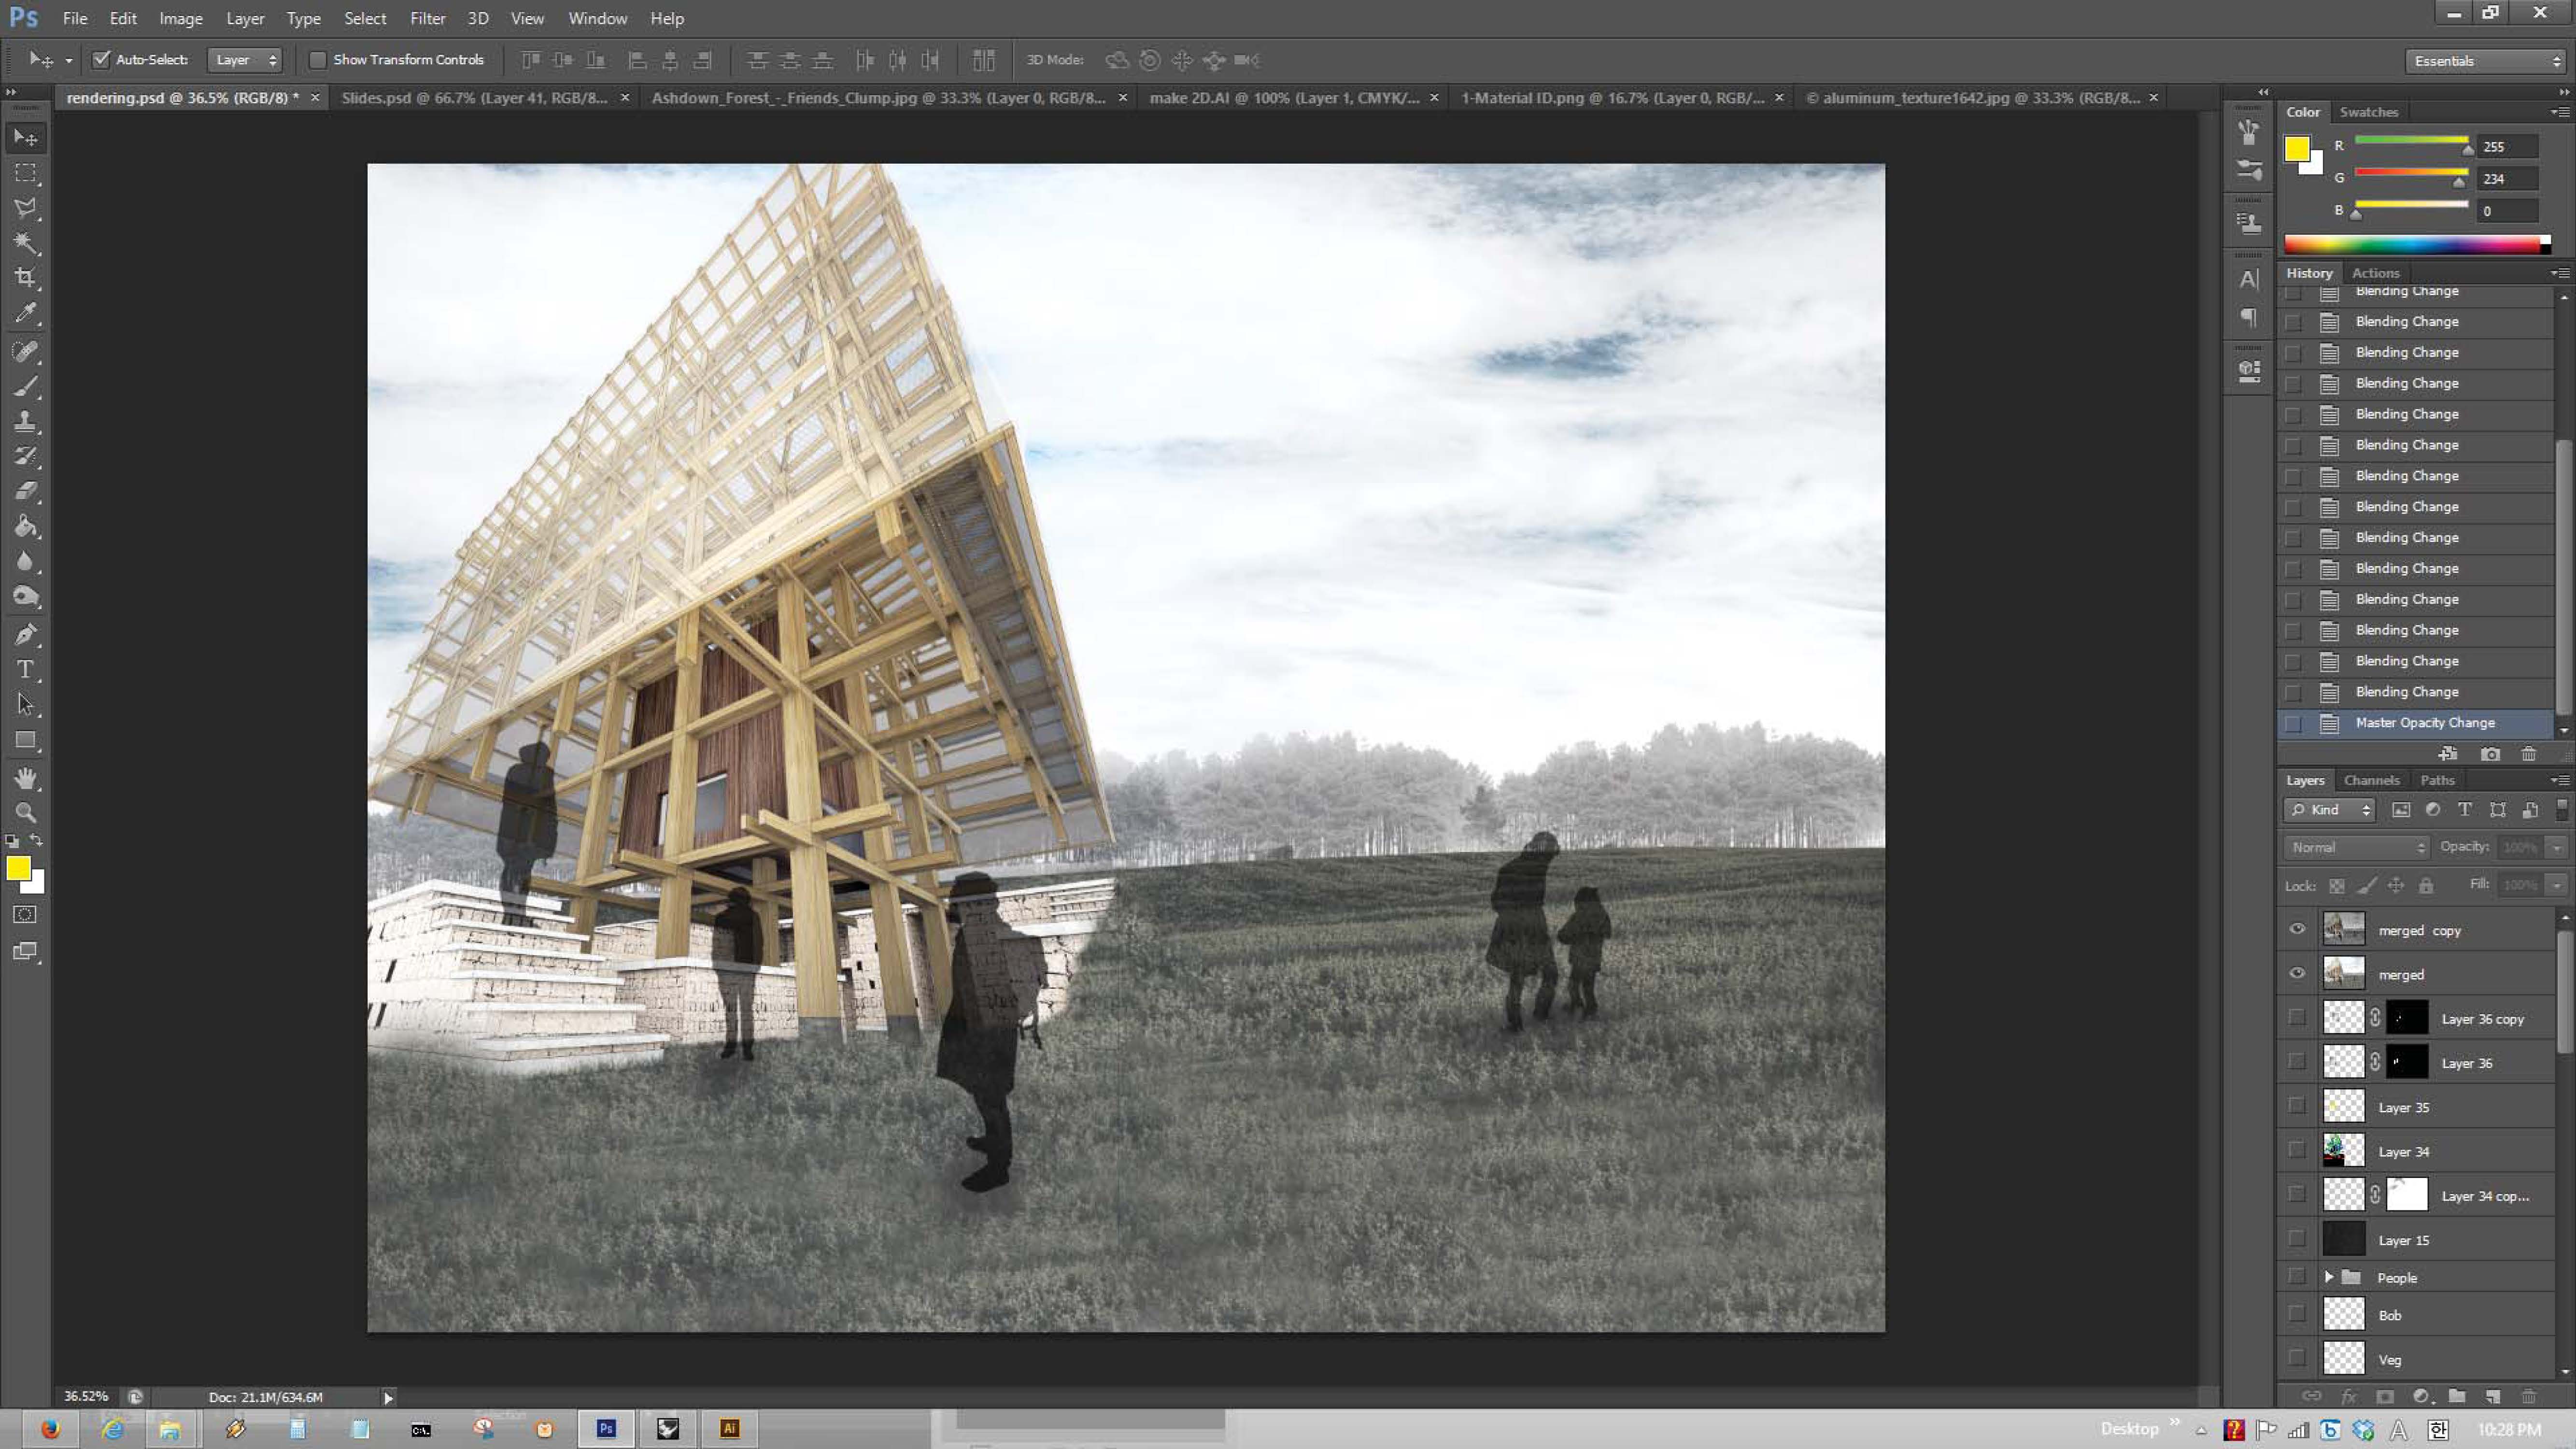
 This is the image before final retouches. As you can see, the project itself starts to blend too much with the context.
 Create a new layer and hit “ctrl+alt+shift+e” to merge all visible layers onto the new layer. This is important because you want the after effects to affect the entire image.
 Duplicate the merged layer and apply the hard light layer effect.
 Now apply a high pass filter on the image the make the rendering pop from the context.
 Lower the opacity so that the image is not so abrasive.
 Now selected the area which will be glass using the polyline selection tool.
 Overlay the area with a glass texture from google.
 Apply a mask to the glass texture layer.
 Apply layer effect and lower the opacity to get desired glass effect.


