| Timeline and Keyframes | |
|---|---|
| In this process we will describe how the After Effects timeline works and also go through some basic operations with keyframe set up. | |
| Part of | After Effects CS6 |
| Part Type | Interface |
| Screenshot | [[File:|320px]] |
Usage
Timeline basics
The Timeline is one of the most important section in Adobe After Effects. In the Timeline you can edit the sequence in which your animation elements appear on the Main Window . The Timeline allows you to add and modify basic settings of your elements, such as Position , Opacity , Scale , Rotation etc. Also, through the Timeline you can apply and edit effects on your elements. These modifications are possible through the assignment of keyframes , which we will explore below.
You can adjust the length of your timeline if you go to Menu --> Composition --> Composition Settings --> Duration . Notice that the total length of your timeline changes.
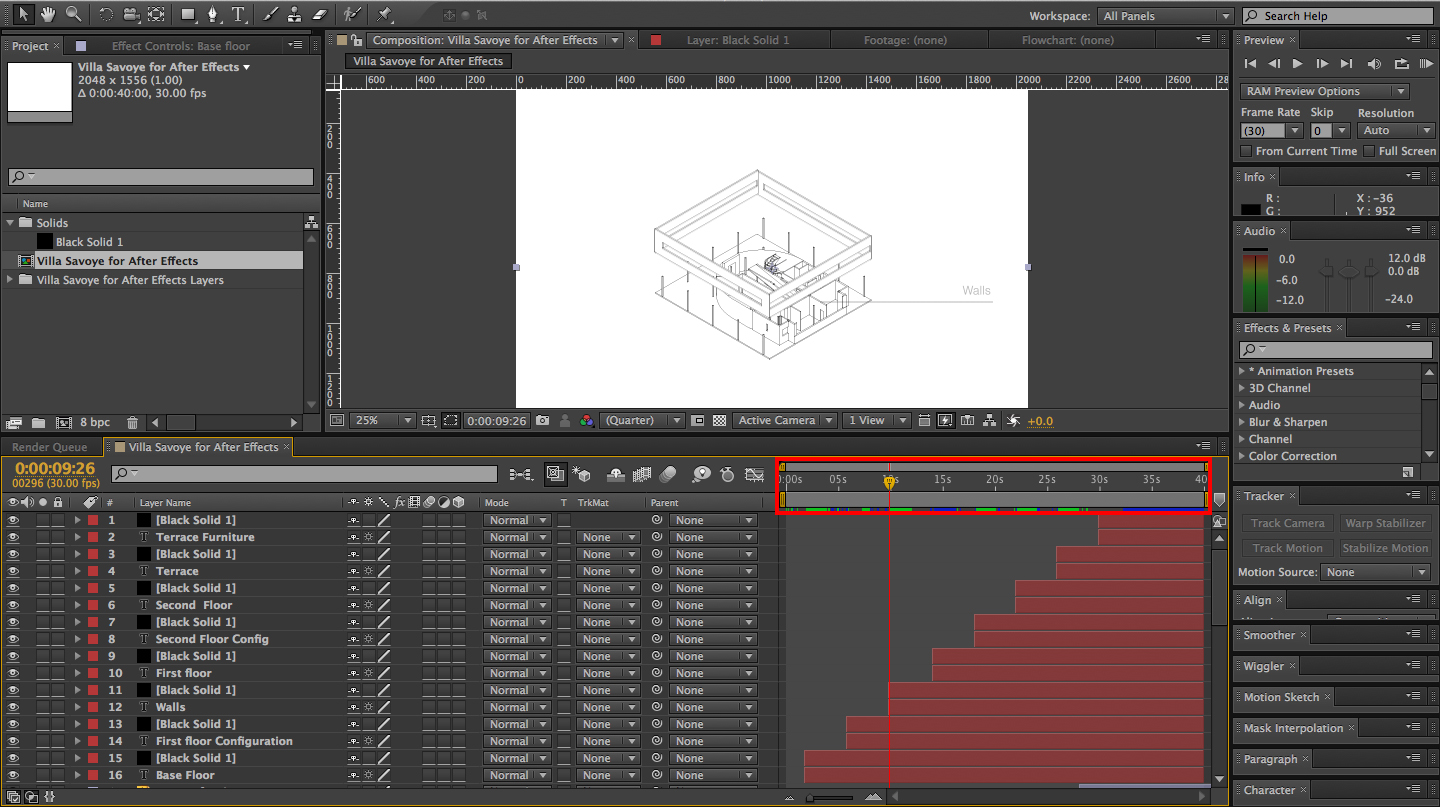
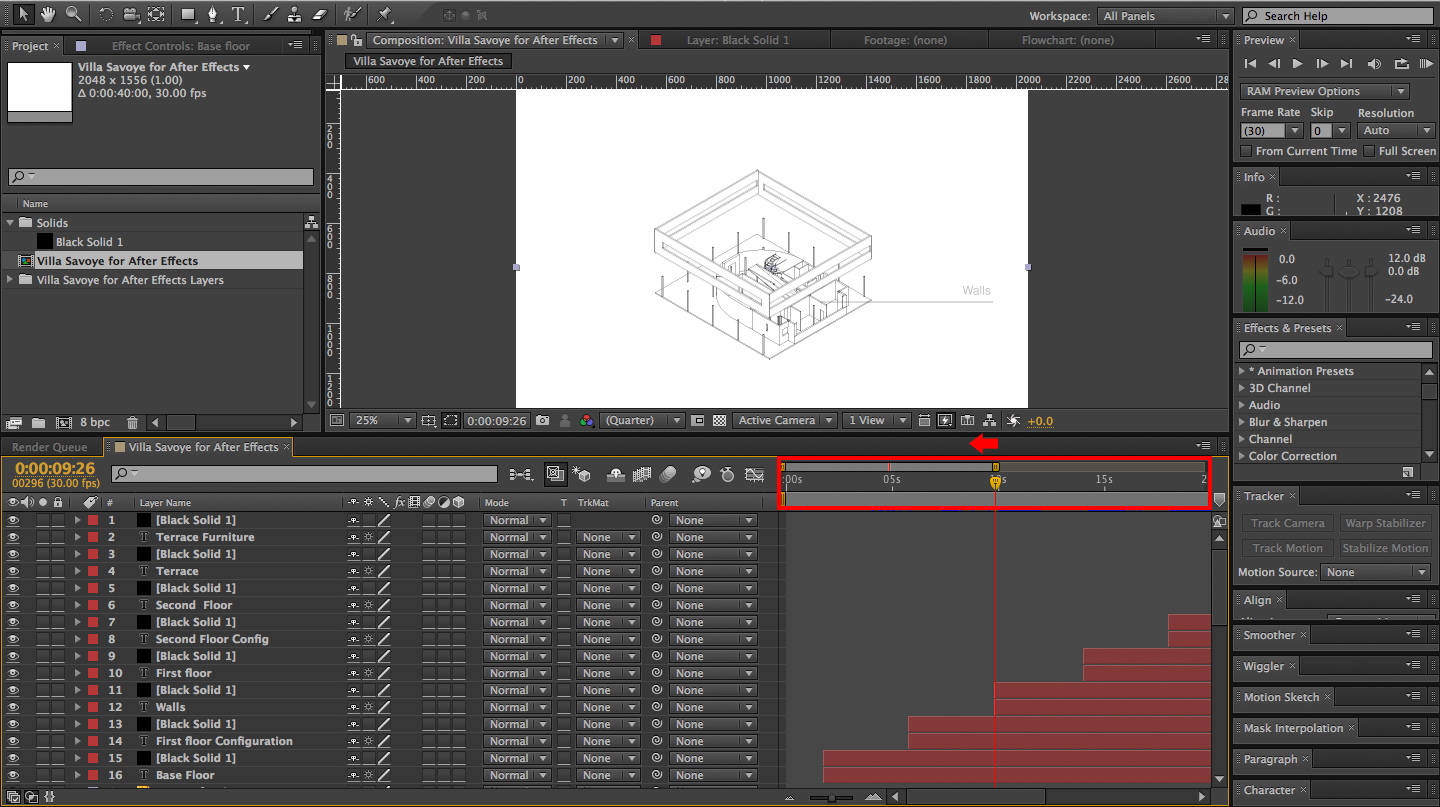
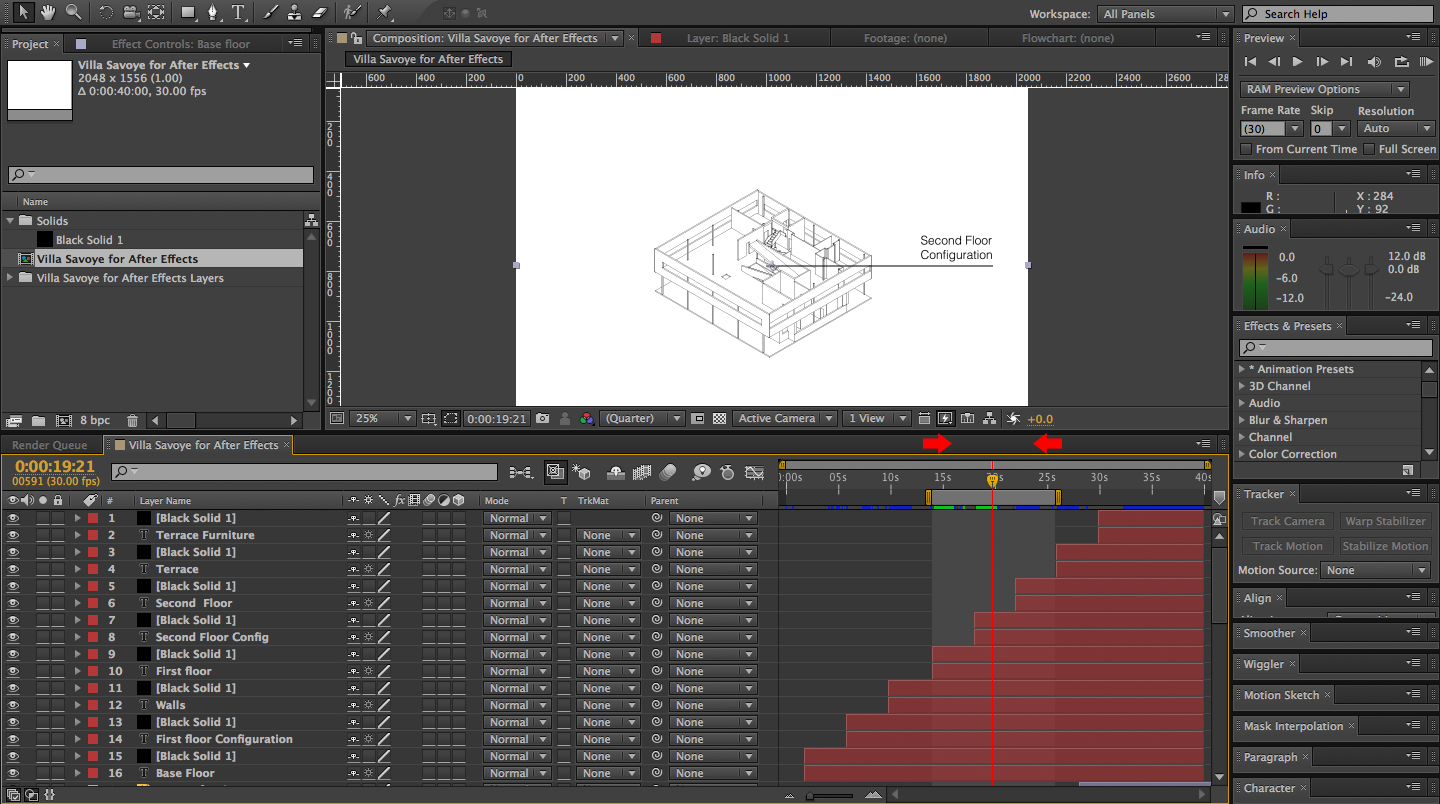
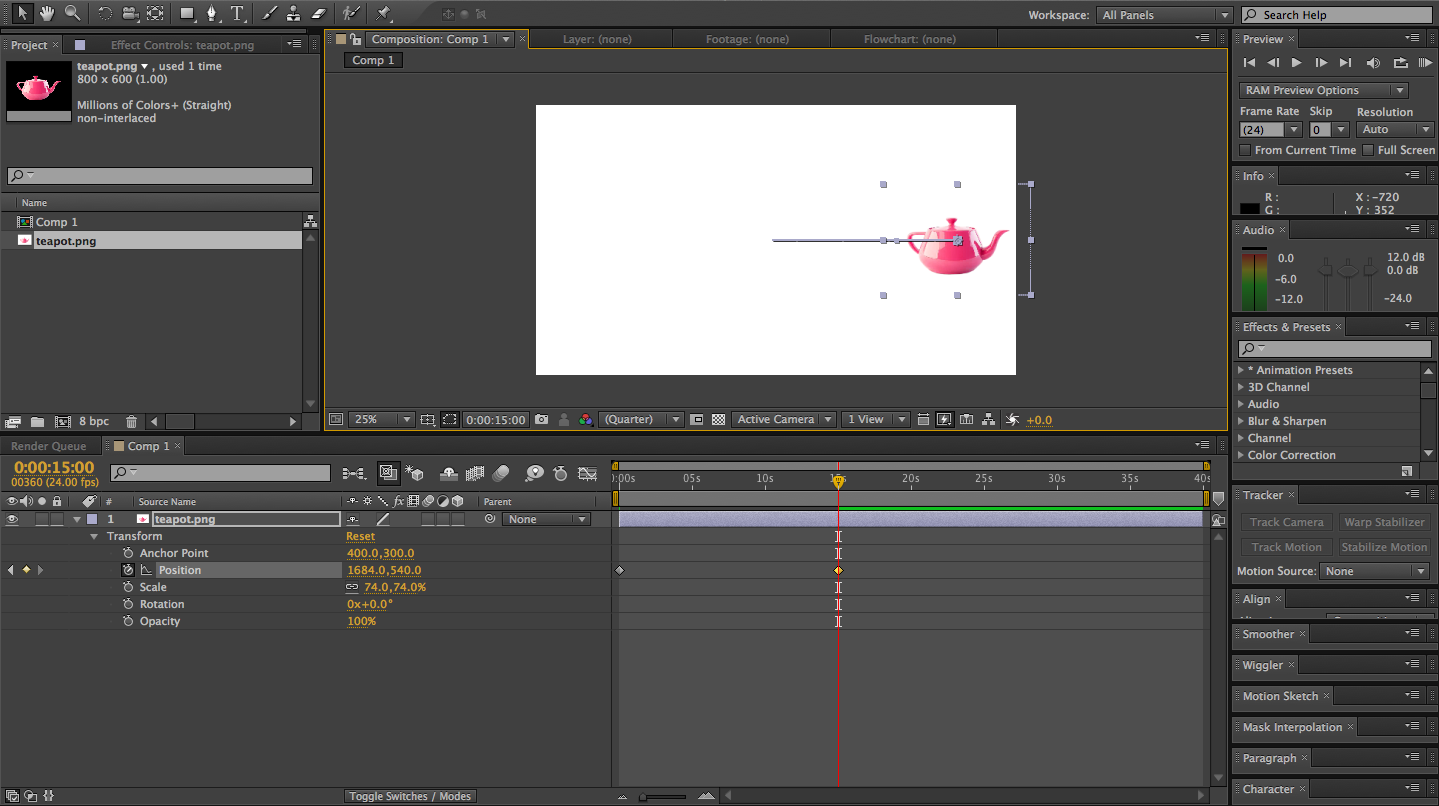
You can adjust the scale of the timeline by moving the upper slider. Scaling the timeline works as a zooming procedure that increases resolution, so that you can operate on the keyframes more accurately. Also, you can preview a limited part of your Work Area , in the case that you want to preview a small part of your animation and not run it from the beginning each time you want to test how it looks. The images below show how the two the operation works.
Scale the Timeline
Limit the Work Area
Keyframe set up
Understanding how keyframes work is fundamental for creating any kind of motion graphics. Keyframes are what an animator uses to indicate key points within an animation. In Adobe After Effects, keyframes are used in exactly the same way as animators used them in all kinds of animations. We set a keyframe when we want to indicate an important moment of our animation and then assign a second keyframe to indicate another moment and After Effects will create the transition from one keyframe to the other. Generally, a motion is indicated by at least two keyframes, one that indicates the initial position of the object and one that indicated its final position.
Basic keyframe set up
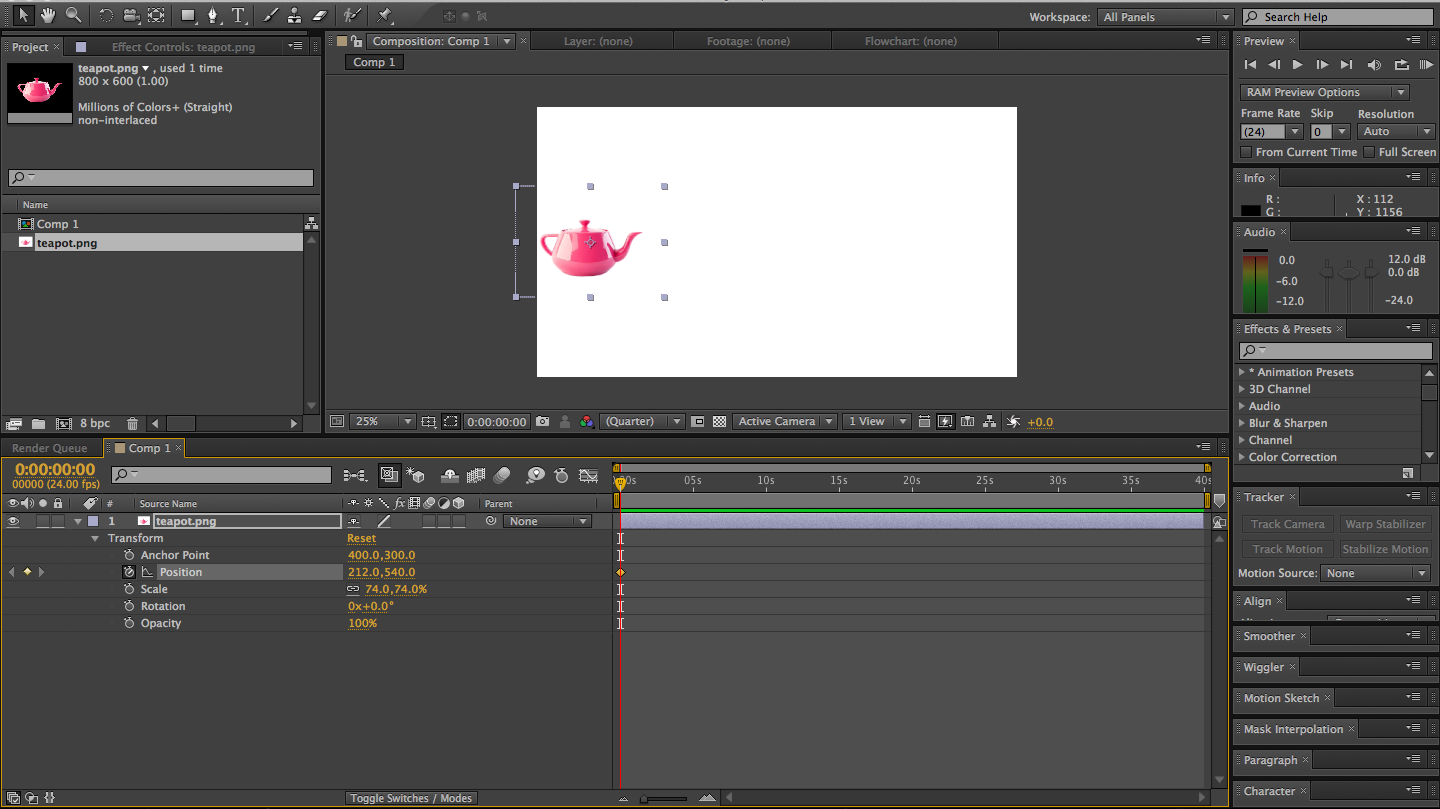
Now we will go through some basic keyframe settings. One of the most common settings you will be doing in After Effects is animating the Position of an object. Other important settings are the Scale , Rotation , and Opacity . All these settings can be accessed in the same place in After Effects interface. To adjust these settings for any layer in the scene, click on the little arrow next to the Layer icon in the Layer window . A drop down will appear. Click on the arrow next to the Transform option. Notice that a drop down appears that includes all the basic settings.
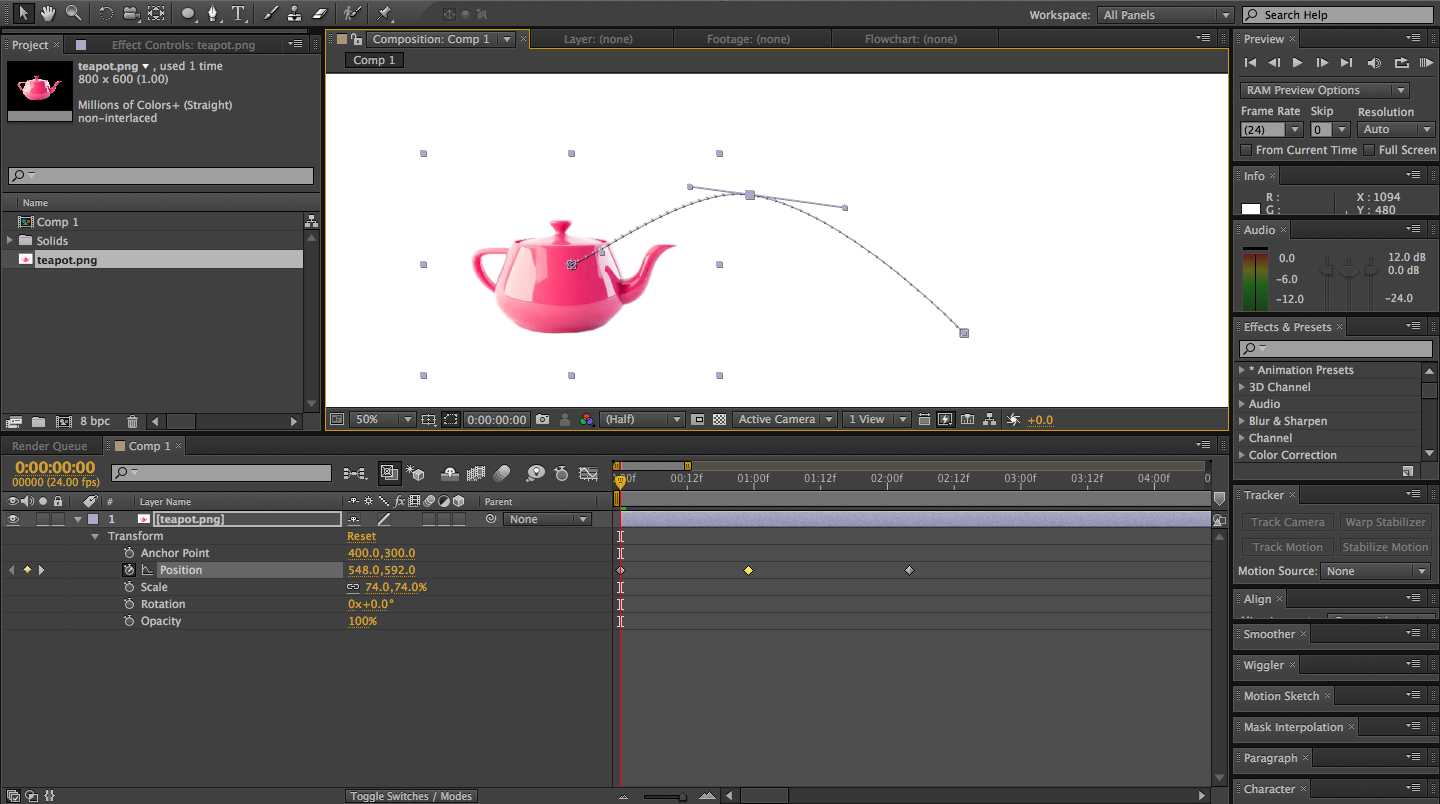
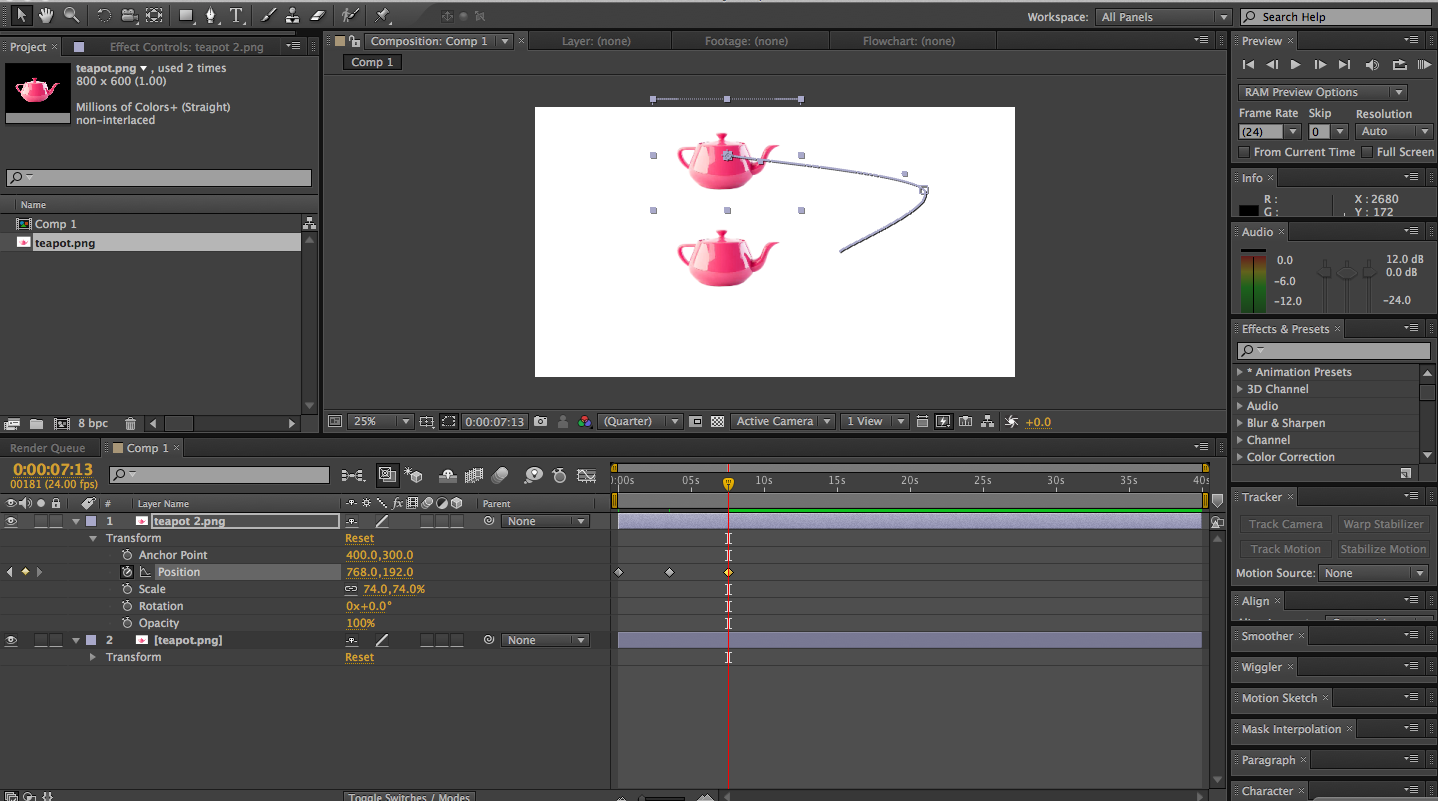
Position : In order to animate the Position of an object, we first need to assign the starting position of the first Keyframe .To do that, first grab the object and place it to the position where you want your animation to start from. Then, set the Current time indicator to the point on the Timeline where you want your animation to start from (this point could be 0 or any other instance of the timeline). Then, click on the "stopwatch" icon next to the Position . Notice that a little "diamond" appears on the Timeline . This is your first keyframe . Remember that to animate the position you need at least two keyframes. To set the second keyframe, move the Current time indicator to a second point on the Timeline and then drag the object to the position. Notice that a second Template:Keyframe is automatically created.
The process can be followed in exactly the same way for the other setting in the Transform section of the layer.
Animation path
The animation path is the trajectory that the animated object follows. The animation path includes the keyframes as points along a line. You can modify the positions of your keyframes, manually by dragging the points of the animation path. One interesting thing to notice is that the path curve, is a bezier curve and it allows you to deform it by adjusting the handles that are located in every point (keyframe) on the curve.
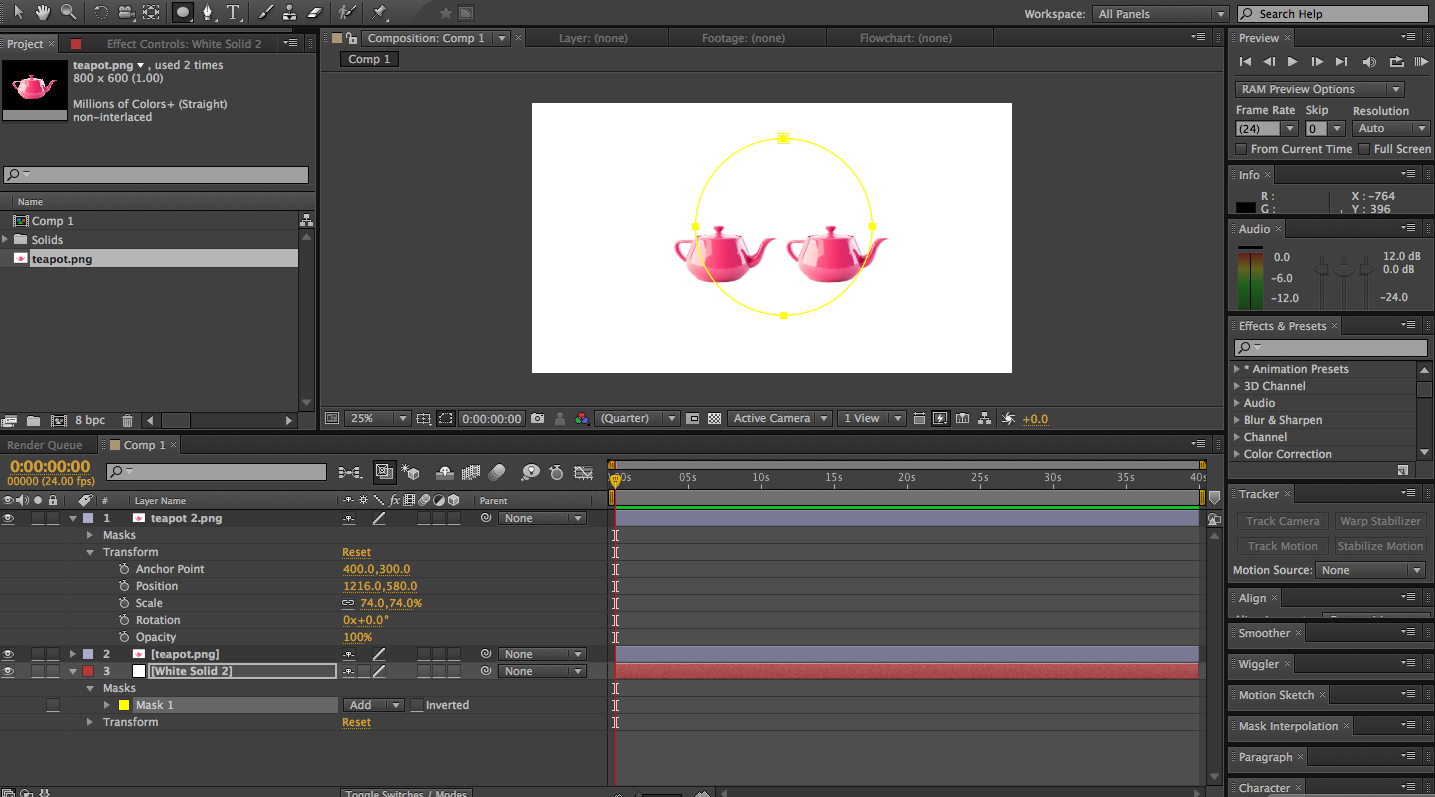
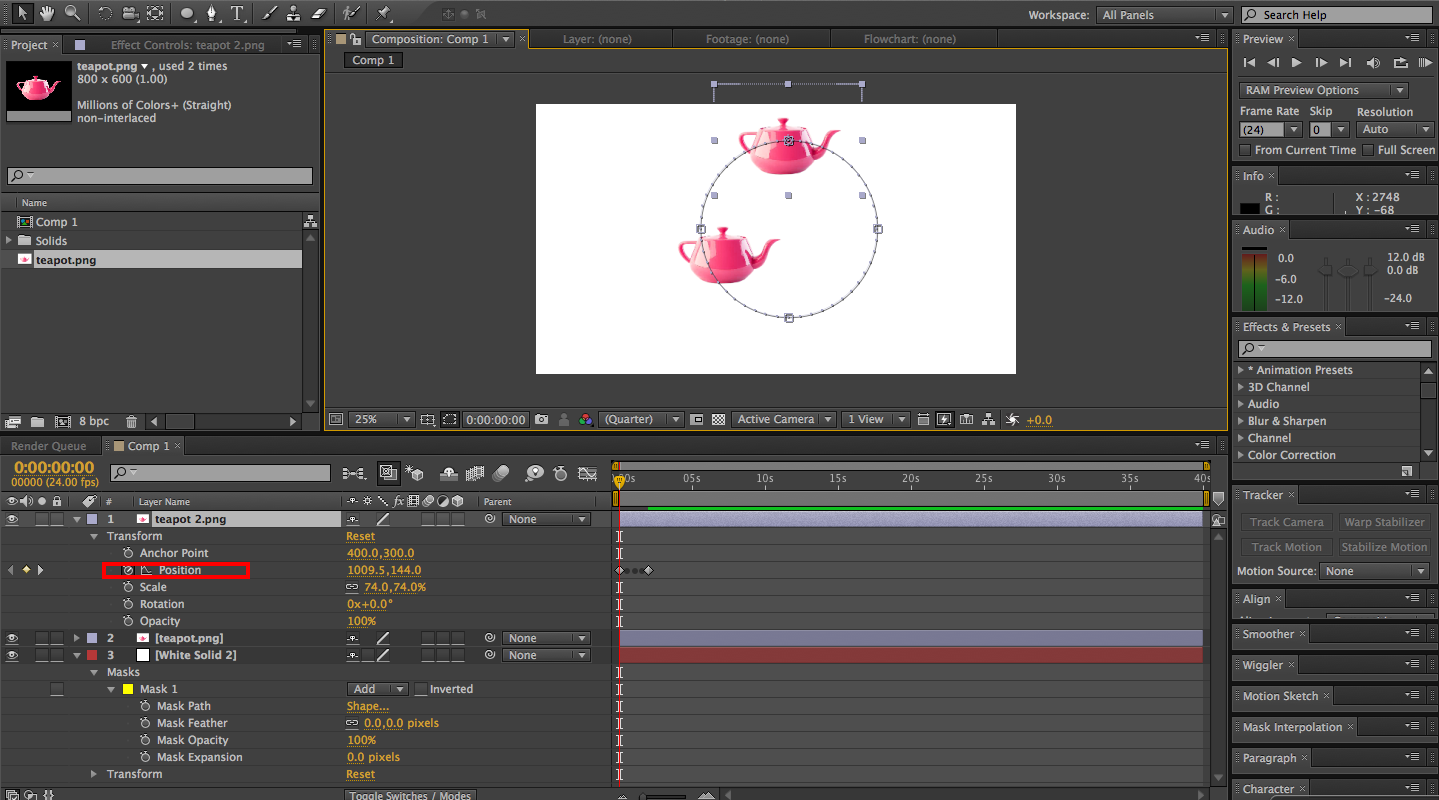
In the case that you want your object to move along a certain path, you can use any mask or any paths for instance, from Photoshop, Illustrator or from a shape created in After Effects. In this example we will create an animation path from an Ellipse and paste it to an object on the scene.
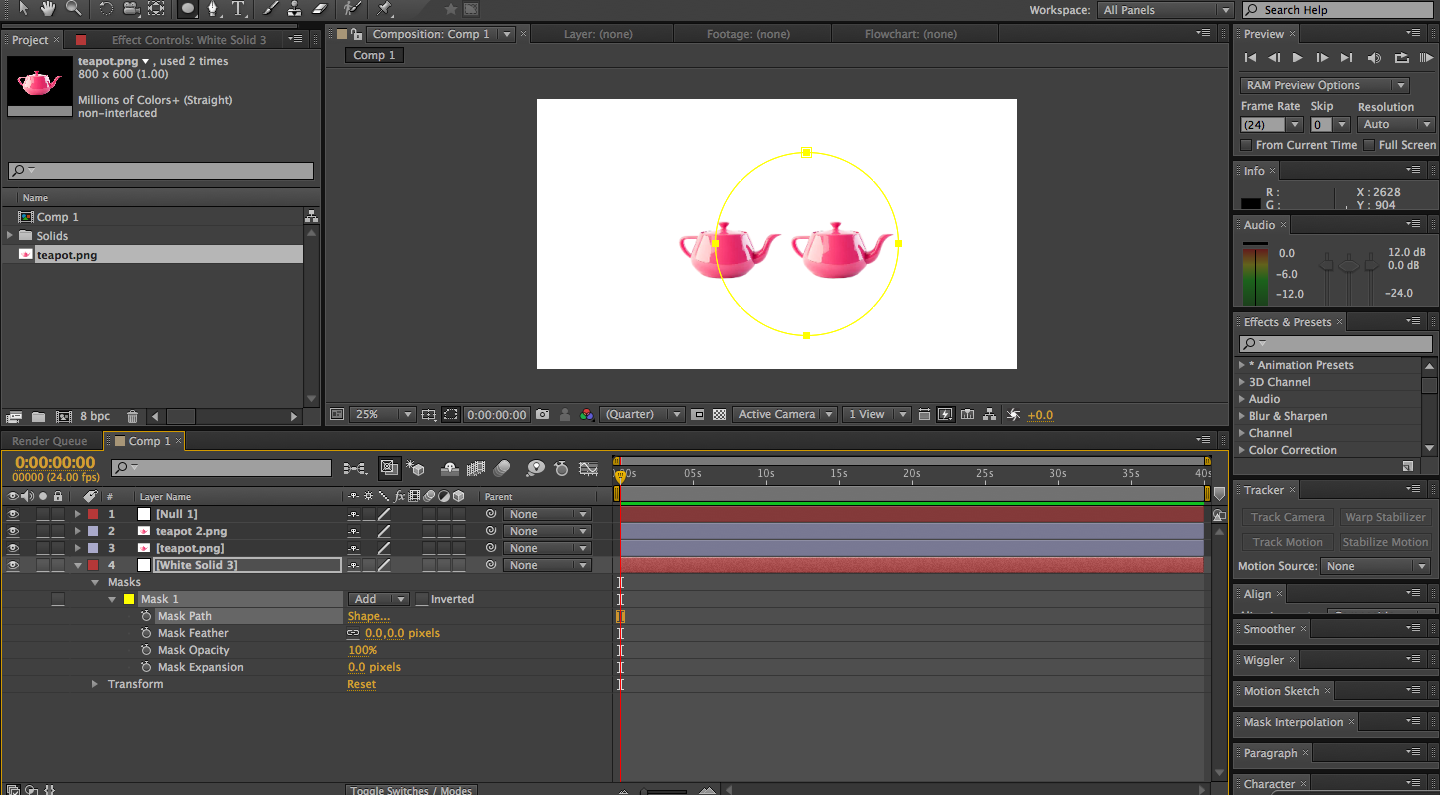
To create a Mask Path from an Ellipse shape, create a new Layer, select it and draw an Ellipse on the scene. Notice that a Mask section is created in the attributes of your layer.
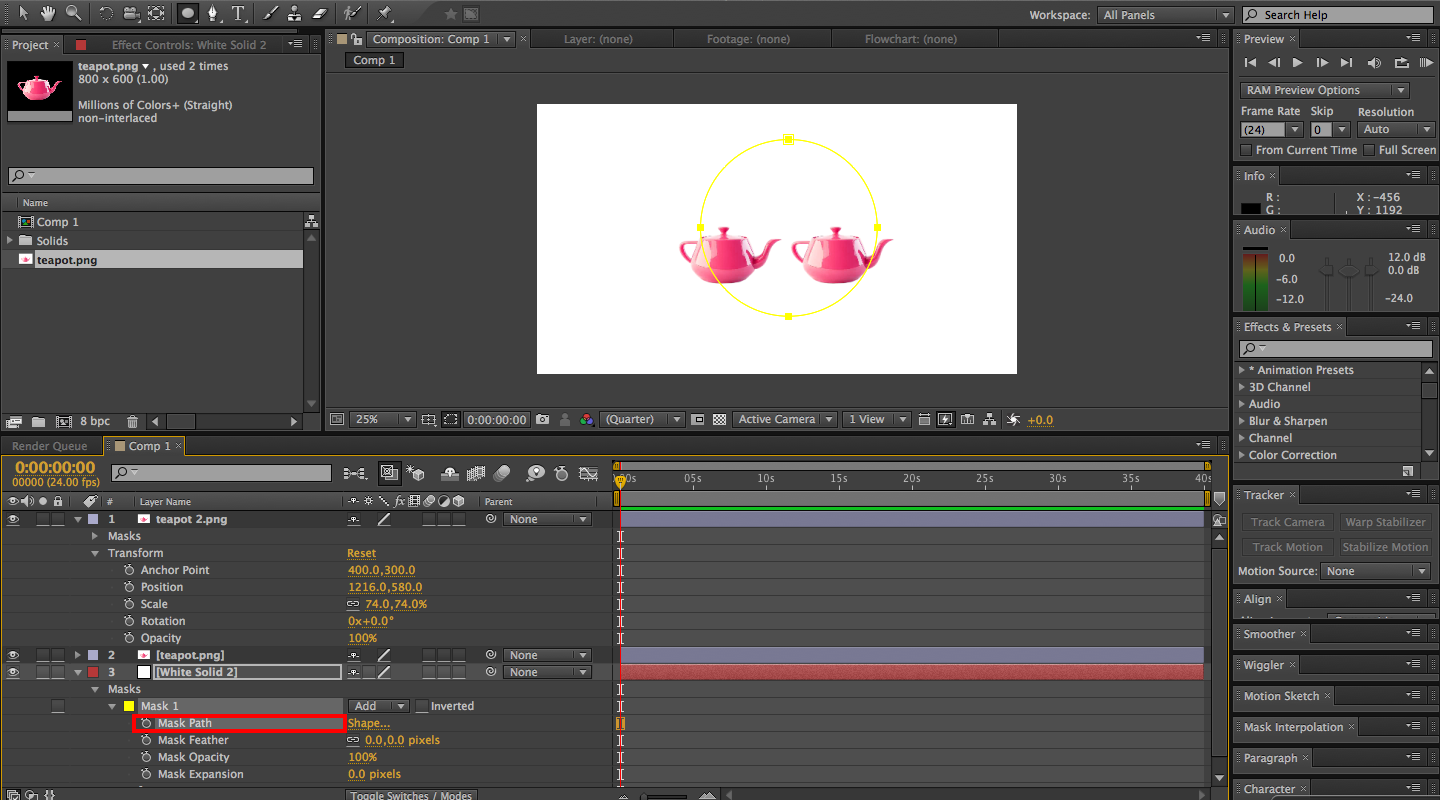
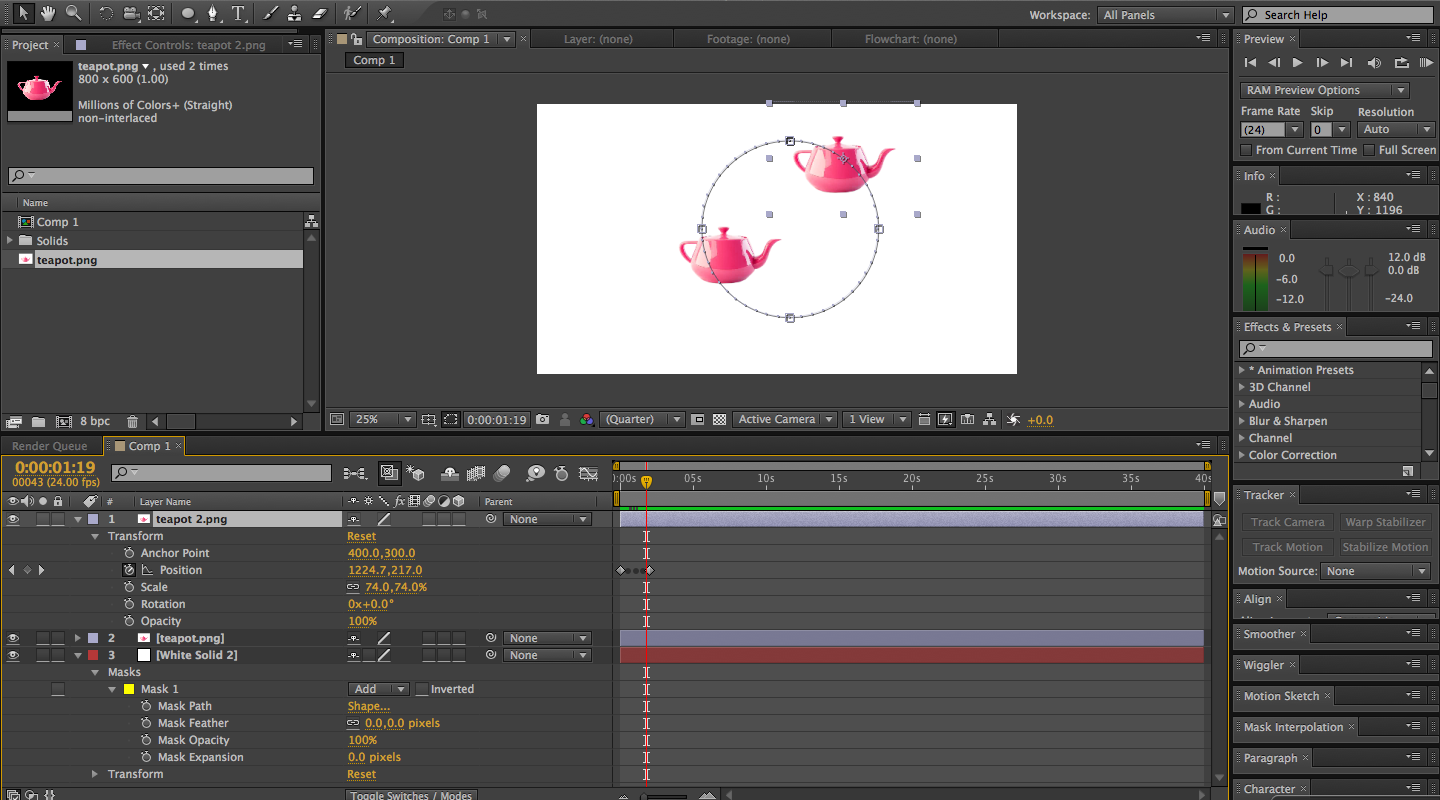
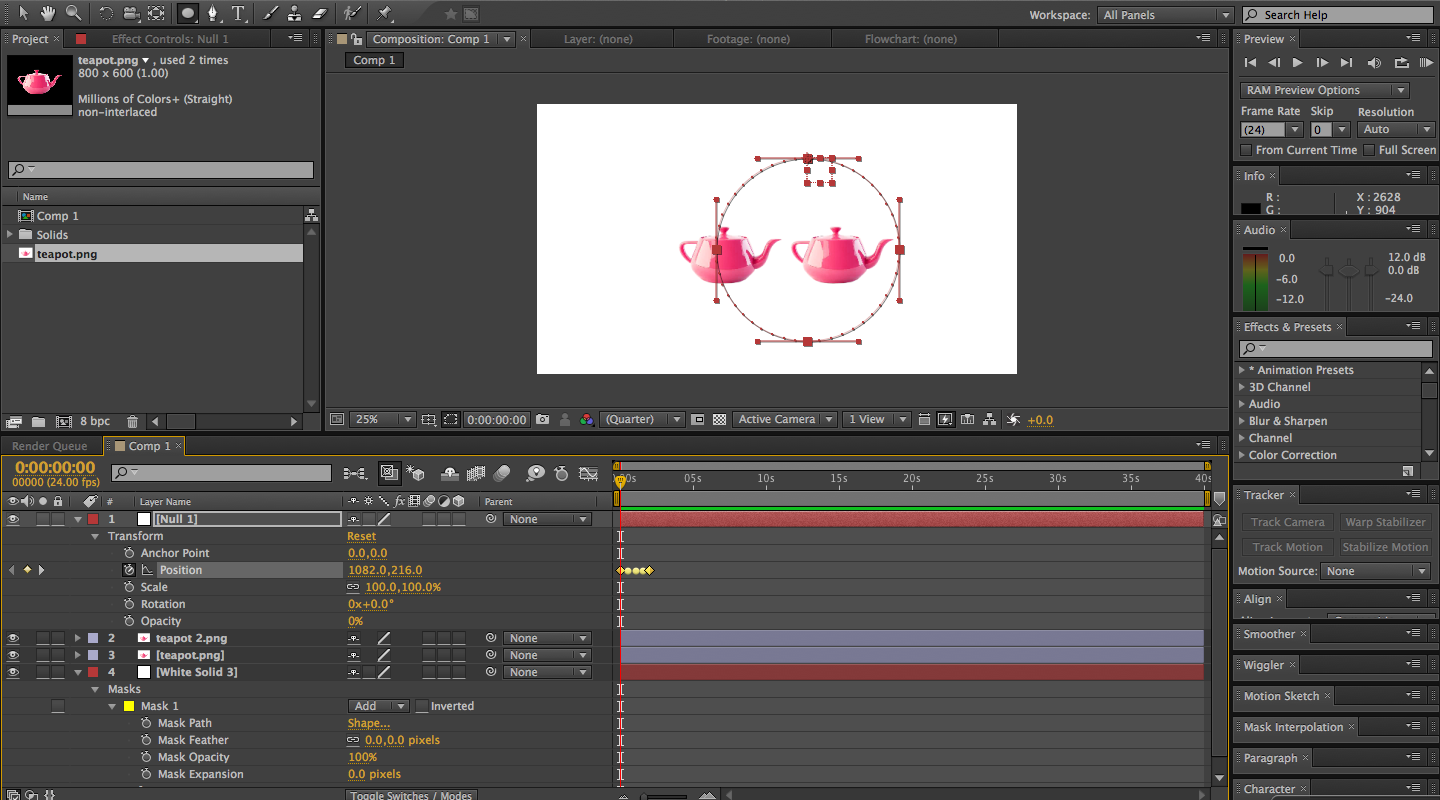
Click on the small arrow next to the Mask section, select the Mask Path and paste it to the Position of the layer you want to apply the path to.
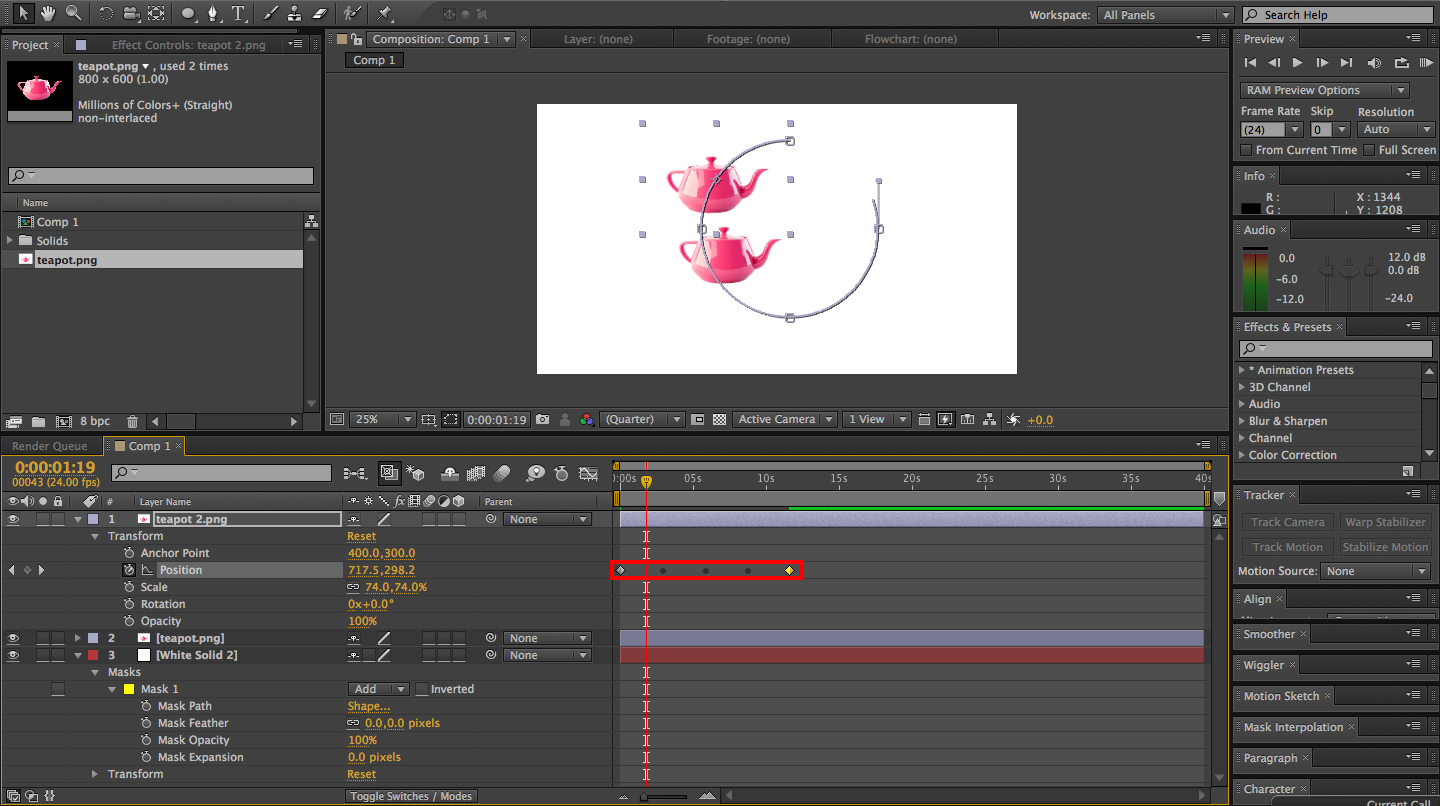
Notice that your layer is now moving along the new path theta has several, linear keyframes.
Notice that if you click to one of the Keyframes , you can stretch them, they remain equally spaced.
Parent Layers and Null objects
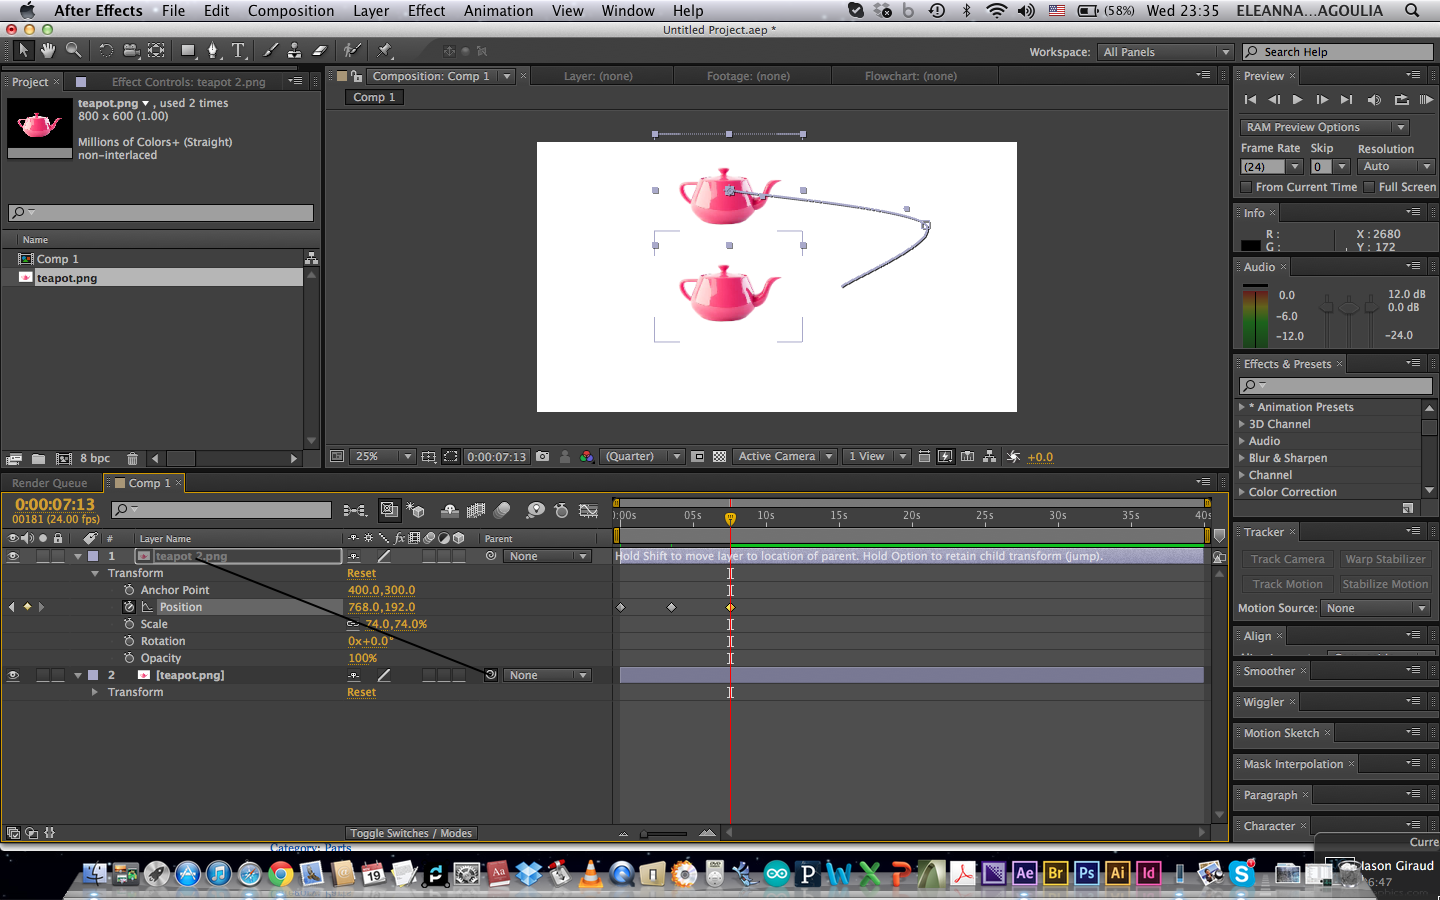
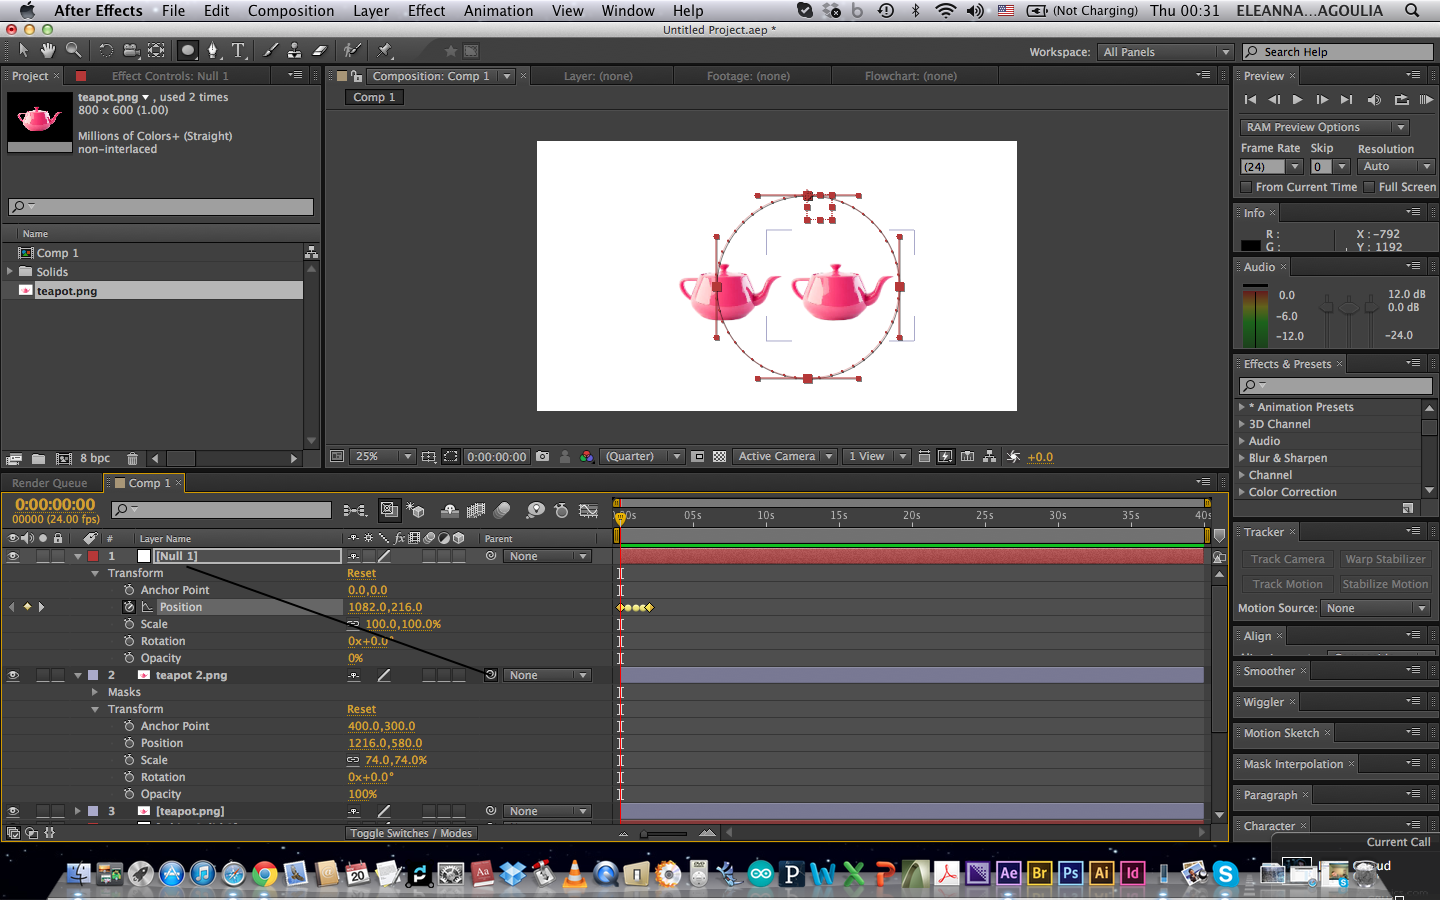
The Parent Layer operation allows you to link two layers. This means the chill layer obtains all the characteristic of the Parent layer. For instance, in this example the child layers obtains the same animation path as the parent layer. To link two layers check if the Parent column is visible. If it is not, right click on the layer grey bar area and select which columns you want to be visible. Select the layer the you want to link, click on the small icon in the Parent column and drag it to the name of the layer that is going to be the Parent layer. Notice that the name in the drop down menu in the parent column has changed from None to the name of the parent layer.
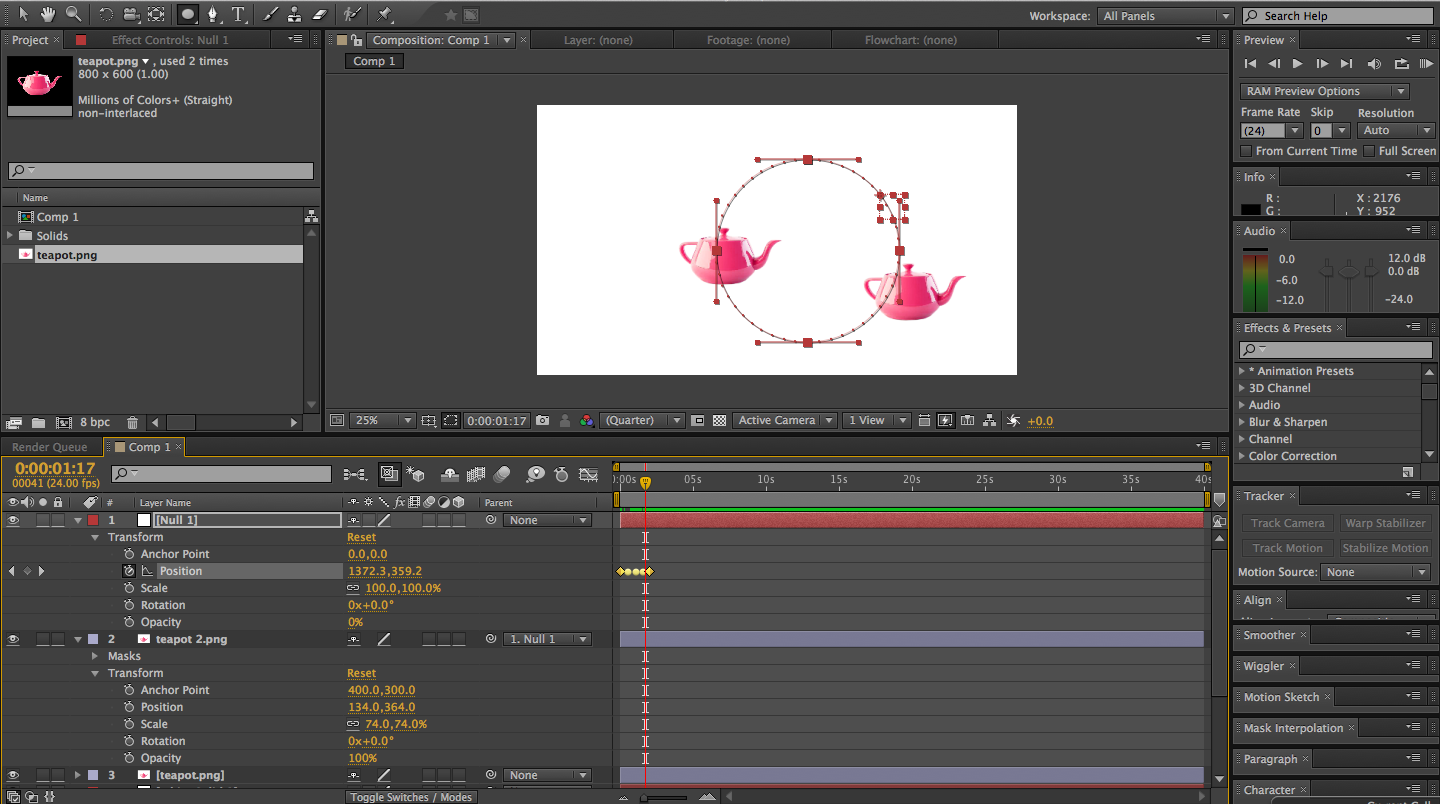
The Null Object is a layer object that you can link other layers to. In the previous example of the animation path, we pasted an animation path from one object to another. Instead of pasting the animation directly to an object, you can try pasting it the Null Object . So, the Null Object will travel on this path. We can combine this operation with the Parent Layer operation and make our object as child to the Null Object . Take this layer and make it the child of the Null Object same way as we did in the example above. Now the Null Object is going to move along with the layer.
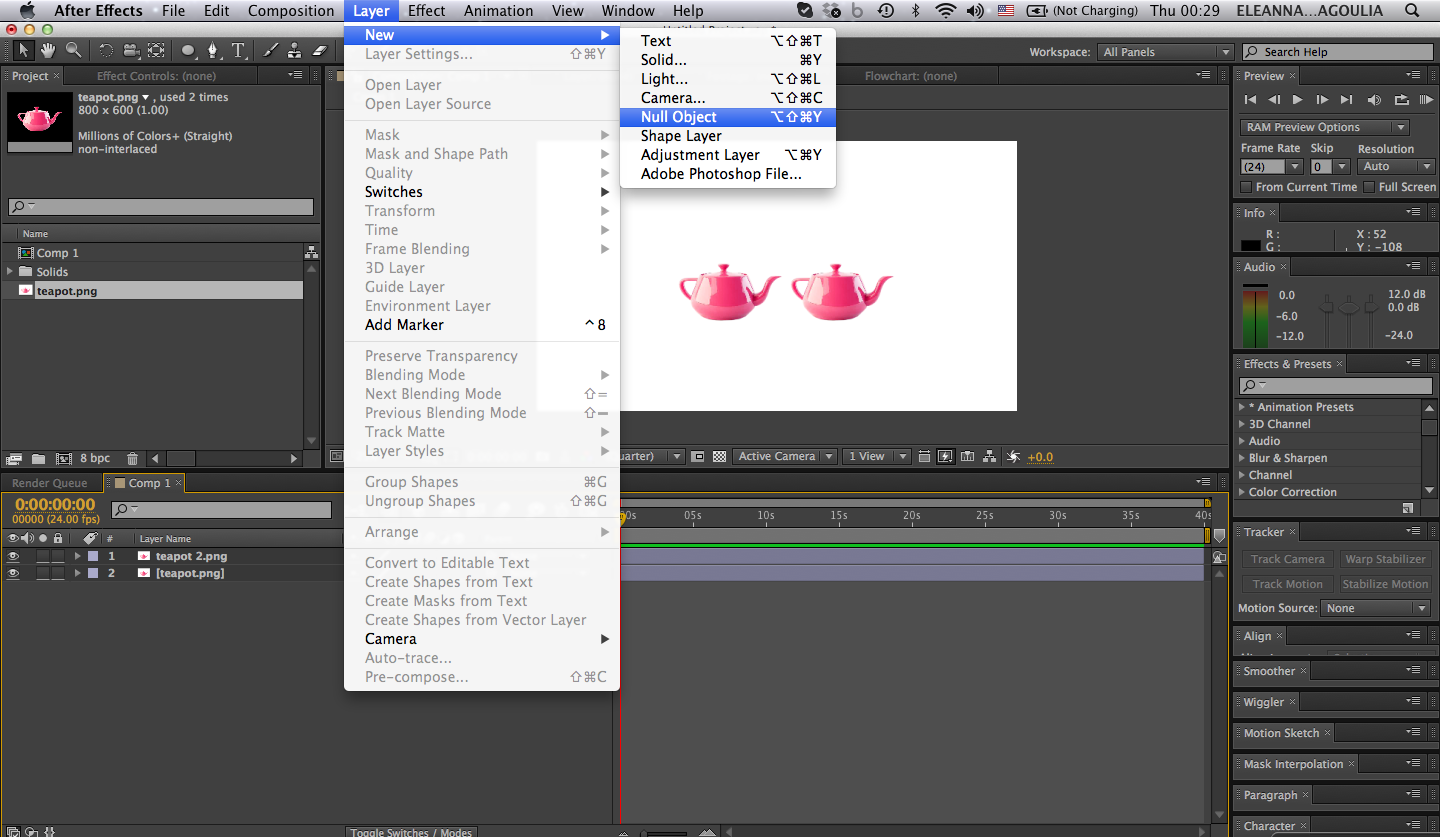
To create a Null Object , got to Menu --> Layer --> New --> Null Object
Copy the Mask Path and paste in the Position of the Null Object
Make the Null Object as parent to your layer
Notice that your layer moves along the same animation path with the Null Object
