|
Post-Processing an Interior Rendering Using Photoshop |
|
|---|---|
| Screenshot | |
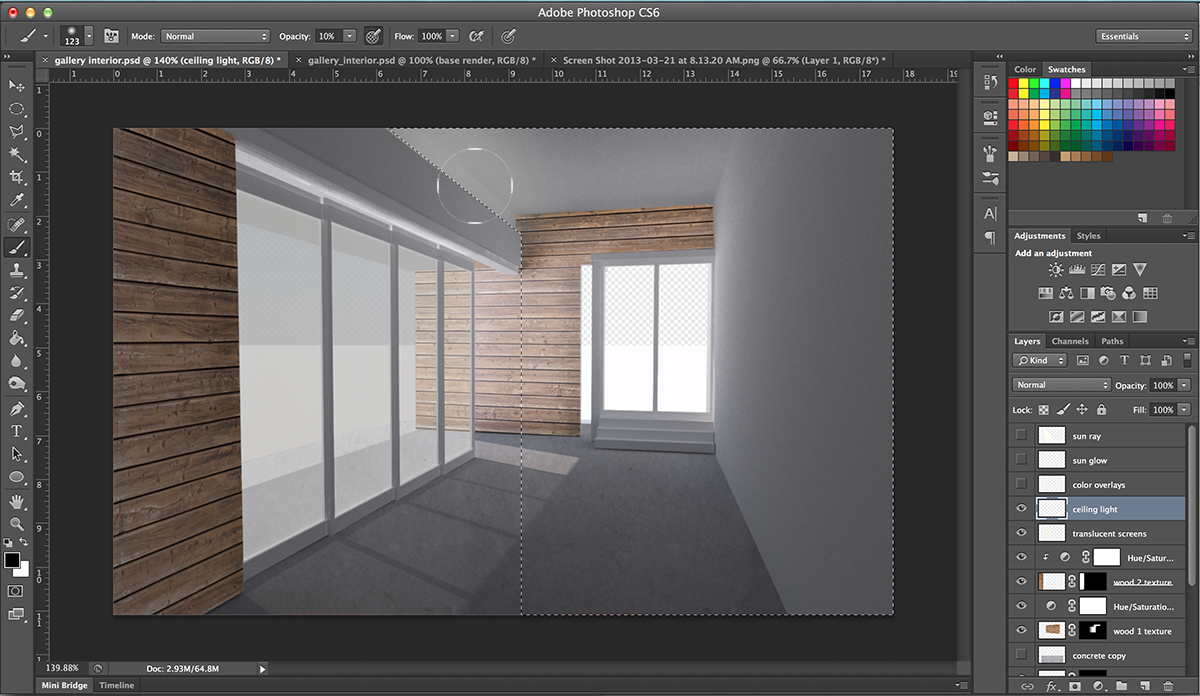
| This workflow will teach how to use a variety of post-processing techniques in Photoshop to create an interior rendering that effectively conveys material and lighting effects. | |
| Uses Tool(s) | Photoshop CS5 |
Interior Daytime Rendering
Since a lot of time can be spent trying to render exact textural and lighting qualities from a 3d model, the use of Photoshop as a post-processing tool can save a lot of time and be an extremely useful method for accurately describing a variety of conditions within a space.
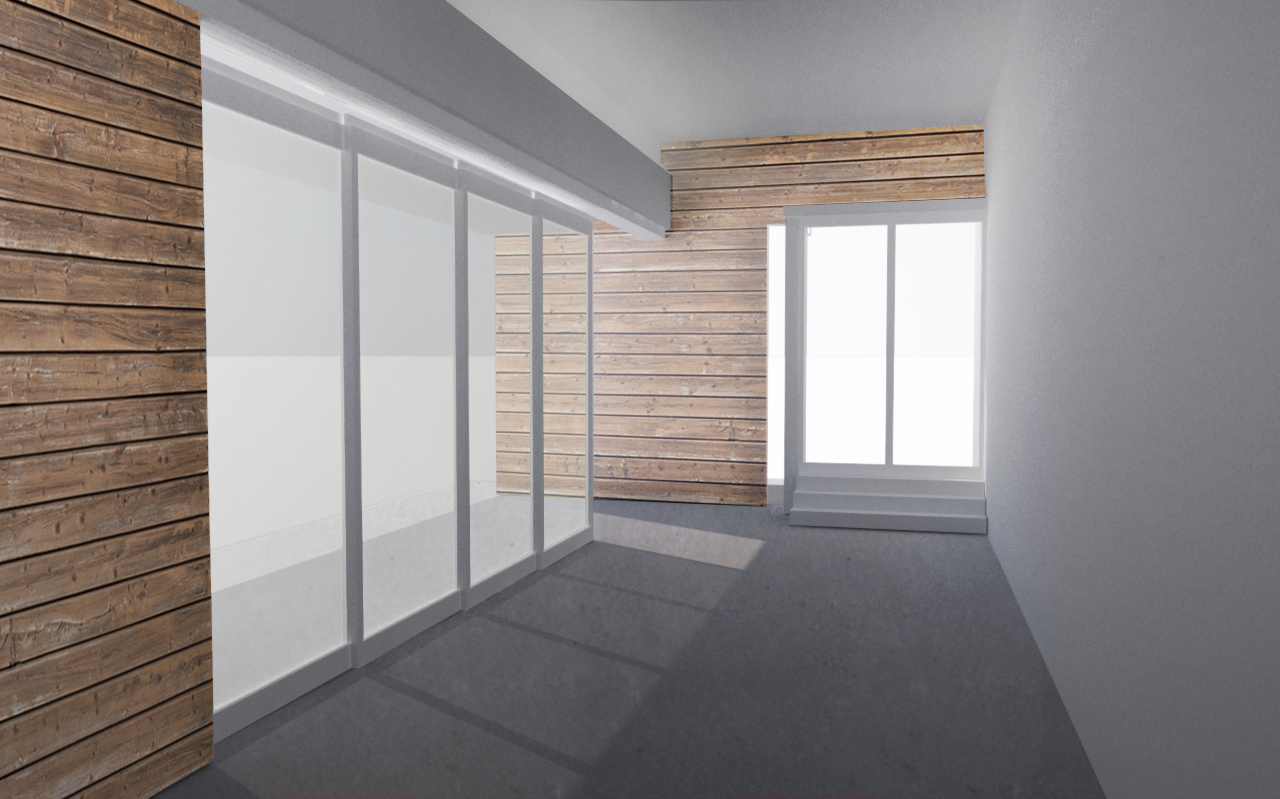
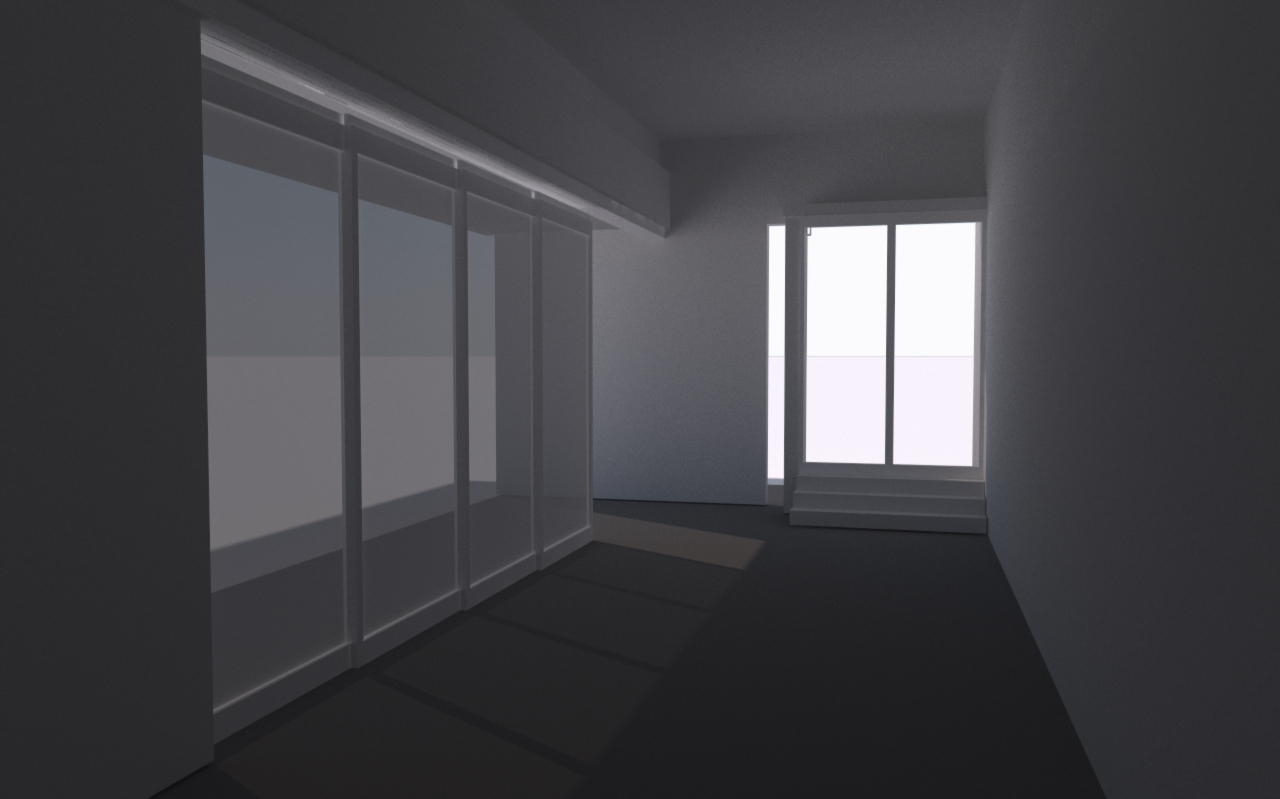
This workflow will focus on taking a basic interior 3d rendering from V-Ray (that uses only the V-Ray sun for daylighting) and using Photoshop to add materials and additional lighting qualities. The provided file is an interior perspective of a small artist gallery, where natural daylighting qualities are an important condition of the space to convey. We will begin by adjusting the brightness and levels of the original rendering and then add concrete texture to the floor of the space and wood to one of the walls. We will then adjust the opacity of the sliding translucent screens and also adjusting the light and shadows in the base rendering to achieve a much more evenly lit quality.
Steps
Adding Adjustment Layers to the Base Rendering
Open the file gallery interior.psd in Photoshop. The file already contains PNG layers that have been rendered in V-Ray. It is good practice to always make a copy layer of your original image to have to revert back to if needed. This is often referred to as working "non-destructively" in Photoshop, and it’s the way you should be working whenever possible.
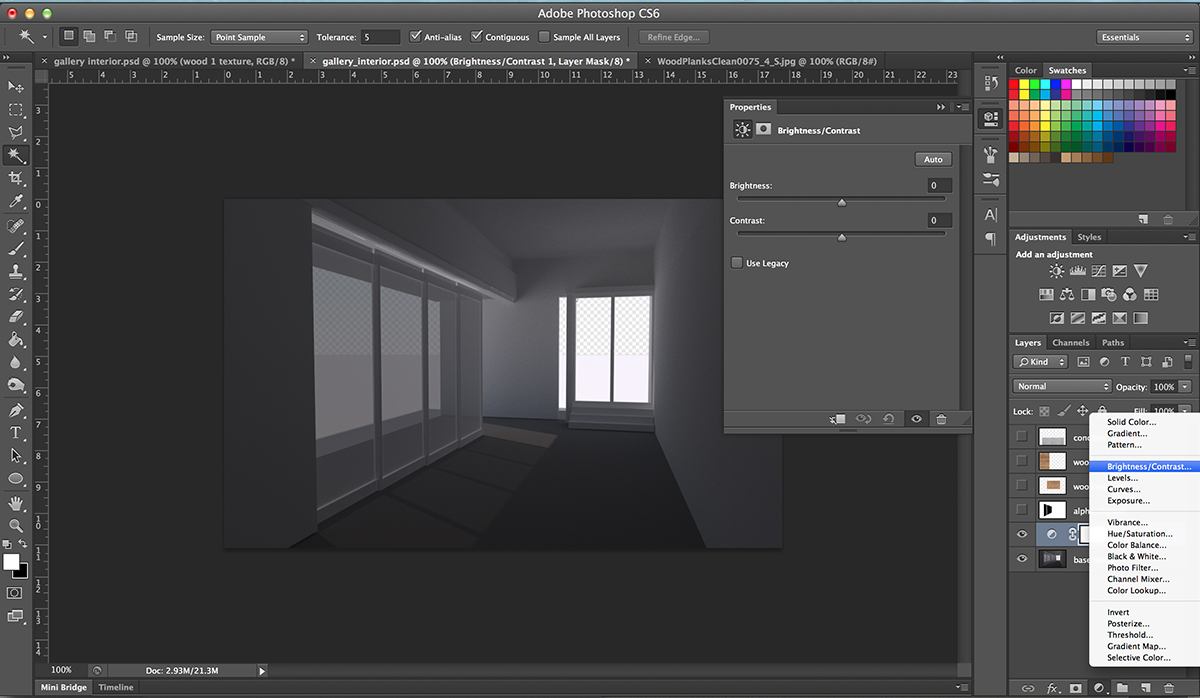
First, we will want to adjust the overall brightness and levels in the original render image since it is a bit too dark. Add an adjustment layer to the layer for Brightness/Contrast and adjust the brightness of the image to a suitable level (somewhere around 80 for our purposes should be sufficient).
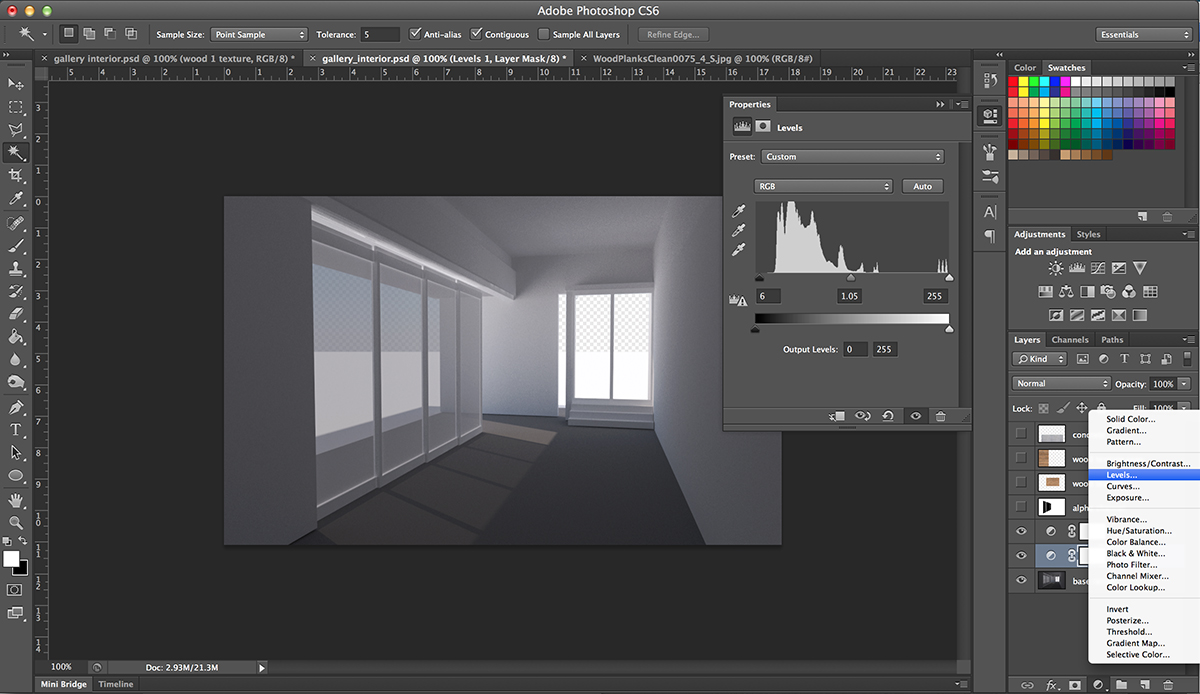
Then add another adjustment layer for Levels to adjust the level of light and dark areas of an image.
Applying Material Textures
Next we will add a concrete texture to the floor. Using a tileable image of a concrete texture, create a new layer and scale the concrete so that it covers the entire floor. Turn the layer off to reveal the base render image and use the Lasso tool to select the boundary of the floor area, including the areas behind the translucent screens. The selection along the bottom of the screens does not need to be perfect because we can go back and refine and edit the selection.
Now that we have the initial selection, enter Quick Mask Mode at the bottom of the tool palette and select the paint brush tool. Paint with white to select more of the image (the red color overlay is removed from areas painted with white). To deselect areas, paint over them with black. Clean up the selection along the bottom of the screens and then exit Quick Mask Mode to reveal the selection.
Now we will create a layer mask with the concrete image. With the concrete layer turned on, create the mask by going to Layer>Layer Mask>Reveal Selection .
Use the Blur tool with a reduced opacity to soften up the concrete texture. Finally, set the blend mode of the concrete layer to Overlay and lighten the layer opacity. This will allow the pattern to overlay the existing pixels while preserving the highlights and shadows of the base image.
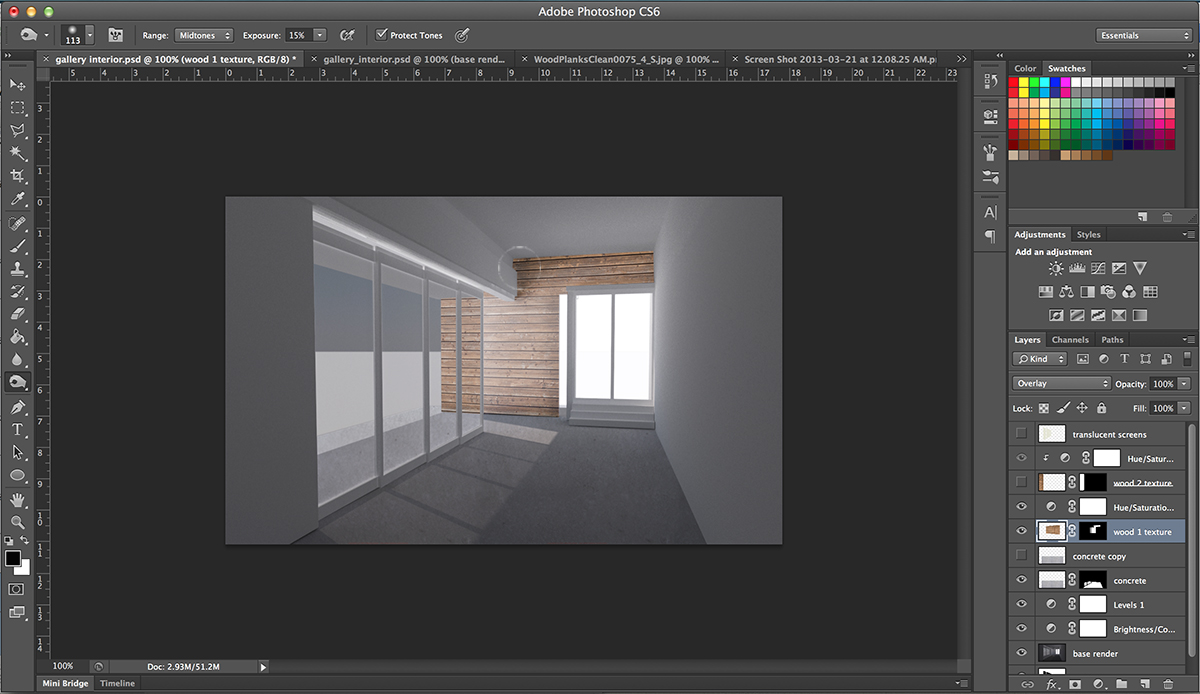
Add a wood texture to the back wall using the same methods described above. The wood texture will need to be modified to accurately reflect the perspective in the image. Do this by using the Edit>Transform>Distort command or by holding command key while the transform tools is active. It is easier to match the perspective lines if we lower the opacity and blend mode of the wood layer before transforming.
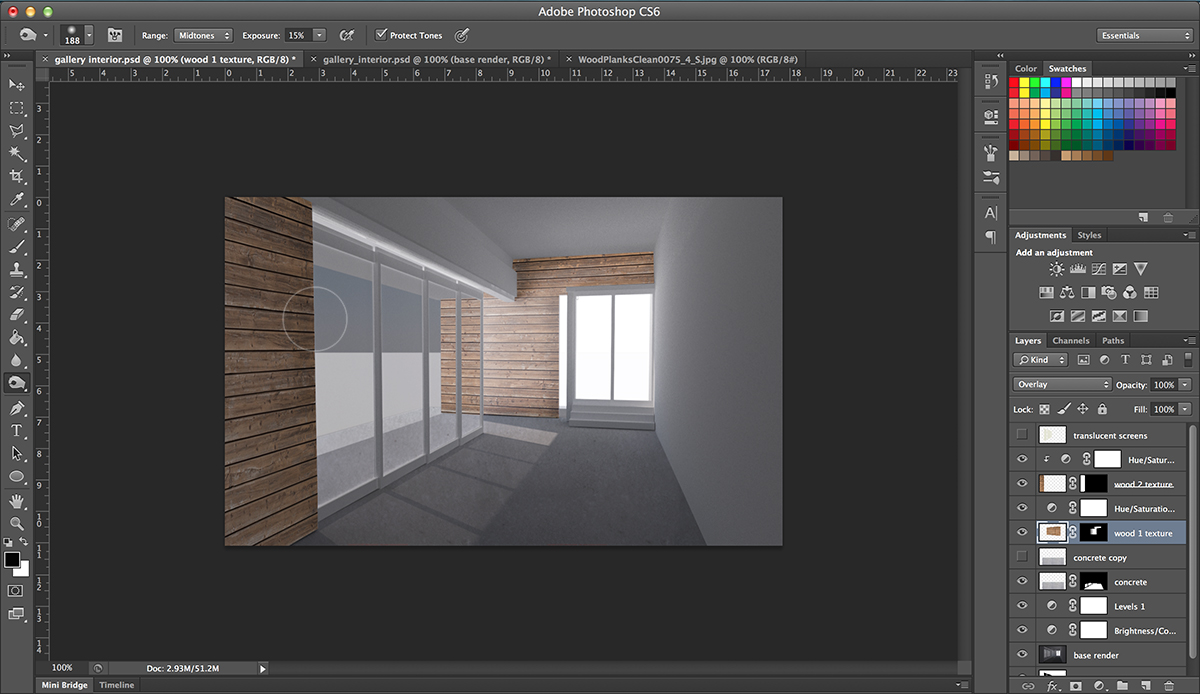
With our wood layer turned off, use the Lasso tool to select the boundary of the wall area. Once selected, turn the wood layer back on and create a layer mask from the selection. This time, instead of using the Blur tool, use the Burn tool to darken the edges and corners of the wall that are not cast in light. Set the Burn tool size large enough to create an even spread and reduce the opacity to between 15% and 30%.
Finally, set the blend mode of the wood layer to Overlay . You may want to add an adjustment layer to the wood and desaturate it slightly for a more subtle color.
If you choose to, add a wood texture to the wall adjacent to the screens using the exact same techniques.
Adding Translucency to the Screens
When the original base image was rendered in V-Ray, an alpha channel image was created for the screens as a way of quickly selecting them when in Photoshop. While the selection methods used above would have been easy enough to use here as well for selecting the screens, using alpha channels in V-Ray for complex selections can save a lot of time in Photoshop. The following steps will walk through how to use an aplha channel from V-Ray to create and save a selection in Photoshop.
Turn on the alpha channel layer provided in the file and use the Magic Wand tool to select the white background. Invert the selection so that our alpha channel contents are selected. Assuming we wanted to come back to this selection at a later time, we can save it under the Channels palette.
On a new layer, fill the selection with an off-white color using the paint bucket. Then set the opacity to somewhere around 30% so that the panels have a more opaque quality.
Lighting Effects
Lighting in interior renderings is a very difficult task to achieve successfully because you tend to have multiple light sources coming from various angles with different expectations of color temperature and intensity. While this can be done in Photoshop, it should be done with caution - it is easy to overdo it or more commonly to do it incorrectly. For our rendered image, we will add a very basic cove light above the screens that we want to cast some light up into the room.
Using the Lasso tool, select the line along the ceiling cove and then straight down to the floor, completing the selection to include everything from there to the left side of the drawing. Invert this selection so that we have the portion ceiling that we want lit and everything to the right of it selected.
On a new layer, use the Brush tool at a large brush size and a very low opacity to add off-white light along the edge of the cove. Don't overdo it, we are going for a subtle effect.
The last step for lighting is to add a color overlay. These can be very helpful, but also should be very subtle and not overdone. On a new layer, using a very large brush size and a very low opacity, brighten up the wood wall near the screens as well as the white wall at the opposite side of the room.
Playing with Layering and other Brushes
You may want to try duplicating layers and creating different effects with filters and using transparency methods to create stronger or softer light and shadows. There is no exact method for rendering interior lighting, the key is just to keep it subtle.
Final Rendering
As compared to the original rendering.

