|
Compositive rendering |
|
|---|---|
| Screenshot | |
| Saving views, rendering using VRay presets. Post-processing of rendering. Composite drawing with linework. | |
| Uses Tool(s) | |
Download the 3d model for this workflow here: model .
The PS file for render: PS .
The AI file for final compositive render linework .
Preparation
Prepare a model for render, normally have to do two things:
- Clean the model, delete/hide all the lines, points, duplicated surface
- Reorganize the rhino layers by different materials. For Instances, in this case, I would call layer as handrail_wood.
Saving views
set an eye height view
Here we set an eye height view.
- set an approximately view according to our design intend
- Put an point on the ground object
- Go to Properties-Details-Point at , we can get the Z coordinates of this point.
- Right click viewport(perspective)-Viewport Properties-camera and target locations , then we can set the Z coordinates to 48084mm+1700mm=50000mm
Change camera lens
- set Camera - Lens Length to a better angle displaying design intend.
- Lens Length : is as similar concept as using real camera to take photos. The smaller numbers mean wilder camera angle. The bigger numbers mean more flatter image, eventually turns the image from perspective to parallel view.
save view
- After we get the approximately view, we start to save the view, named as render
render using VRay presets
set lighting
Using vray render, there are three important steps. Set lighting is always a crucial and first step. In this case, it is a exterior view, so we use vray-sunlight setting to get a realistic sun light effect.

5. After setting the parameter, we can put the sun position anywhere inside of this view.
render option
The second step for vray render is setting render option panel . There is already one preset inside of the rhino model you have downloaded. While several parameters will be explained as followed in case for future adjustment:
- set physical camera
- Go to Camera-Physical Camera
- Check On icon
- Change the shutter speed from150-600. As a real camera, shutter speed control the exposure time, which means how much lighting will come through the lens. The bigger the number, the darker will be the image.
- Set Film speed(ISO) around 100-150 for exterior render. ISO means how much the film will capture the light. The bigger the number, the lighter the image.
- Environment setting
- Go to Environment . Click m both for GI
- and Background
- Go to Texture Editor-Type-Sky
- Go to Sun , changing sun-light source to light 01(we just set for the scene)
- output size
- Go to Output-Output Size . Width and Height determines the image size. For test rendering it can be small. Final image is usually bigger, depending on the final board size.
- Image Aspect means the ratio. For instence, 2 means Width twice larger than Height .
- L : means lock the ratio or unlock.
- Set VBF channel
Add two VFB Channels: Shadow and Render ID
Material panel
Normally, when we using vray for rhino, we would assign material by layers. For example, we have already create layer stairsteps-wood, so we would apply wood to this layer.
- Go to layers-material library-choose plug in-browse , find the specific material for a specific layer.
render result
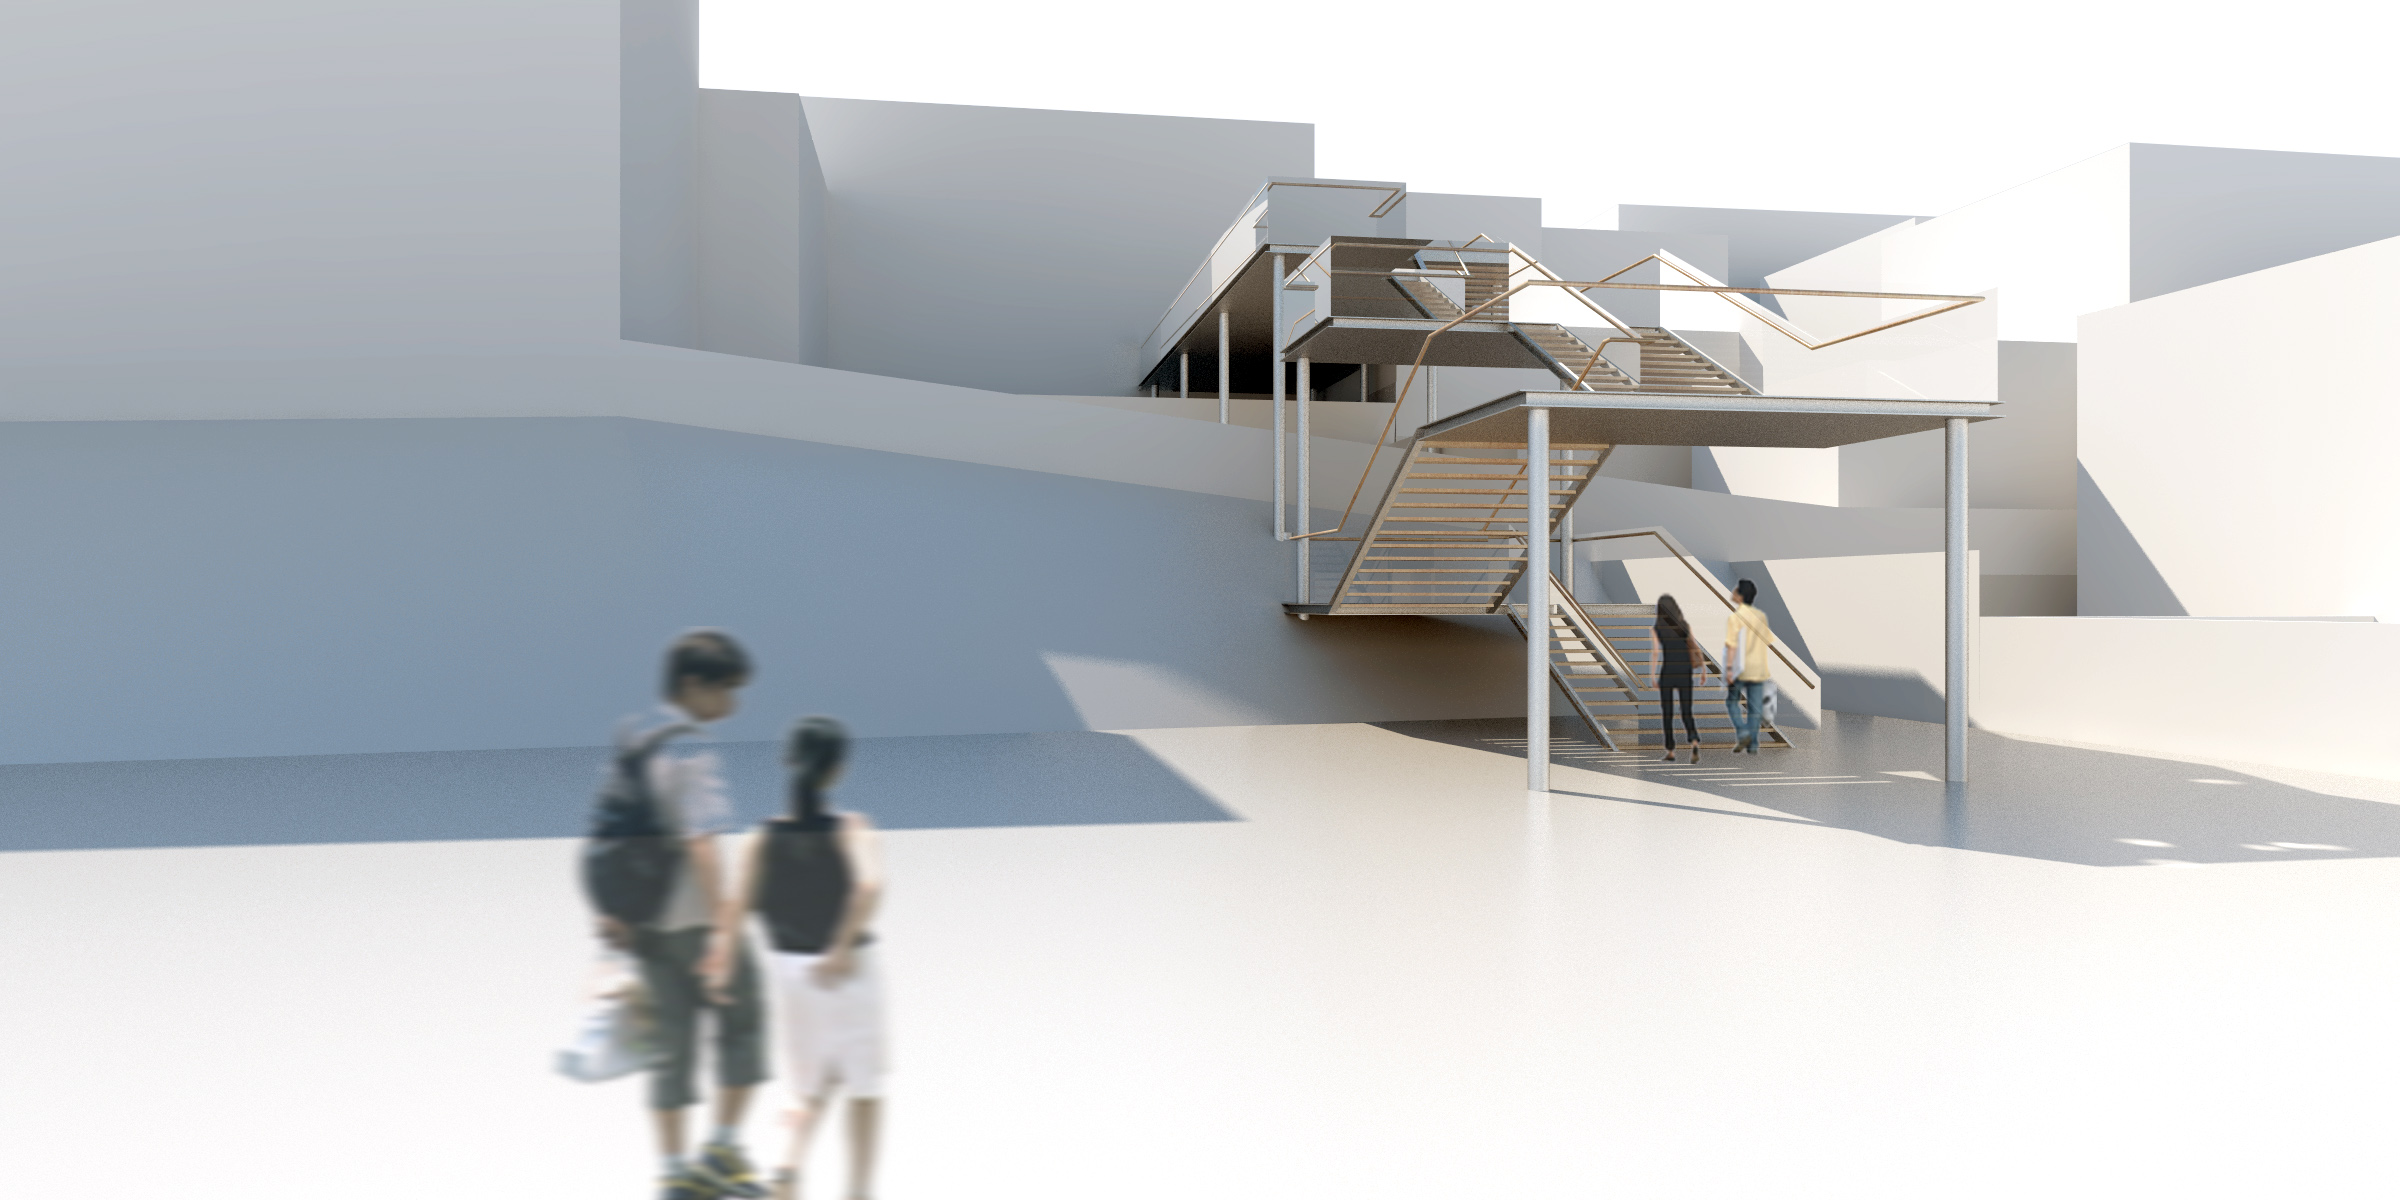
After set up the view, lighting, and material, we are now ready for final rendering. Go to
output panel
change the
width
and
height
to final size, Here we use 2400*1200.

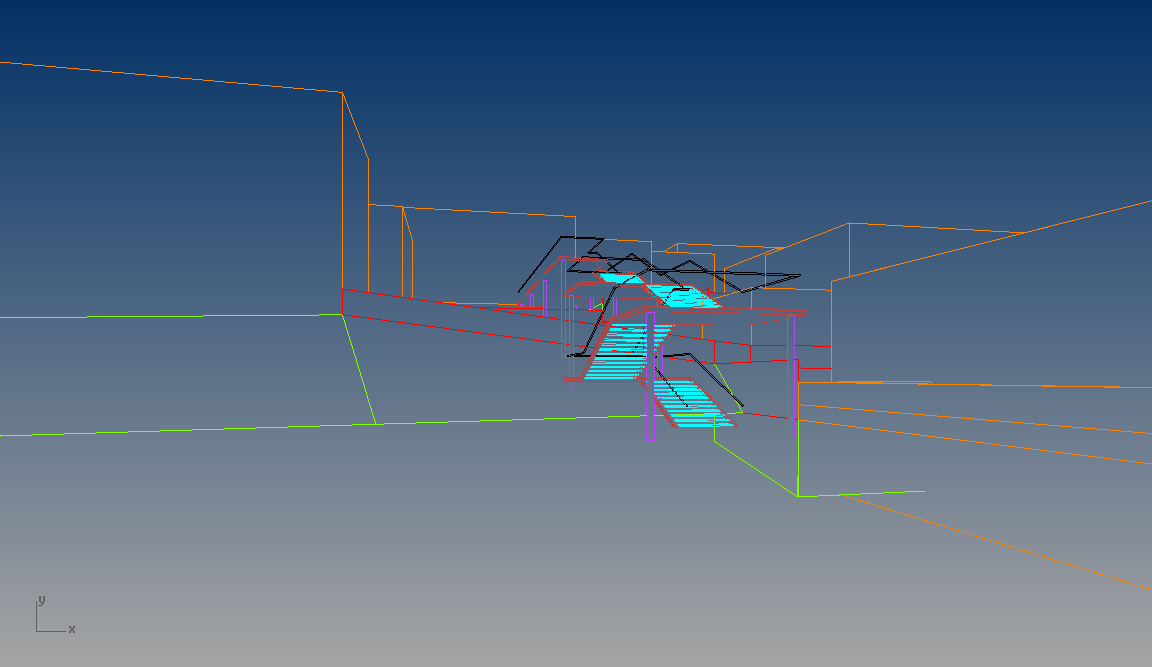
extract line work
- Go back to the setting view
- Hind all the objects which can't be see from this view, hind all the lines and curves. Select everything, go to Properties-isocurve density-uncheck visibility
- Change unit tolerance , remember to change it back after we make2d
- hide the glass layers
- make2D
- go back to the same view, make 2d just for the glass layers.
- Every time, after make 2D, make sure clean the lines, curves and have a organized layer structure.
Post process
ps-color, light, contrast adjustment
- Open the final render file in PS.
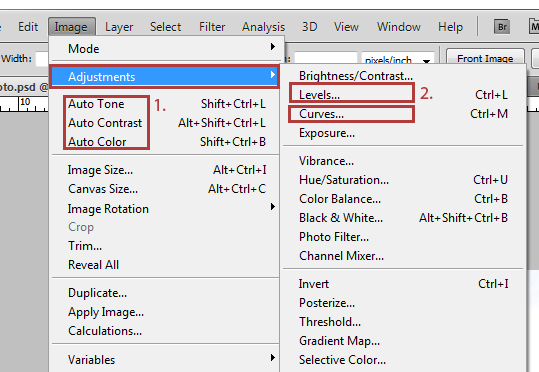
- Go to 1. Image- Auto tone-Auto contrast- Auto color , these tools help us to make change automatically. 2. If Auto function is not the effect we prefer, we can go to Adjustment-level 0r curves , making changing manually.
The effect after Auto function.
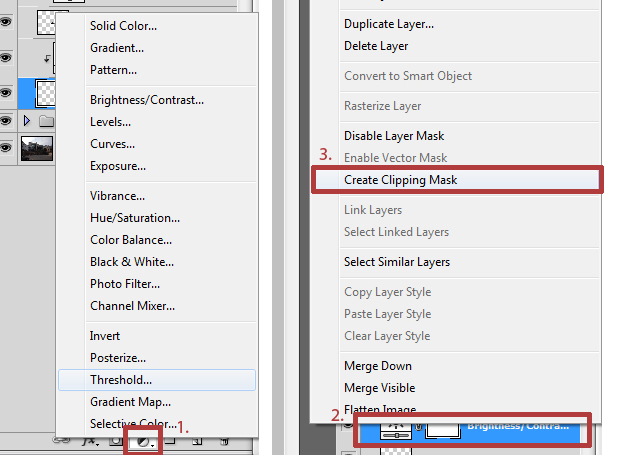
- Another way adjusting color, contrast, lighting is using adjusting layers .
- Here we can use levels or bightness/contrast function
- After we create the adjustment layers, right click it, choose create clipping mask which means function will just affect the one layer below.
- Add people, trees, or other materials. Notice people's scale, position, color saturation and etc..
AI-Overlay linework
- Open the exported AI file
- set up artboard to 11 x 8.5
- Place the jepg file (after PS process)to AI. Create a new layer called background. Put this layer on the bottom.
- scale either lineworks or image to merge them together.
- notice: embed the image.
- According to various design concept, assign different line work and line type to different layers. In this case change the lines in layers: handrail, stairslanding, glass, stairsteps, to Dark gray, 0.2 pt lines
- assign layers: site, buildings, columns, backyard, fence to Light gray, 0.35 pt lines


