|
Layer Management and Image Merge in Photoshop |
|
|---|---|
| Screenshot | |
| This workflow teaches Photoshop as a tool for merging separate images into a single unified composition. Layer management and the use of selection tools are emphasized. Students will learn an efficient process in photo editing which can be used throughout the design process; from concept development through presentation renderings. | |
| Uses Tool(s) | Photoshop CS5 |
Steps
The Basics of Layer Organization in Photoshop
Within this workflow we will be editing layers in order to combine them into a convincing photorealistic composition.
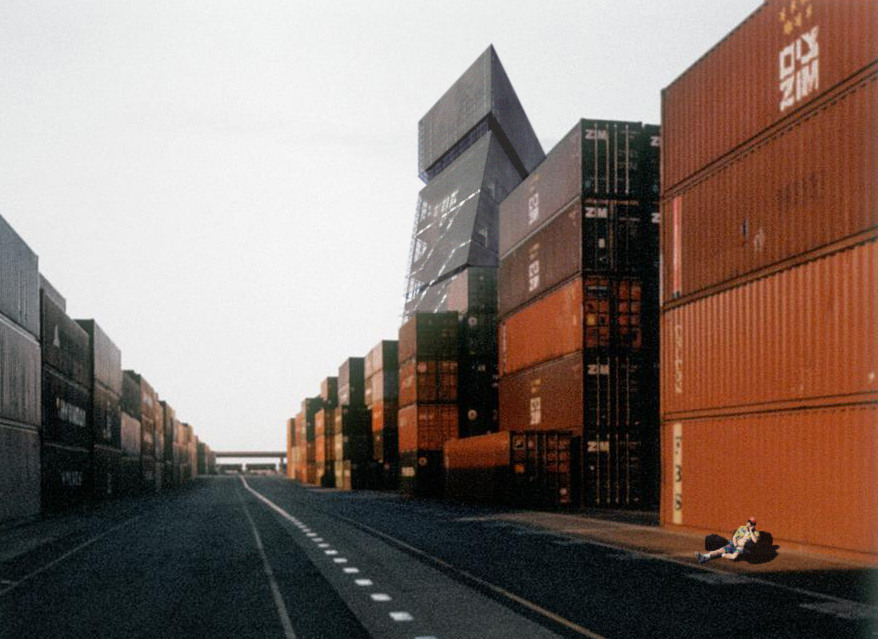
The first step after opening Photoshop is to open the file "Workflow 1.psd". Here we will see an image combining a container yard with the De Young Museum Tower and a man relaxing in the sunshine.
- Workflow 1.psd
 This image is created through combining three separate images that are isolated within their respective layers. We can begin to see how this composition is achieved through examining the Layers Panel. If the Layers Panel is not already open, you can open it by selecting "Windows > Layers" from the top menu bar.
- Layer Visibility
Within the Layers Panel we have three layers stacked on top of one another. We also have an Eye Icon to the left of the thumb nails of each layer. If we select the Eye Icon it will deactivate the associated layer making it invisible. Here the visibility of Tower Layer and the Man layer has been deactivated.
- Layer Composition
The order in which the layers are stacked also plays a role in their visibility. When we simply drag the Tower Layer and the Man Layer below the Container Layer we lose visibility of them. This is because the Container Layer occupies the full dimensions of the document and is opaque. We can think of the Container Layer as a full sheet of paper that obscures the smaller Man and Tower paper fragments beneath.
Placing an Image / Creating a New Layer
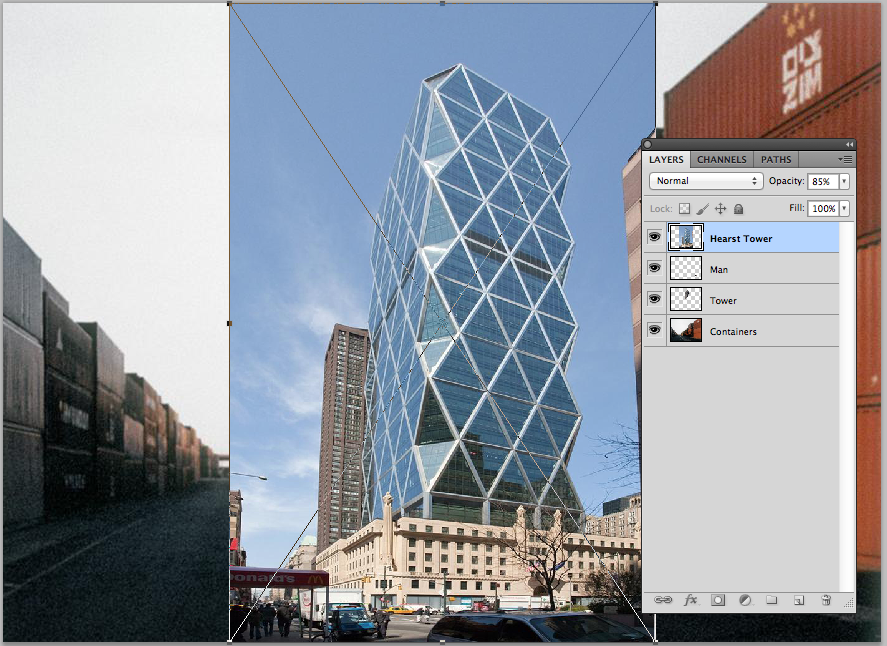
Now we will place a new layer within the composition. From the top menu bar select "File > Place" and select the Hearst Tower.jpg file. A new layer titled "Hearst Tower" will appear within the Layers Panel and its accompanying image of Norman Foster's Hearst Tower will appear (note that the Hearst Tower will only be visible if the layer that it is within is above the Container Layer).
- Hearst Tower Layer
Notice that there is a bounding box around the image. This enables us to scale and rotate it freehand. To do so, run your cursor over and around any of the 8 control points along the bounding box. Straight arrows indicate the modulation of image dimensions, rounded arrows indicate the rotation of the image.
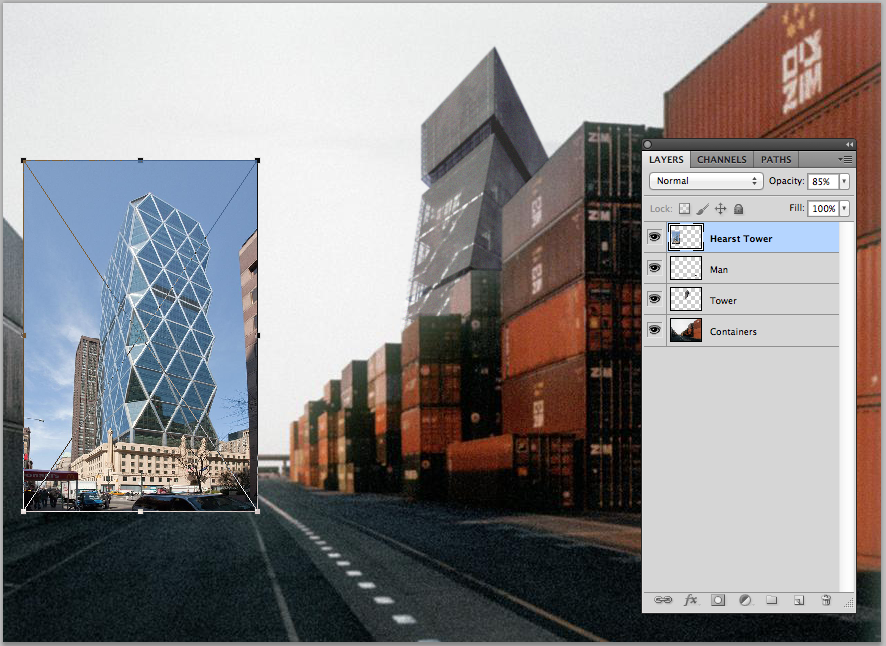
In the case of this specific exercise we want to convincingly embed the Hearst Tower into the existing composition. To do so we will need to scale the layer.
Scaling a Layer
Run the cursor over one of the corner control points until a diagonal two-sided arrow appears. Click to select the command and hold the Shift Key to ensure that the layer is scaled proportionally. Move your mouse towards the oppose corner that was initially selected and the image will scale down proportionally. Try to find an approximate scale that relates to the context that it is situated within.
- Scaling Hearst Tower Appropriately
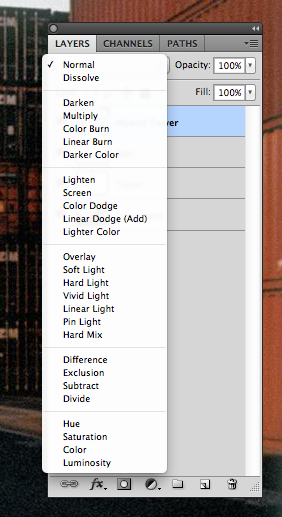
Press Enter and the image will be placed into the composition. To finely adjust the placement and scale of the image use the Filters drop down menu found within the Layers Panel.
- Filters Drop Down
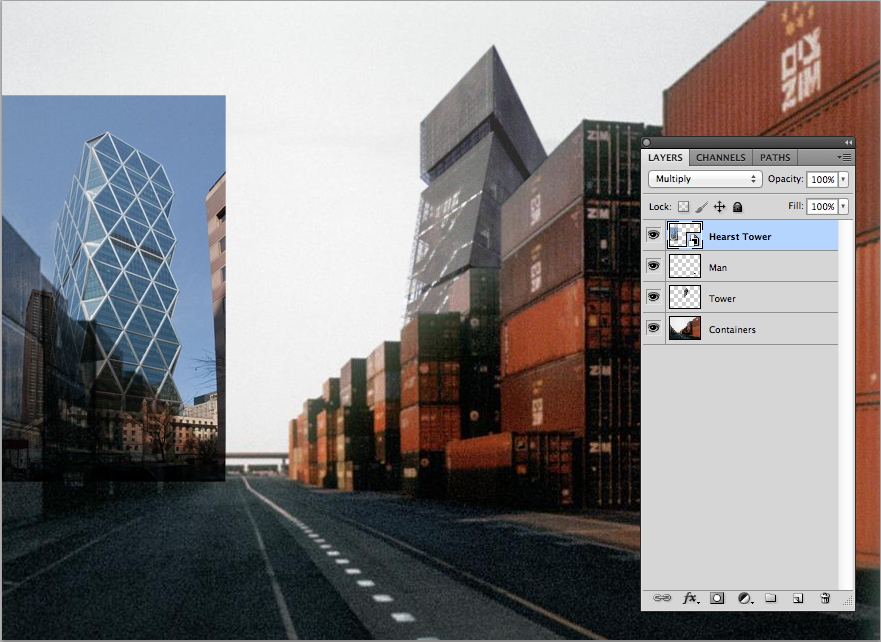
Select Multiply. This filter is useful when needing to see the contrast between two layers. Check out different filters here . Now we can finely adjust the scale and placement of the Hearst Tower Layer in relation to the scale of its neighbors. This can be done by selecting "Edit > Transform > Scale" from the top menu bar, and by dragging the Layer manually with the cursor.
- Scaled & Positioned
Rasterizing
A critical step when editing Placed images within a Photoshop document is the conversion of the image from a Smart Object into a Raster Object. Smart Objects, or Placed Layers, are different from other layers because they are linked to a source (e.g., an Illustrator file, jpeg, gif or other Photoshop file). In order for Photoshop to read the file as a bitmap, or a matrix of editable rectangular pixels, we need to Rasterize the Smart Object.
- Raster Graphic Detail & Smart Object Icon
Select the Smart Object Layer (the one with the Smart Object thumbnail), RIGHT CLICK, and select Rasterize Layer.
Editing the Raster Image
Now that we can treat the Hearst Tower Layer as a collection of individual pixels, we can being to isolate it from its native surroundings such as the bright blue sky and the buildings at its base.
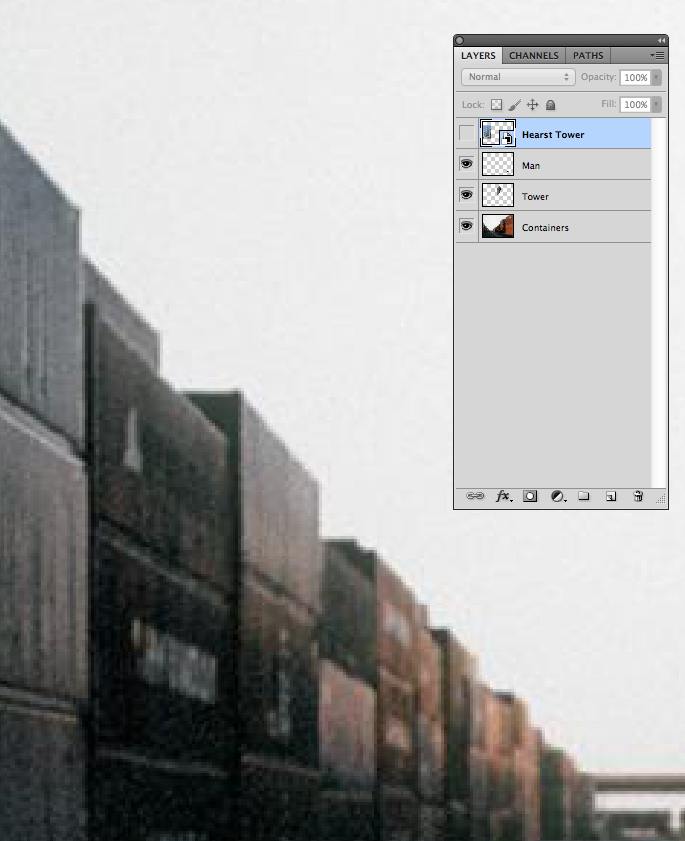
Notice the De Young Tower appears to emerge from behind the containers. We will be treating the Hearst Tower in the same way. Accordingly, the first editing move will be to remove the pixels that would be hidden by the containers in the foreground. To focus on this portion of the composition, deactivate the Hearst Tower layer and use the Magnifying Glass Tool to focus on the edge created by the containers. The best way to use the Magnifying Glass Tool is to hold down the OPTION / ALT KEY and scroll with your mouse. If you need to pan throughout your screen because the image is extremely magnified, hold the SPACE BAR down, RIGHT CLICK and drag.
- Focussing on the Edge of the Containers
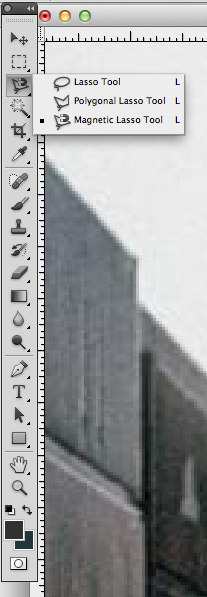
Now that we have an edge to work with we can begin to explore the three Lasso Tools. They are found in the Main Toolbar along the left margins of your screen and are titled, Lasso Tool, Polygon Lasso Tool, and Magnetic Lasso Tool.
- Lasso Tools
The three Lasso Tools are useful when needing to select groupings of pixels with varying degrees of precision.
Select the Lasso Tool and begin to trace over the top of the edge created between the overcast sky and the containers. You will notice that the line you are drawing reflects however you are moving your mouse. This is a fairly imprecise method of selection. After you are finished tracing, the line will automatically connect both of its ends with a straight line. This completes the "lassoed", or selected area. Deselect by RIGHT CLICKING and selecting DESELECT.
- Lasso Tools - Freehand selection
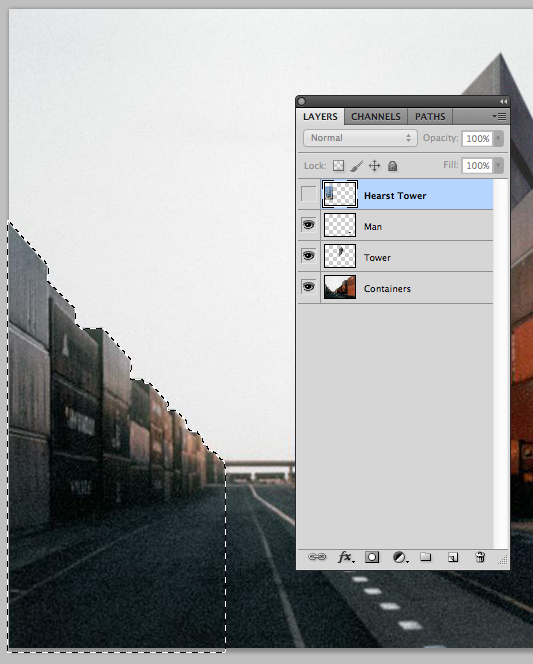
Select the Polygon Lasso Tool and begin to trace over the same edge as before. You will notice that with this tool you must RIGHT CLICK to create a point, your subsequent RIGHT CLICK will add a second point and a straight line between them. If you need to erase a point simply use the DELETE KEY. You can delete as many points as you need to. After you have traced the edge you will need to complete the "lasso" or selected area yourself. In the case of editing the Hearst Tower, we will select as much area as possible beneath the container edge line.
- Polygon Lasso Tool - Rectilinear selection
Given the rectilinearity of the containers, the Polygon Lasso Tool is a good choice for selecting the needed grouping of pixels. However, the Magnetic Lasso Tool will perform the task with greater precision. DESELECT the selected area.
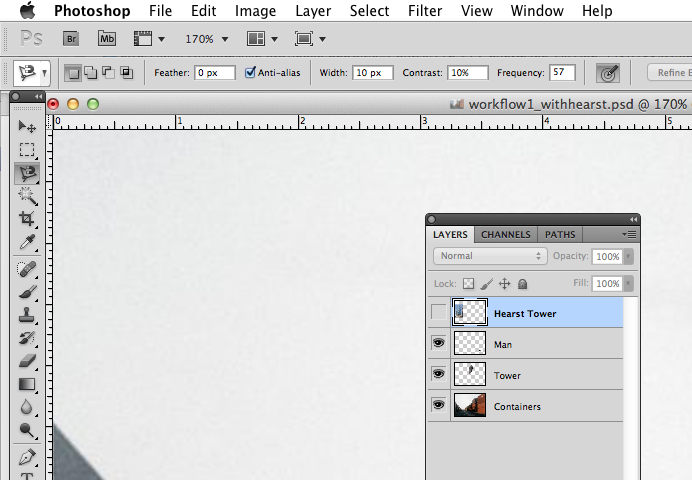
Select the Magnetic Lasso Tool. You will notice several options appear directly below the top menu bar. We will be focussing on Width, Contrast & Frequency.
- Magnetic Lasso Tool - Options
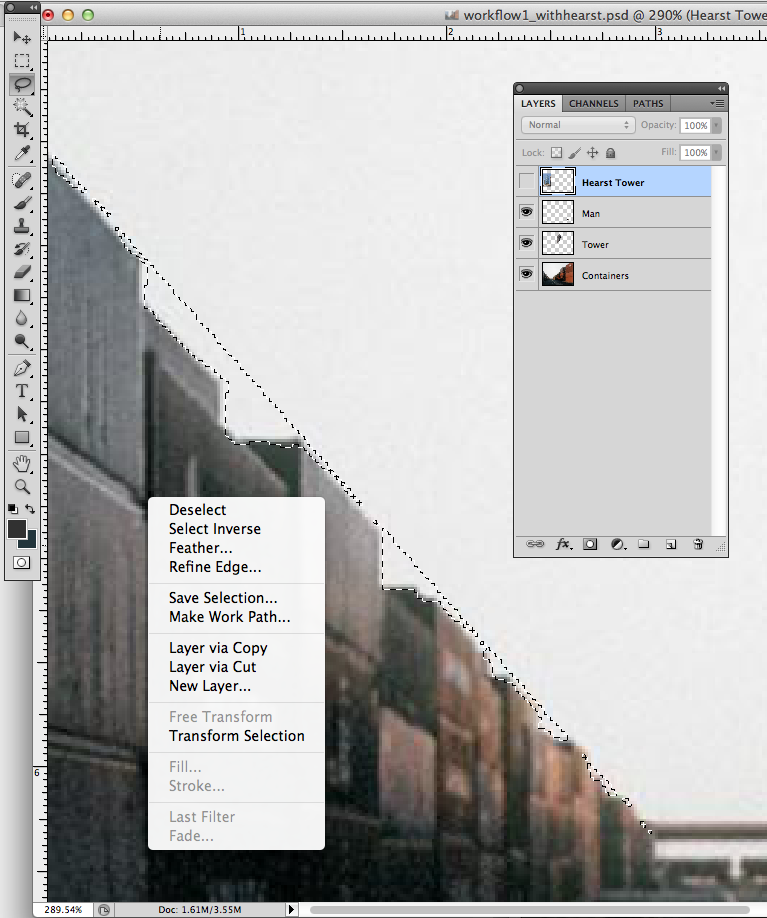
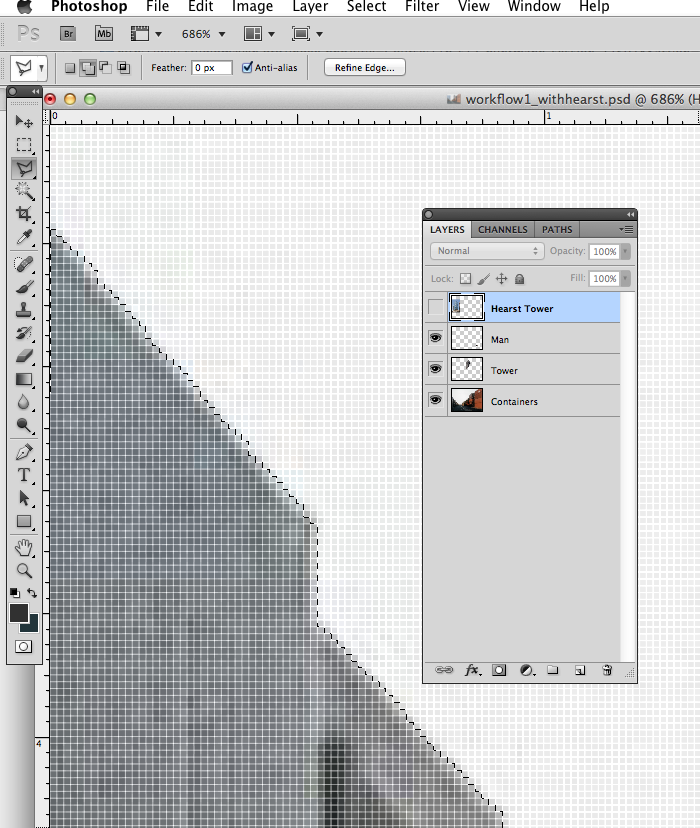
The Magnetic Lasso Tool is most effective when there is a distinct edge to select. It detects and snaps to the edge of an object as you trace along its outline. The lasso width option controls how close the edge you need to stay as you trace the image. Frequency controls how often points are laid down, and edge contrast helps you fine tune the edge detection. Here are a few tips when working with this tool: If you get too far away from the edge, you may get a point in the wrong place. Like the Polygon Lasso Tool you can back up and remove points with the DELETE KEY. You can also add points manually by clicking once where you want to place a point. To be precise when using the Magnetic Lasso Tool, zoom into the image until individual pixels are visible and use the SPACE BAR to pan through the image as you select the edge.
- Magnetic Lasso Tool - Precise edge selection
Deleting Selected Objects
Now that you have selected the grouping of pixels beneath the container edge we will need to remove them.
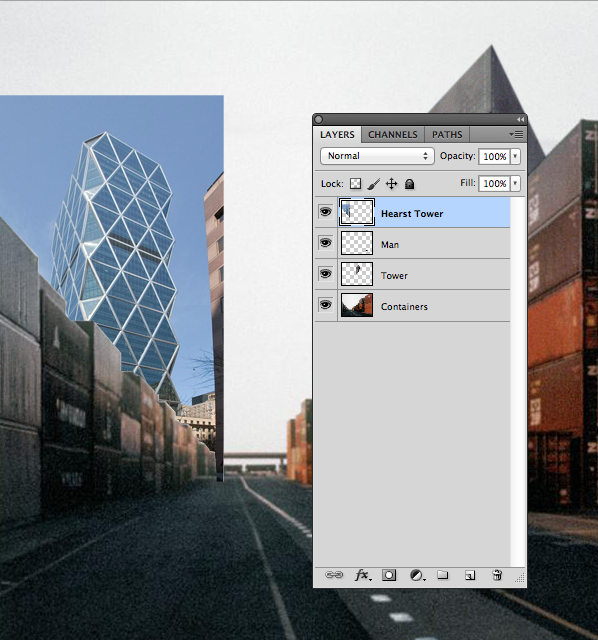
Make sure that you have the Hearst Tower Layer selected and active / visible and hit the DELETE KEY. Change the Layer Filter to NORMAL. Now you will be able to see the Hearst Tower beginning to integrate with the containers beneath.
- Deleting Hearst Tower Layer Pixels
