| Lights | |
|---|---|
| Light objects in Rhino do not render or shade, but they provide sources of light that will affect the final render image. Use different types of light to produce different lighting qualities. | |
| Part of | Rhinoceros |
| Part Type | Entity |
| Screenshot | [[File:|320px]] |
Introduction to Lights
Lights are necessary for producing a successful final render. When using render engines such as V-Ray , where lights are placed and their intensity will determine the lighting quality and visibility of the scene.
While lights have options in Rhino, there are also light options in V-Ray that will affect the final render.
Lights Toolbar
Using the Lights Toolbar is a simple way to create lights. Simply click on the button of the toolbar to insert a light. There are several different buttons on the toolbar; hover over each button to find out what type of light each button corresponds to.
Light Properties
The properties for specific lights can be accessed by selecting the light, using the Properties command, and selecting "Light" from the drop down menu.
Intensity
Lights can be turned off or on. When choosing a color for the light, darker colors, like gray, dims the light. Shadow intensity sets the darkness of the shadow independent of the light's brightness.
Intensity Multiplier Units
The intensity multiplier controls the intensity of light. This is especially useful when rendering with the Physical Camera turned on. There are different physical units for light intensity--take into consideration the scale of the scene to determine the correct intensity of light.
- Scalar
- The final color of the light it is given by the color and multiplier of the light without any conversion.
- Lumens
- The measure for the total illuminating power of the visible light. Using this option, the light's intensity does not depend on its size.
- lm/m/m/sr
- The measure for the total illuminating power of visible light calculated in lumens per square meter per steradias. The light's intensity does depend on its size.
- Watts
- The measure for the amount of visible light emitted. Using this option, the light's intensity does not depend on its size. Keep in mind that this unit does not work like a real light bulb--for example, a 100 watt light bulb in real life emits between 2 and 3 watts of visible light.
- w/m/m/sr
- The measure for the amount of visible light emitted in watts per square meter per steradian. The light's intensity does depend on its size.
Options
- Decay
- Unchecking "No Decay" will turn decay on. This means that the distance between the light and objects will affect the rendering. The further the object from the light, the less light it will receive.
Types of Lights
To figure out what type of light is best for the scene, read on. It is advisable to do test renders to ensure that the lights are working correctly.
Spotlight
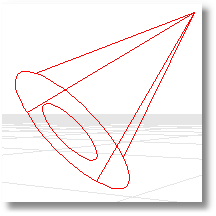
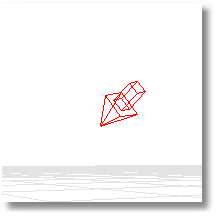
The spotlight will appear in the model as a cone shape. The direction of the cone will be the direction of the spotlight. Spotlights with a narrower cone will produce a more concentrated light than spotlights with wider cones. The width of the spotlight does not determine the range of light (how far the light will reach), but the length and width together control the shape of what is illuminated by the spotlight.
Use the Spotlight command, or press the spotlight icon on the toolbar. Click in the model to choose the center of the base, and then choose (or enter the measurement for) the radius of the base. To edit the spotlight's direction, length, beam angle, hotspot angle, and position, turn on the spotlight's control points. Do this by selecting the spotlight and then using the PointsOn command, or pressing F10 . Click and drag the control points.
Objects near the center axis line of the cone are illuminated most brightly; that full illumination continues for half the diameter of the cone, and then the brightness drops off to zero at the edge of the cone. Spotlight hardness is an option unique to spotlights. It defines the hardness of the spotlight edge--that is, when the brightness of the spotlight begins to drop off.
Point Light
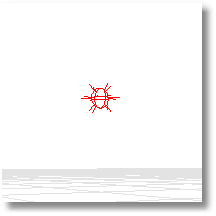
A point light emits light from a single location in all directions, also known as omni light. It is useful for interior scenes that require artificial lighting (such as from a light bulb). Especially important when working with point lights is paying attention to the light's intensity and decay settings.
Use the PointLight command, or press the point light icon on the toolbar. Click in the model to choose where to place the light. It can be moved later.
Rectangular Light
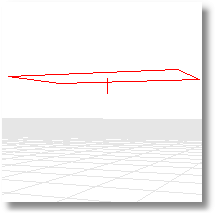
A rectangular light object emits light in one direction. Unlike the Spotlight, with Rectangular Light the angle of the light cannot be changed. The size of the light object affects its lighting range. If a larger range with the same light intensity is needed, then the intensity of the light will need to increase. A larger rectangular light will spread the light out over a larger area, so the shadows will become more diffuse.
Use the RectangularLight command, or press the rectangular light icon on the toolbar. Click in the model to choose the light's start point, length, and width. The direction of the light is shown by the short line extending from the center of the rectangular light. To change the light's orientation, select the light object and use the Rotate command to rotate the light.
The Invisible option determines whether or not the light object will appear in the rendering. The default setting has Invisible unchecked, which means that in a rendering, the rectangular light object will appear as a rectangle of light. The light object, if visible, may create a shadow in the scene. If the rectangular light is invisible, it will still light the scene, but the rectangle itself will not render.
The Double Sided option will make light emit from both sides of the rectangular light object. The default setting has Double Sided unchecked.
For a discussion of Rectangular Light's use and options in V-Ray rendering, see Lights in V-Ray and Rendering with Interior Lights .
Linear Light
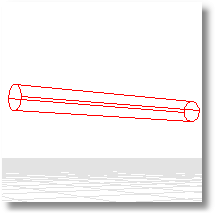
A linear light object emits light similar to a fluorescent tube light. This is useful for Rendering with Interior Lights .
Use the LinearLight command, or press the linear light icon on the toolbar. Click in the model to choose the light's start point and end point. The light object can be rotated to change the orientation of the light.
Directional Light
For directional light, the direction of the arrow is the direction from which the light will shine. While spotlight intensity and range can be edited, directional light is different because it emits uniform parallel rays in a specified direction, simulating sunlight. The exact location of the light object does not matter as the light object only indicates the direction of the light.
Use the DirectionalLight command, or press the icon on the toolbar. Click in the model to choose the location at which to aim the directional light, and then choose a location for the directional light. To edit the light's direction and position, turn on the spotlight's control points. Do this by selecting the directional light and then using the PointsOn command, or pressing F10 . Click and drag the control points. In V-Ray , a directional light can be placed with sunlight properties already loaded.
The options for the directional light control the following properties. Changing these settings in Rhino will affect how the light will render in V-Ray .
- Turbidity
- Controls atmospheric haze. Higher values increase the haze, creating a smoggy effect, and a warmer color cast. 3 is the default value, 6-12 is warm, 20 is heavily altered.
- Ozone
- Controls the blueness of the light. Higher values gives a blue cast to the scene. 0.35 is the default value, while 1.0 is the highest value.
- Intensity Multiplier
- Controls the intensity of the light. Higher values mean stronger light, bit the intensity multiplier unit affects the scale of the increase.
- Size Multiplier
- Controls shadow softness. Higher values create softer shadows. 1 is default, 6 produces soft shadows, 12+ produces very soft shadows.

