| Creating and Assigning Layers | |
|---|---|
| describe this part here | |
| Part of | AutoCAD 2012 |
| Part Type | Method |
| Screenshot | [[File:|320px]] |
Creating Layers
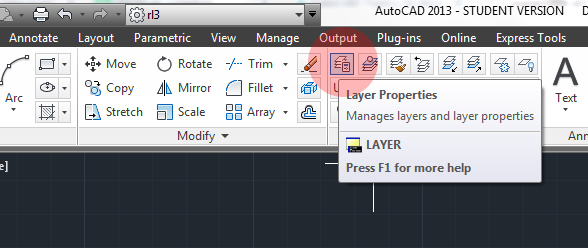
Create a new layer by using the "Layers" palette of the ribbon to launch the Layer Manager.
Launch the Layer Manager by clicking on "Layer Properties"
The Layer Manager shows you all the layers in the file. You can customize this by creating your own layers and assigning properties to that layer here. A new layer is created by clicking on "New Layer".
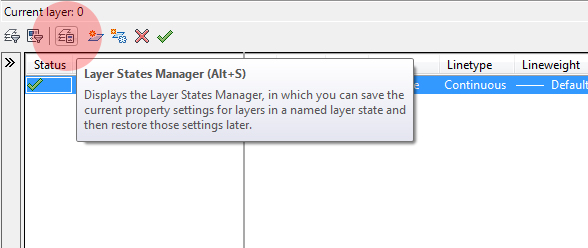
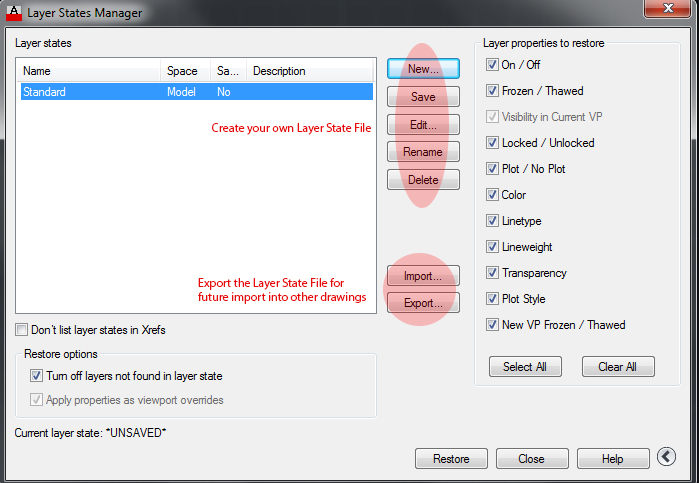
Since you will use mostly the same layers in all your drawings, creating new layers for each individual drawing would be an inefficient use of time. The Layer States Manager allows you to save your layers and their properties, export this and import into a different drawing.
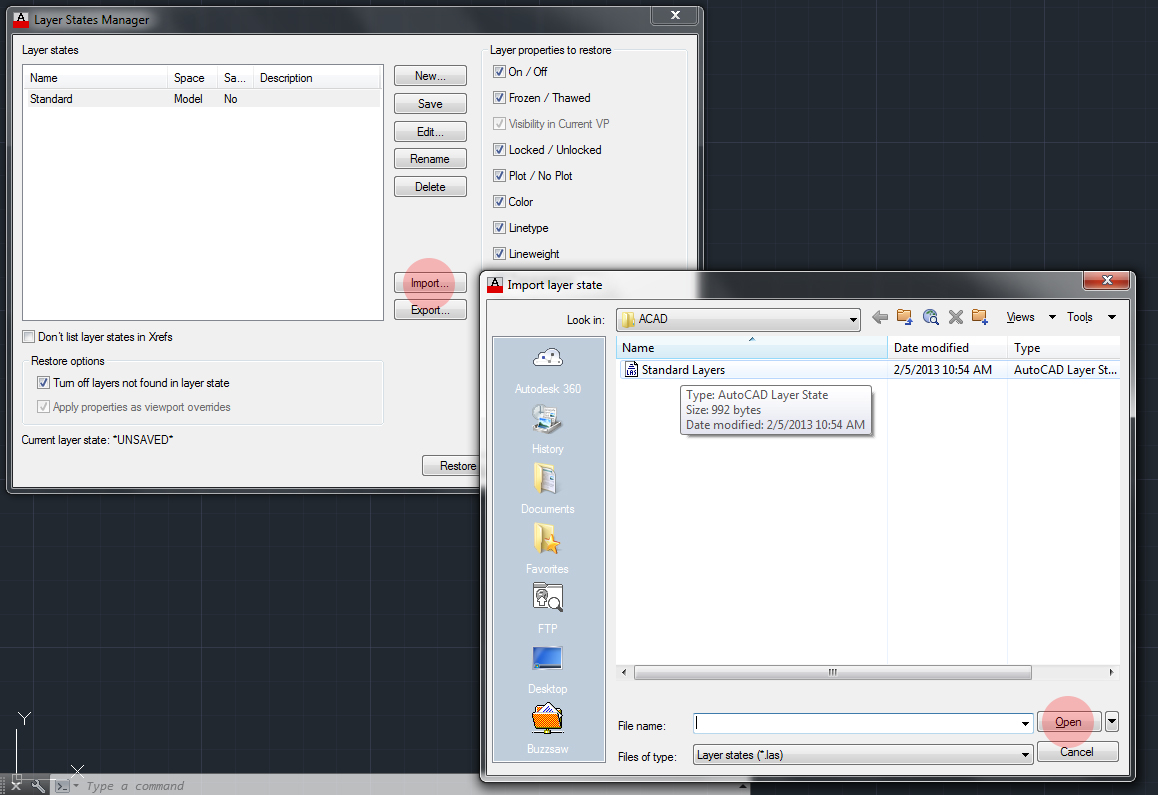
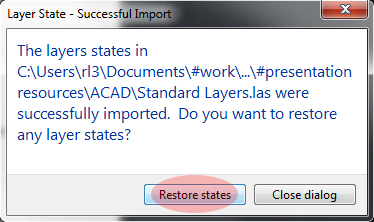
Clicking on "Import" brings up the "Import layer state" dialogue, where you can browse to a previously saved and exported layer state file. This brings all your layers and their properties into the drawing.
Choose "Restore" in order for the layers to have the original properties that you created.
After importing your layer state file, your layers can be seen in the layer manager as well as in drop-down format on the "Layers" palette on the ribbon. Now you are ready to assign your geometry to layers.
Assigning Layers
Assign a layer to geometry by first selecting the geometry you wish to be on a particular layer, and then selecting the desired layer from the "Layers" palette of the ribbon.

