|
Exterior Renders using VRay and Site Photographs |
|
|---|---|
| Screenshot | |
| Starting from an exterior photograph, this workflow will outline the steps to creating the matching perspective view in Rhino to produce a render in VRay. Then the images will be merged together in Photoshop along with some additional post-processing tools for various desired effects. | |
| Uses Tool(s) | Rhinoceros , VRay , Photoshop CS5 |
Exterior renders are key in describing the building design in relationship to the surrounding site. This type of image could be produced by either modeling the extents of the site OR placing a rendered image into an existing photograph. To do this, the perspectives must be matched exactly by using the Background Wallpaper feature in Rhino.
Working with the image itself will be outlined as steps in Photoshop to isolate the location of the building and work with the various layers already embedded in the image. Various selection tools will be reviewed to help make this process more efficient and precise. Rather than emphasizing pure photorealism, several post-processing tools will be reviewed in the later steps to cater for different stylistic intents.
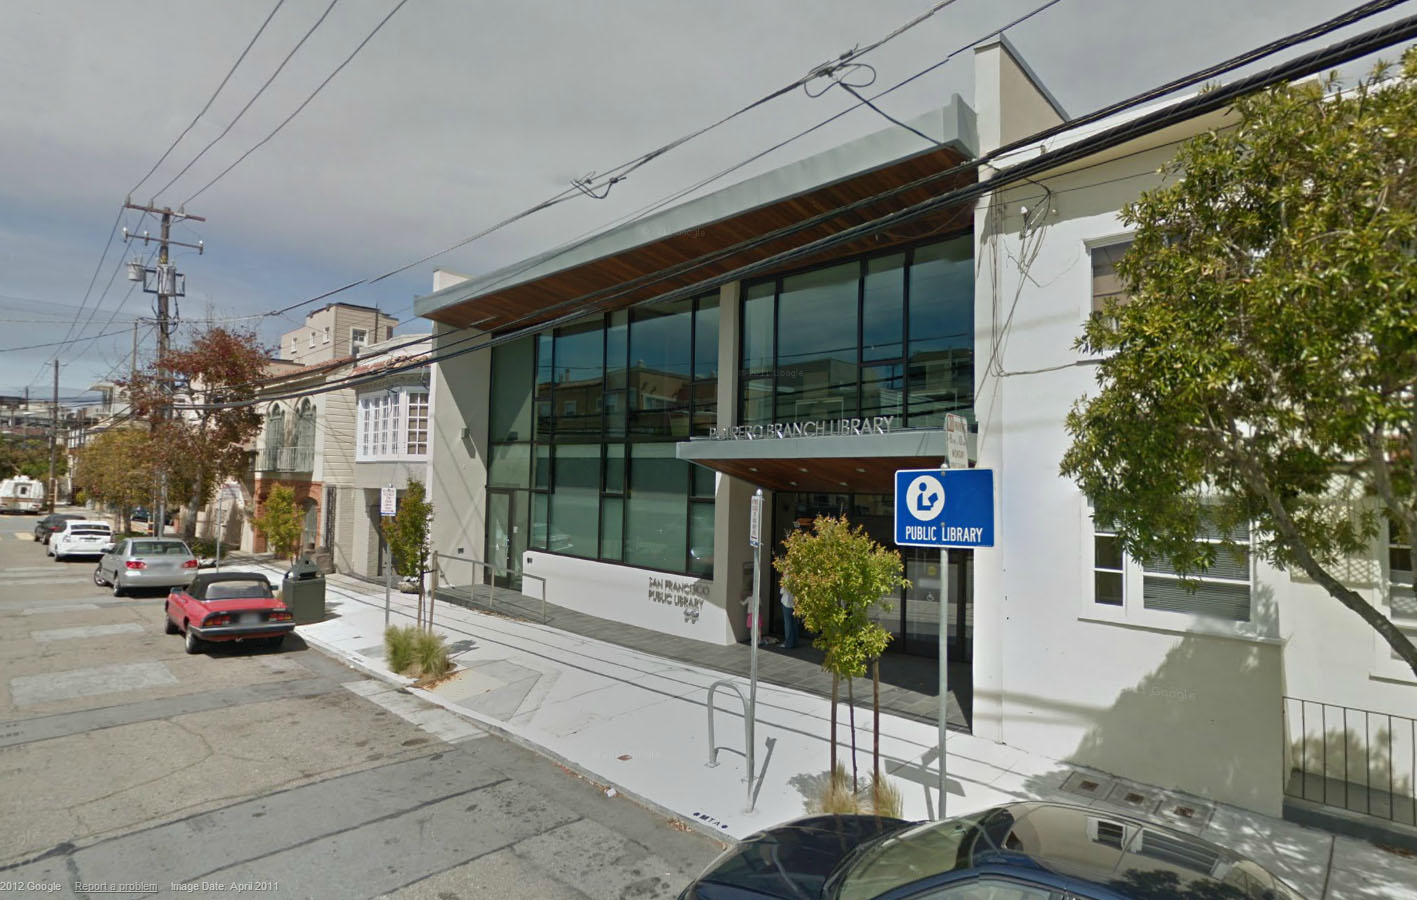
You can download the street view here
You should try to use your own model to plug in - but if you need an ugly library to work with click here
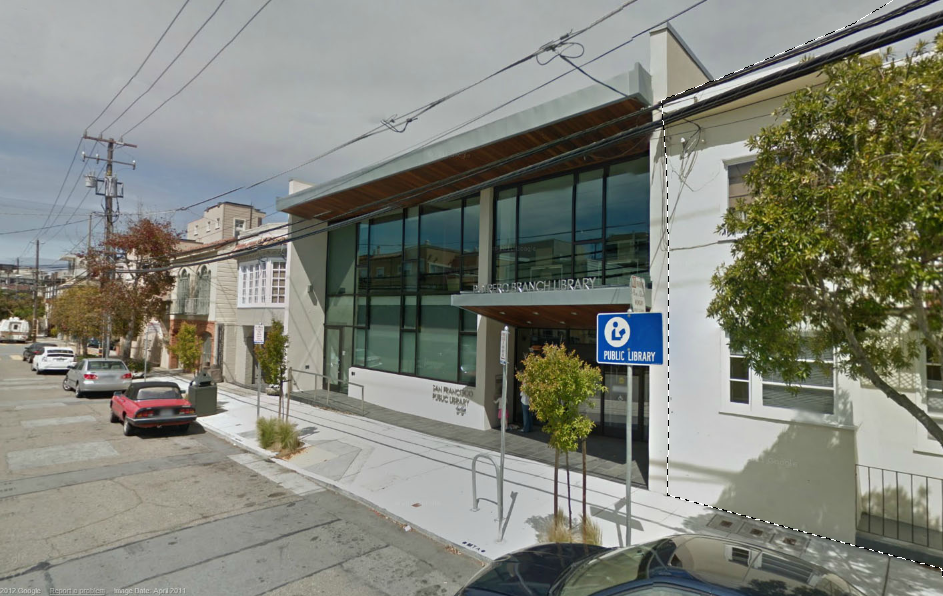
We will be working with this photograph:
Add Wallpaper in Perspective View
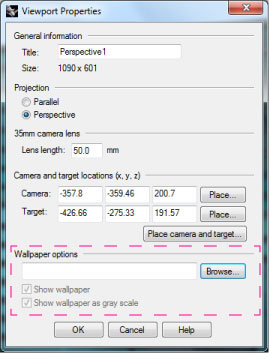
The best way to match the perspective perfectly of an existing photograph is to place it as a Wallpaper in Rhino. This is different than a PictureFrame or BackgroundBitmap because it will literally span the entirety of the viewport and not move as you rotate and pan around the view. Right click on the Perspective Viewport to go to Viewport Properties and click on the "Browse..." button to select an image to become the wallpaper.
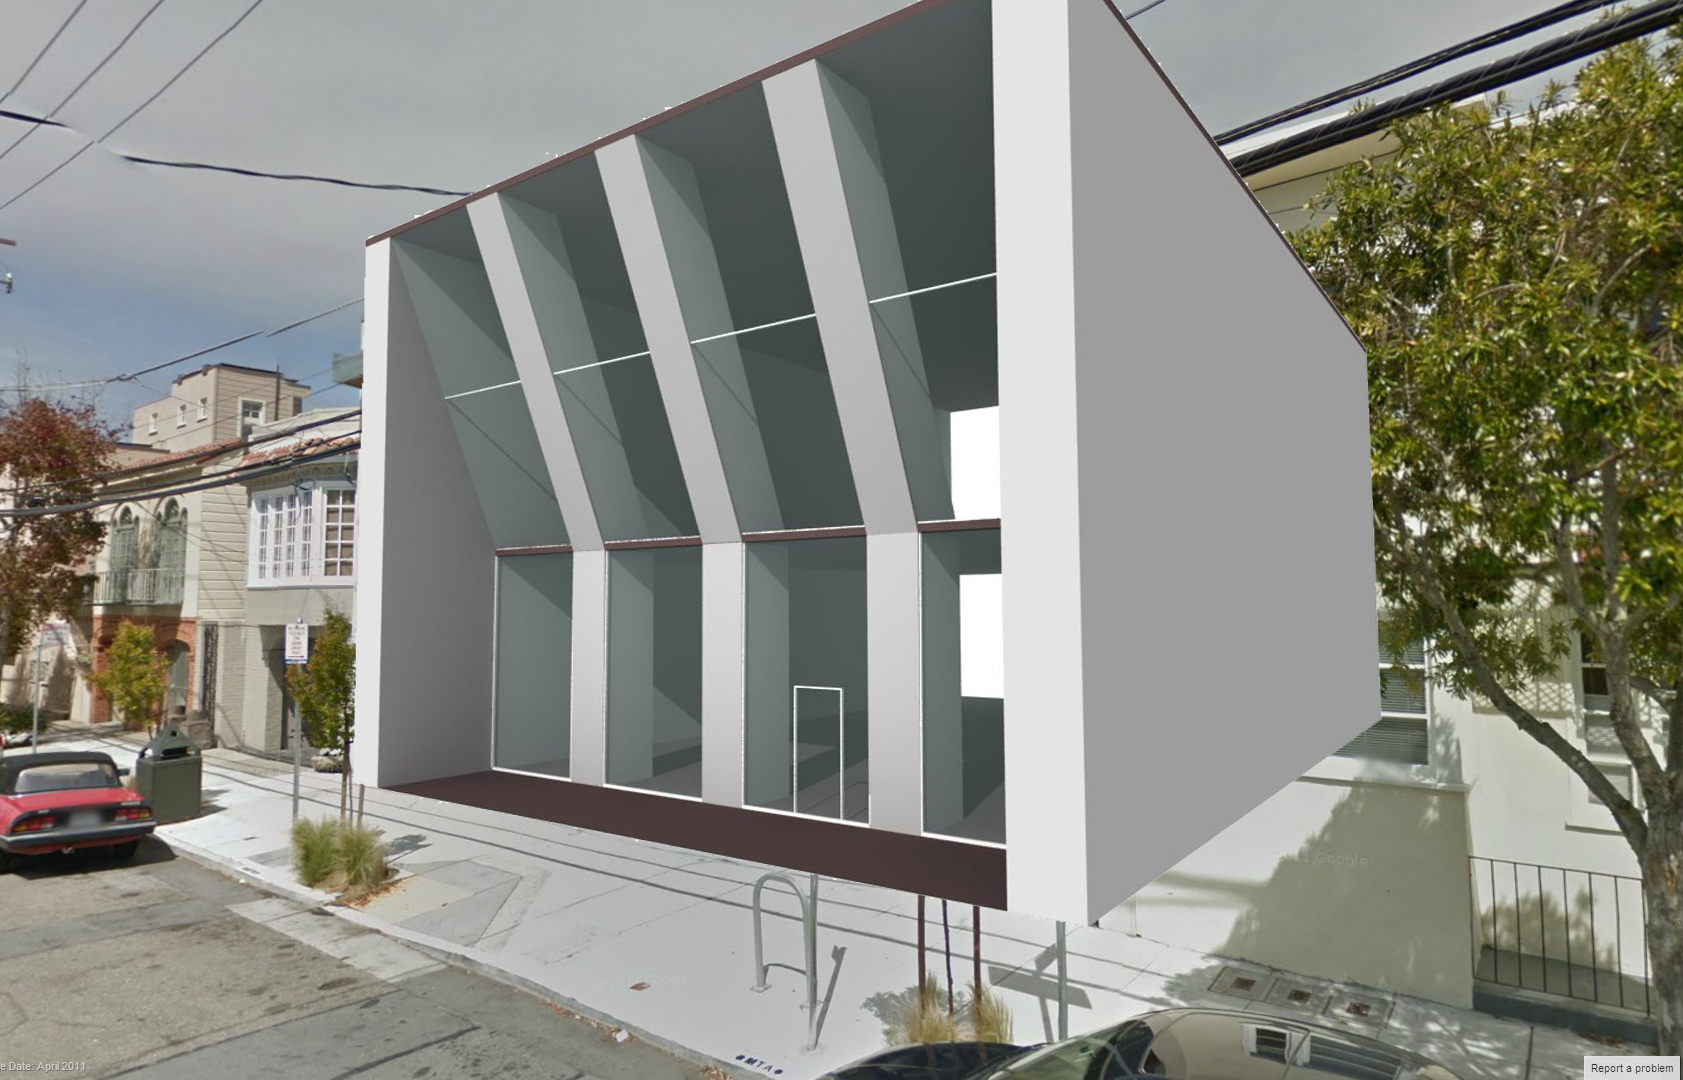
 After adding the wallpaper we want to fit our 3D model into the picture.
One helpful tool to do this for you is the PerspectiveMatch command which matches selected points from the photograph to points on the digital model. Rhino uses these points to attempt to not only orient your model correctly, but also change the lens length appropriately.
Follow the rhino command prompts carefully, and make sure that you pick points on multiple axis (rhino cannot calculate the perspective if all 6 points are along your front facade). You will notice that once rhino executes the command, your viewport camera lens length will have changed on its own.
Add Sunlight
Look at the existing photograph to see if there are any clues as to the time of day in the image. Look for shadows from overhangs and trees that will be important to match as you set up the sunlight system for the render.
If using Rhino5, use the SunDockBar to insert a sun. If using Rhino4, use the SunLight command to insert and place the sun. Remember that the location of the sunlight (which is a Directional Light ) does not matter - except that it should be easy to located and edit later. Directional Lights create light rays in parallel vectors all over the proposed view just like sunlight would - the arrow in the viewport is simply representing the designated vector, or direction.
Adjust Camera Settings
At this point, it is important to do a few test renders to make sure that the sunlight is in the desired direction and there is enough light in the scene. Keep the image size low so that the render does not take too long to test through.
Add Material
Before rendering you will need to add material for Vray to render in Rhino. The "ugly library" file should come with materials. If not see this workflow .
Complex materials should most likely be added in post-processing in Photoshop rather than texture mapped over the entirety of the building.
Add Render Channels
Render channels will be key in working with the image in Photoshop for easier selection. In the VRay Render options, use the VFB Channels tab to edit the channels. These are all separate layers that will be rendered as an image. The most common, Color , will be the actual render. Other ones to include:
- Material ID - creates a different flat color for each material so that all alike materials could be selected at once
- Alpha - creates a black/white image that references the background of the image (where there are no objects in the viewport) versus the rendered portion of the final image
- Shadow - will render only shadows.
Render
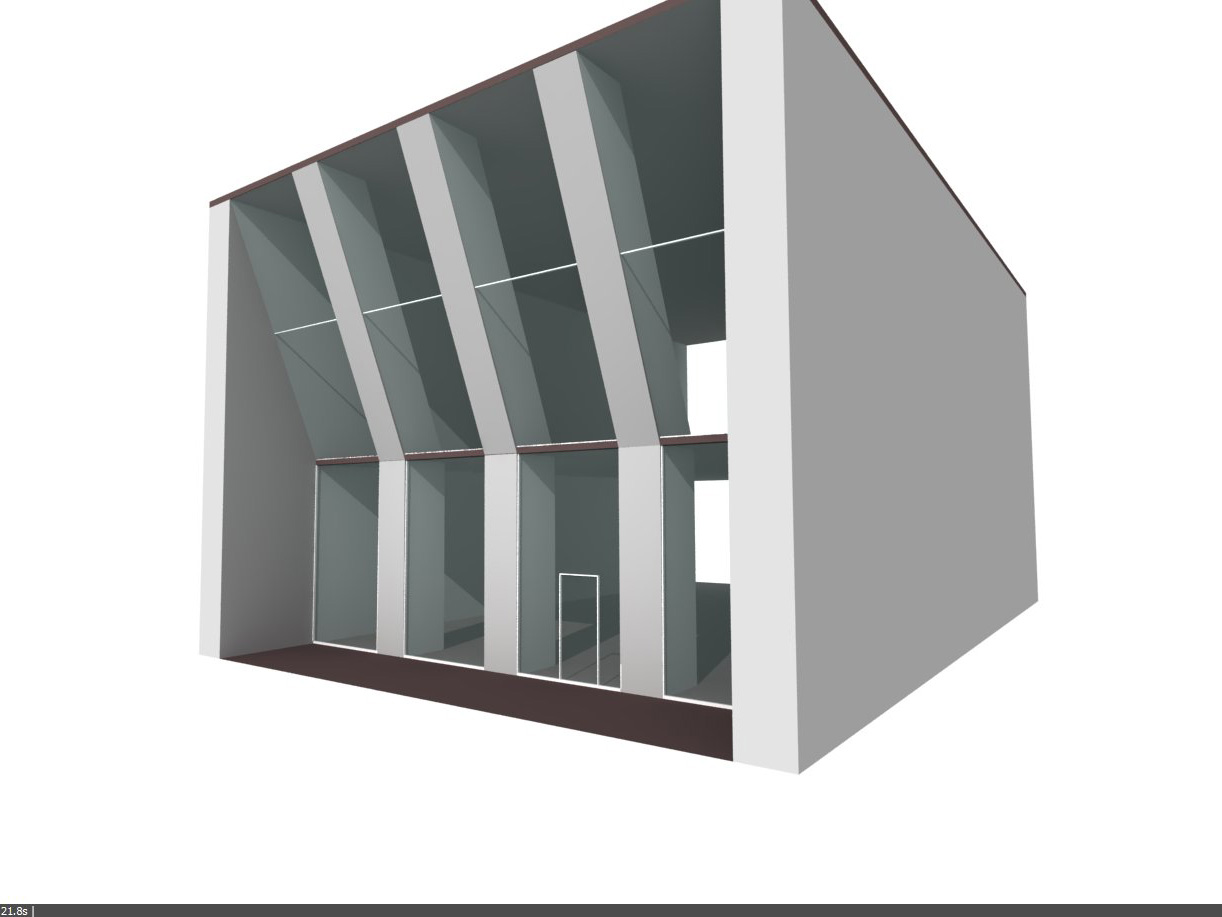 Once you are sure that the render you have set up has sufficient light, edit the image settings so that the final render is much larger. Consider how big you would like your final image to be when deciding the final image size - will it be spanning the entirety of a board or around the size of an 11" x 17"?
In the VRay Render Options, use the Output tab to edit the image size. Suggested size: 1600 x 1200 or larger.
After the render is finished, ' be sure to save all the rendered images.' You may have to change the drop-down menu in the render window to find the different Render Channel images to save them separately.
Place Images in Photoshop
First, open all the rendered images (the layer channels as well) and the original photograph in Photoshop. Use the Copy and Paste tool to bring all the rendered images together in the same Photoshop file, with the render channels on different layers.
Once the render is placed in the same photoshop file, you may need to work to re-position it into place. Transform the image as needed by selecting Ctrl+T to scale and move the rendered image. You can also right-click on any corner the transform box to shear the image to fit better. For not, do not worry about areas where the image needs to be cropped or deleted.
Re-prioritize Background Layers
In the original photograph, consider what elements may exist in FRONT of the rendered image. This may include trees, street signs, cars or side walls. In this example, the right building should cover the side wall in the render therefor we need to reselect this part of the photograph and move it to a layer that is in FRONT of the rendered image.
With the render image hidden, use the Polygonal Lasso tool or Magnetic Lasso tool to outline areas that should be placed in front of the render. Try to trace the objects using clearly defined borders - the sharper the edge, the easier it is to blend with the rendered image later. Once this is selected, Paste the images back into the file. Do not move these images - they should match the background image exactly. These should create a new layer automatically. Move this layer to the top-most layer.
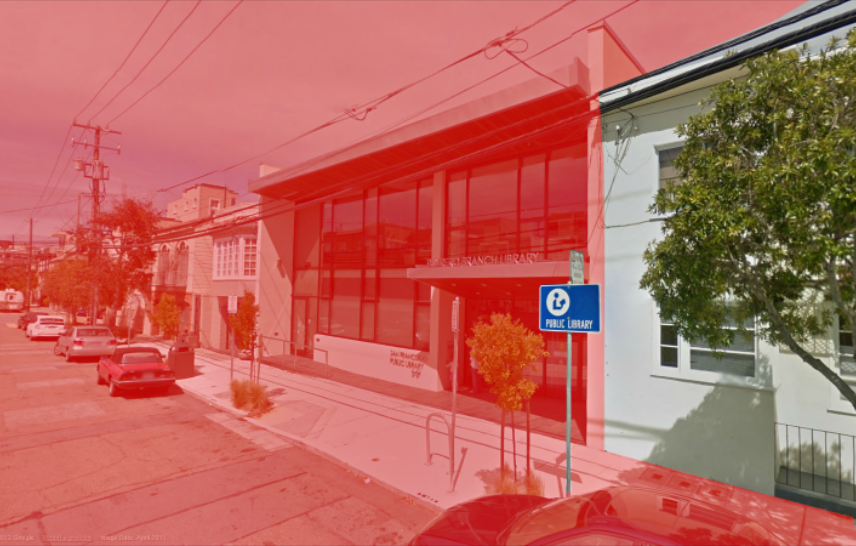
Helpful tip: To modify a selection, press the Q button to go into Selection Mode . In this mode, areas that are not selected become tinted red. You can easily add to the selection by using the eraser tool or removing areas from the selection using the paintbrush tool. Once your selection is complete, simply press the Q button to return to the "marching ants" view.
Final touches
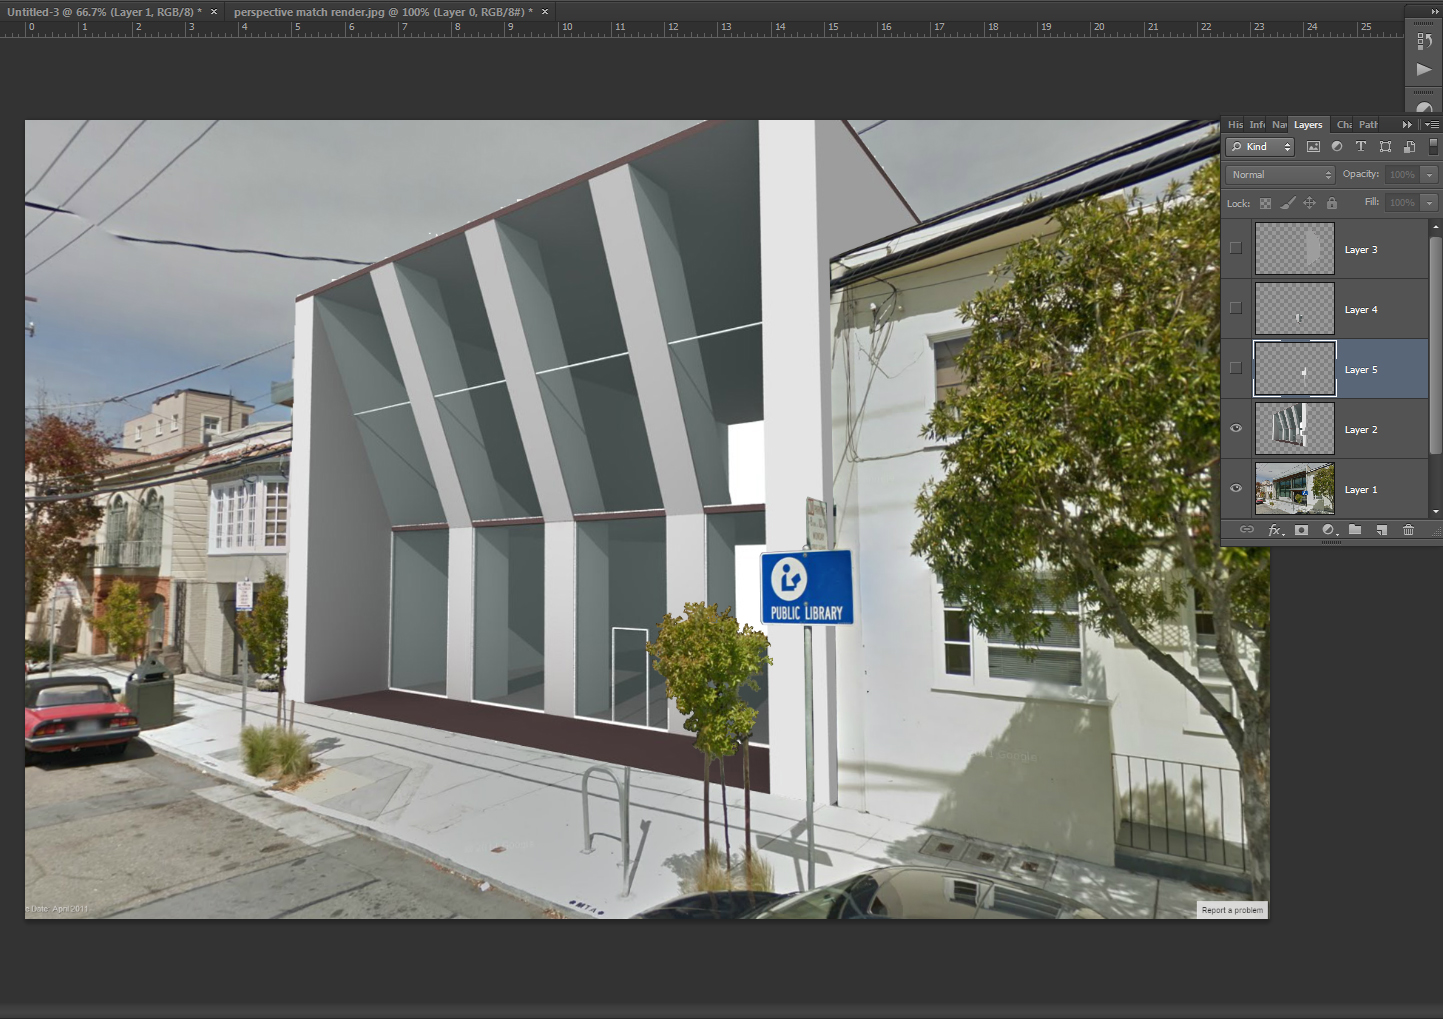 Now you can turn on all the layers to see how the new elements appear on top of the rendered image. Feel free to use layer adjustments to ease the blending of the images together, or return with an eraser tool to adjust the edges.
In addition to matching the photograph, stylistic elements can be added to emphasize a certain concept or idea. Additional elements such as trees and people can also be added to enhance the image.

