|
Creating Composite Materials Using Image-Maps in Vray |
|
|---|---|
| Screenshot | |
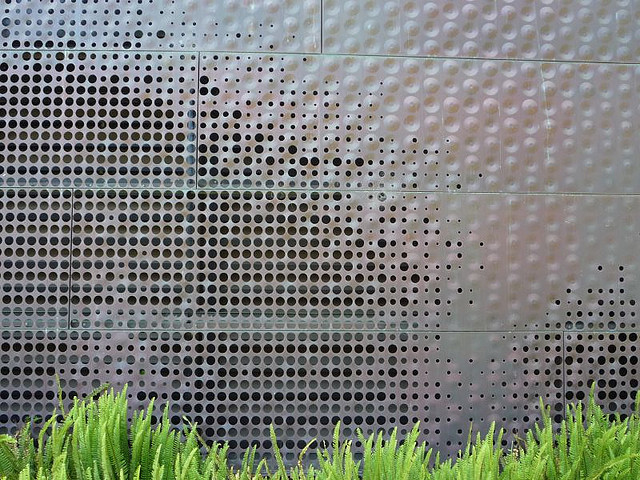
| Using the facade of the de Young Museum as an example, this workflow demonstrates how to use custom-generated image maps to define composite material "layers" in V-Ray. Using the material editor dialog, we will edit the transparency, diffuse, and displacement layers to create the pattern of punches across the material, alter the color using an image map, and simulate the bumps of the material. | |
| Uses Tool(s) | VRay |
Steps
Load Basic Settings
Throughout the process of creating a new material, it is important to test-render the actual image to make sure everything is rendering as expected. Use the same V-Ray settings that will be used for the final render.
To load an existing V-Ray setting (such as the ones handed out in class), click on the V-Ray Options icon. Then click File->Load , and select "exterior.visopt". If desired, create a sunlight and adjust the camera or intensity of the render to make sure the model is clearly visible.
Refer to the following workflow if you are having difficulties with this.
Create a New Material
Open the Material Editor in V-Ray. Right click on Scene Materials and select "AddVrayMtl." A new listing should appear. Rename this material as "Screen1" so that it can be easily identified later.
Add Color Using an Image Map
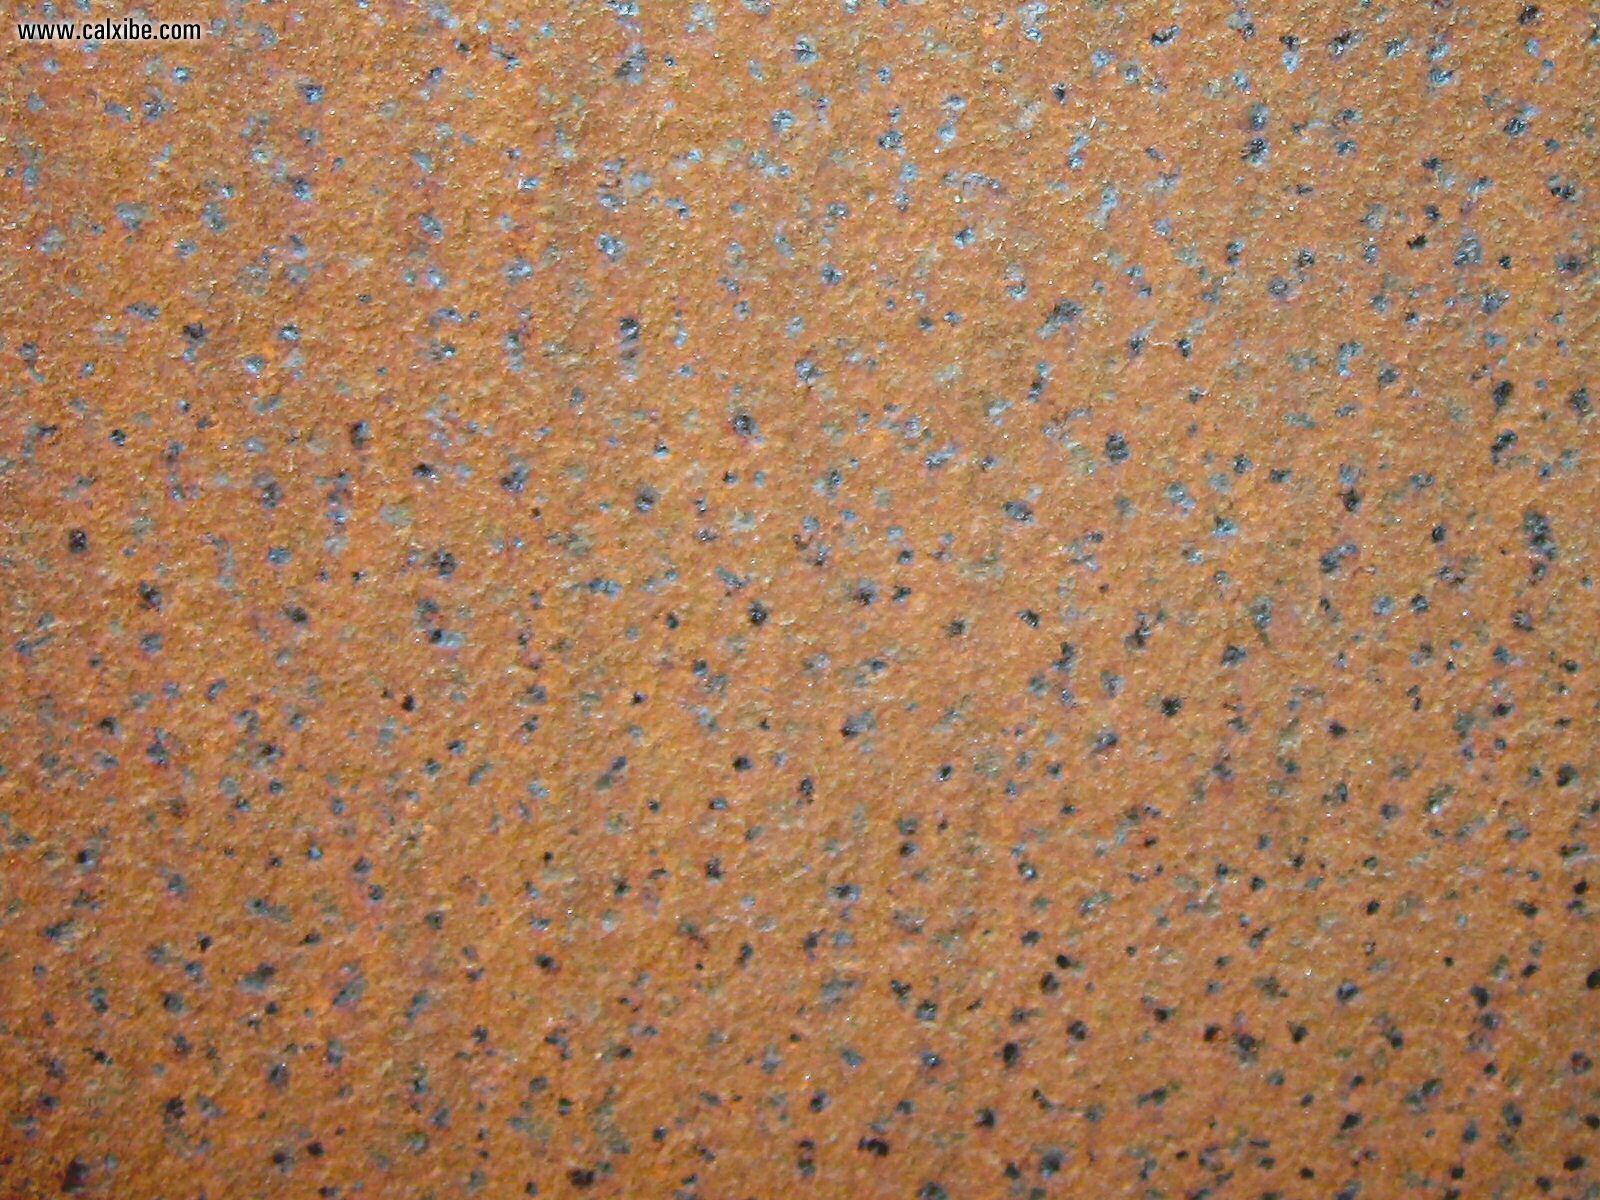
Color can be added to a material by simply selecting a color for Diffuse. However, the de Young facade has a rich, uneven rusting all over the skin that continues to change over time. In this case, just using a color for the material will render too flat and even. To add some texture and irregularity to the color of the material, an image map should be used.
To do this, download and use the following rust image to create an image map for the material. Select the "m" next to the Diffuse color. Select "Bitmap" from the pulldown menu and load the downloaded rust image.
Add the Perforations
In V-Ray, material transparency is set within the Diffuse layer--the option is right next to the Diffuse Color option. In the same way that changing the Diffuse Color or image map changes the color of the material, changing the Diffuse Transparency alters the transparency of the material. A color can be selected to create an overall percentage of transparency, or a transparency pattern can be mapped onto a material. Transparency patterns are typically black and white images--wherever the map is black, the material is opaque; wherever the map is white, the material is transparent. Shades of gray create varying degrees of transparency.
To create an overall even pattern of perforations, download and use the following image to create a transparency map. Select the "m" next to the Transparency color. Select "bitmap" from the pulldown menu and load the pattern.
Attribute Materials to Objects
The next step is to attribute the material to objects or layers. Materials can be applied in two ways: from within the V-Ray Material Editor, or within an object's Properties in Rhino.
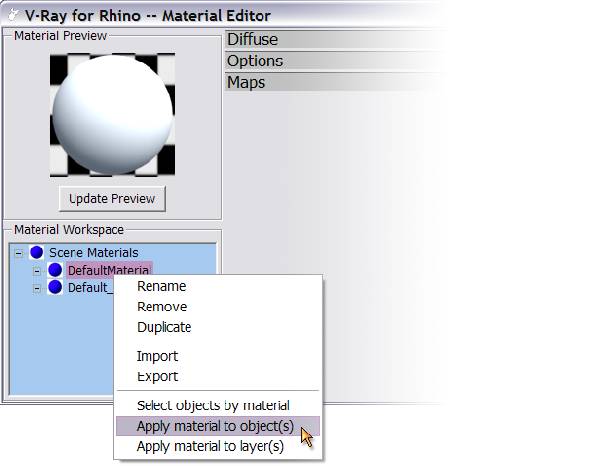
In the V-Ray Material editor, right click on the material name, and then click on either "Apply material to layer(s)" or "Apply material to object(s)".

To attribute the material to objects or layers in Rhino, select the objects or layers. Then, use the Properties command and select Material from the drop-down menu. Assign the material by Plug-in, and then click Browse to select the desired material (in the case of this workflow, the material is called Screen1).

Attribute this basic screen material to the exterior facade of the museum model and quickly test render to see what the building looks like so far.
Adjust Material Scale
Depending on the scale of the model, the way the model was built, and the default settings in V-Ray, the image map and transparency map may not be rendered in V-Ray accurate to the scale of the building in real life. The image map may be enlarged and look stretched out, or the transparency map may not create the right effect because of its size relative to the building.
The test render should reveal whether or not the image map and transparency map are mapping at the right scale. Remember that the architect designed the de Young Museum's perforations to give a sense of porosity without registering the exact holes in the skin.
To change the scale of the perforations, edit the UVW of the transparency map in the Material Editor, under UVW Transform. In the Repeat column, increase the values of U and V to increase the number of times the image map repeats within each surface. Click on the Update button to preview the material texture
Creating a New Pattern
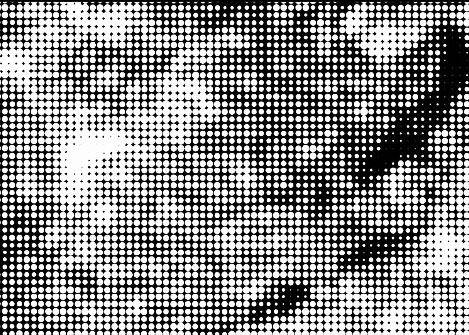
Repeat the previous process of creating a new material, but this time use the following perforation pattern as the image map on the tower surfaces to create the more organic and abstracted pattern of the surrounding trees. Do some test renders after changing the scale of the image to see what renders most similar to the existing building.
The pattern image can be edited in Photoshop to change how it appears in renderings by changing the pattern in numerous ways, such as mirroring it, cropping it and scaling parts of it.
Final Render
To create a truly realistic rendered image of this building requires creating new V-Ray material settings with different transparency bumps for each facade of the building. Rather than creating an overall perfectly executed digital model of the building, it would probably be best to simply concentrate on one view and edit only the surfaces within that one view. A view can be saved and quickly restored for rendering later.
Once the final material settings are made, adjust the output size of the render and render the final image.
Common Problems
- Is the perforation patterns the inverse relationship than you intended? If your transparency bump is flipped - you can easily edit the image in Photoshop by inverting the colors and re-loading the transparency file in VRay.
- Are some objects not updating with the new material settings? Sometimes you may have attributed the material to an object, not a layer. You can always select all the objects within a layer and double check the Object Properties to confirm that all the objects are dictated by the material properties of the layer, not individual objects.
Resources
- CGTextures
- Vast library of high-resolution textures for download. Account registration required.
- Maya NG's Textures
- Over 4250 free, high-resolution textures. Limited to 20 downloads per day.


