|
Depicting 3D Surface in 2D |
|
|---|---|
| Screenshot | |
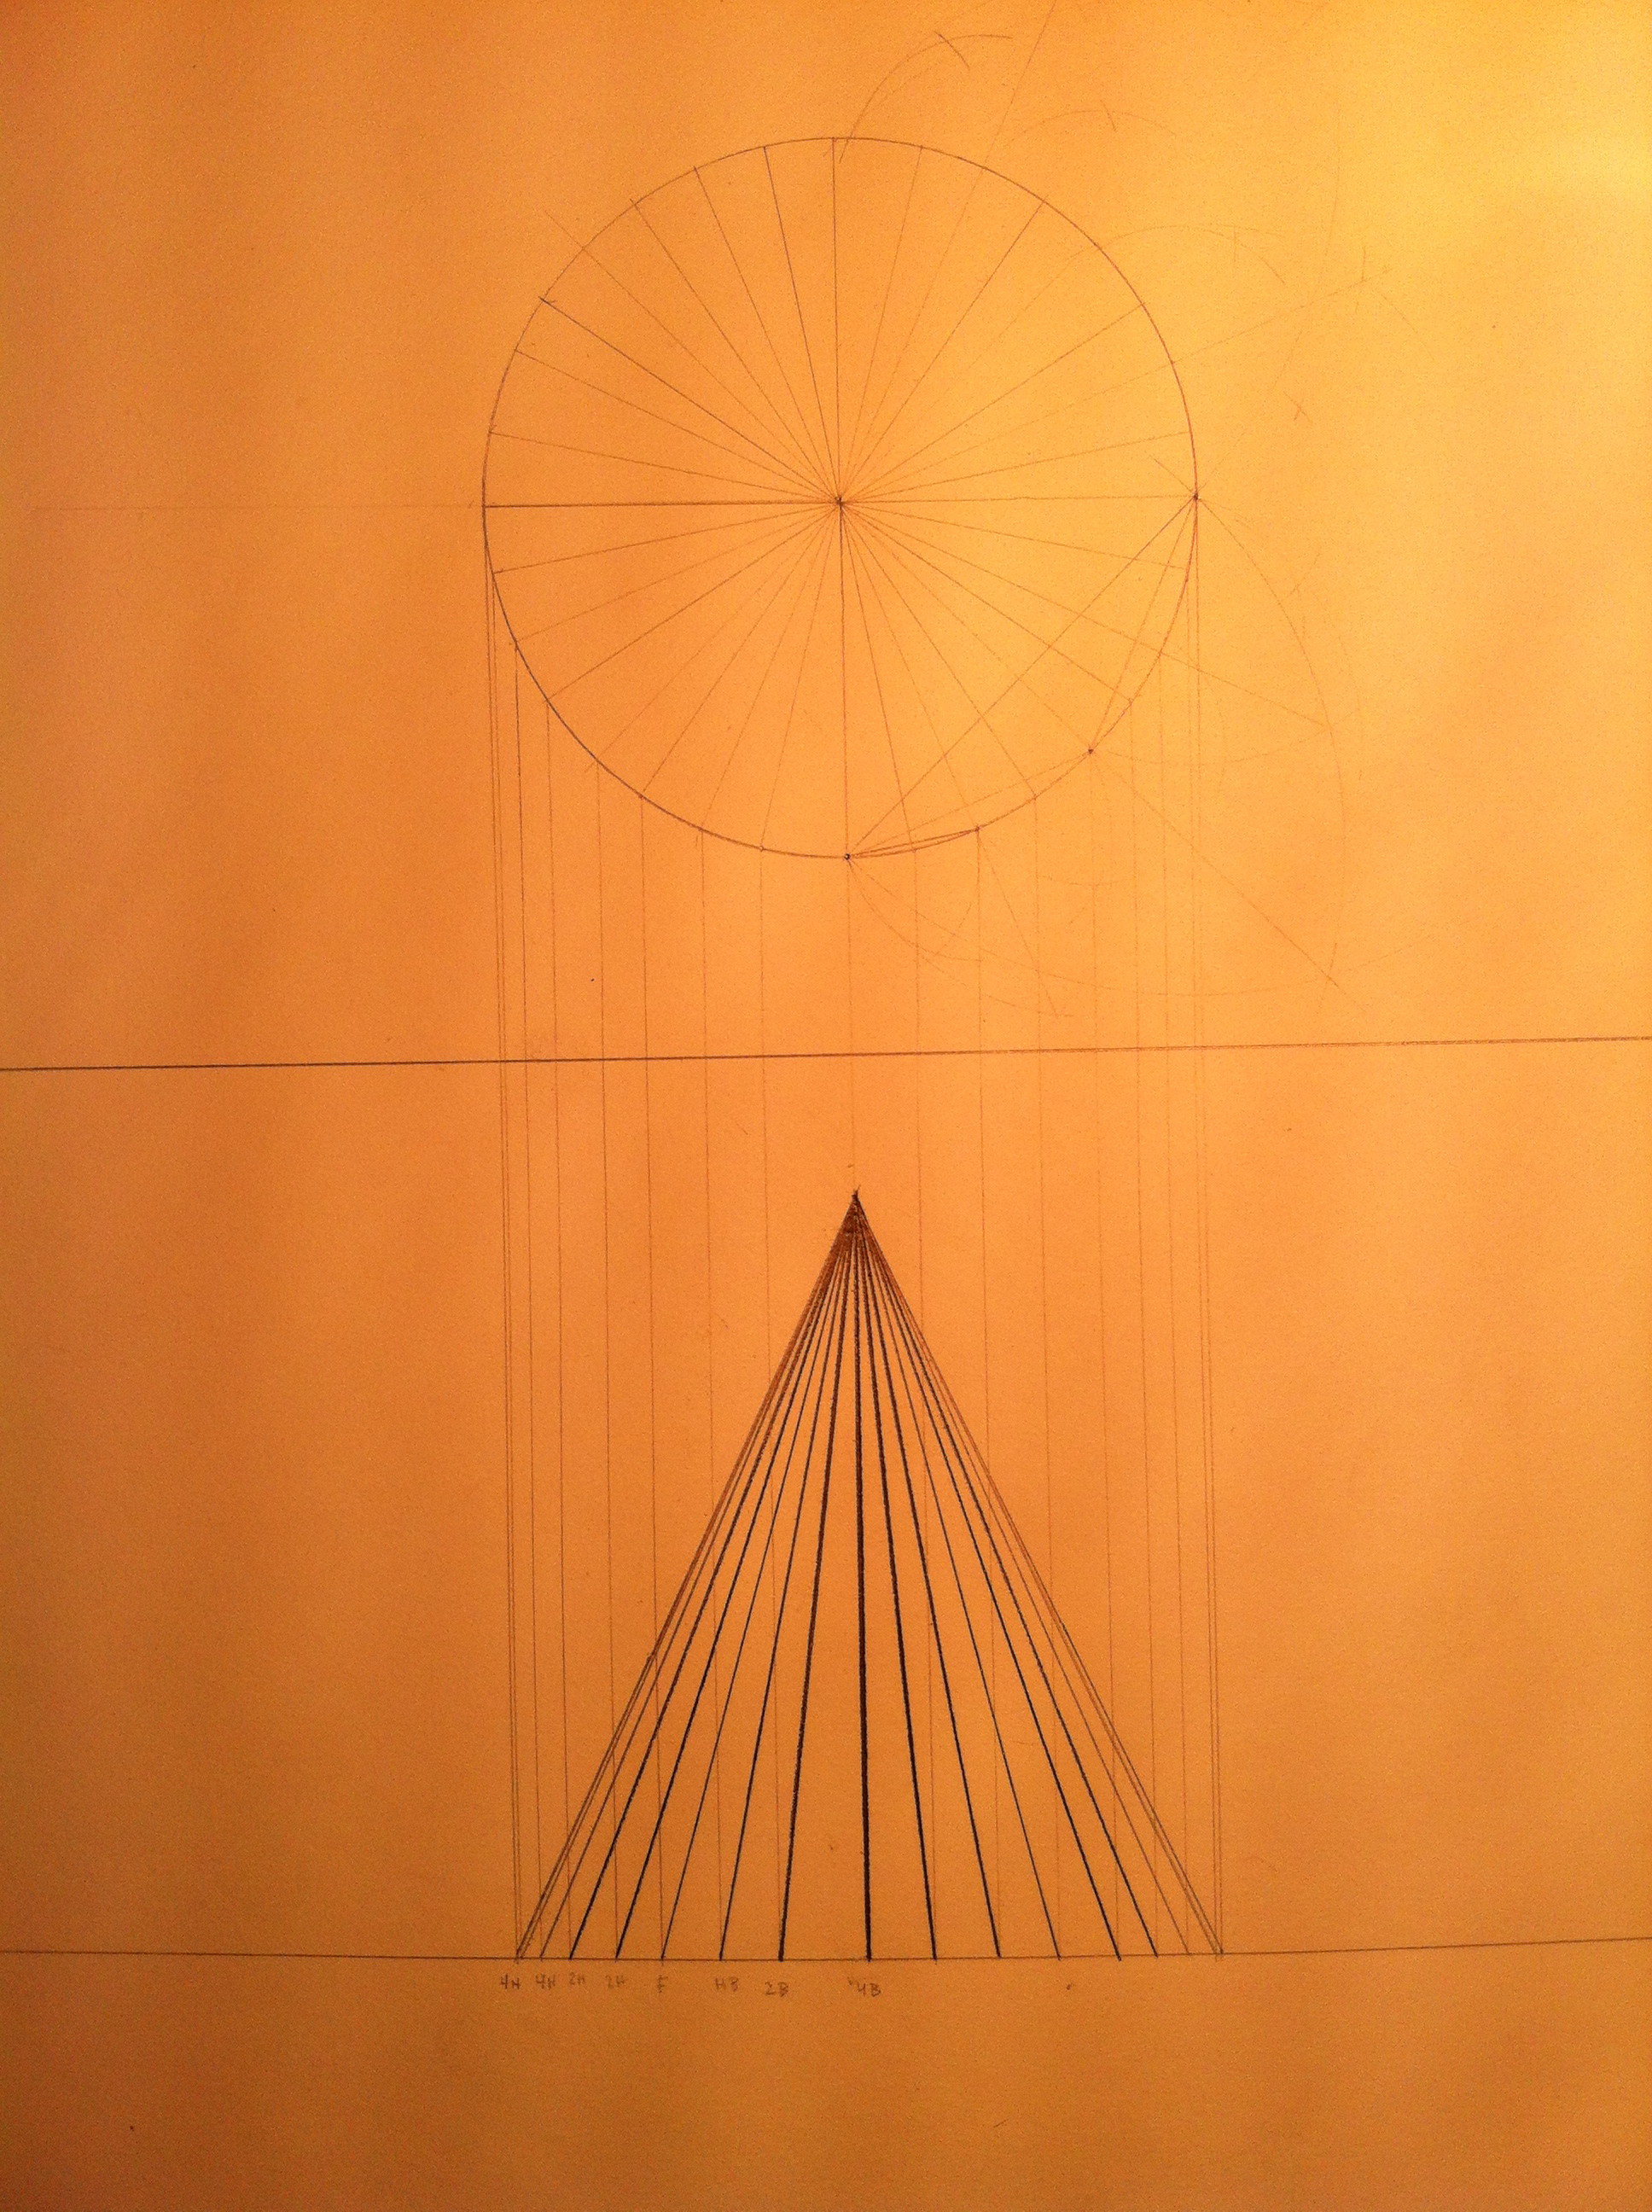
| This workflow will walk you how to depict a 3D surface in 2D by hand. By using the conventions of descriptive geometry, you will learn how to draw curved surfaces by drawing a cone from plan view to elevation. It is essential to understand how shapes are subdivided, projected and translated into 2D representation of a 3D object. | |
| Uses Tool(s) | Drafting Board |
When drawing a 3D surface in 2D, we can depict curved and receding surfaces though the use of line weights and line concentration. First, we will draw the a plan of a cone and subdivide the circle so we have lines to project onto the elevation. We will then draw an elevation of the cone, using the projection lines to represent cone’s receding surface. This drawing method allows the viewer to perceive the cone as a 3D object with a curved surface.
Depicting a 3D Surface (Cone) in 2D
TOOLS: Drafting Surface Paper Graphite Pencils Lead (weights 4H, 2H, 2B & 4B) Lead sharpener T-square or Drafting Triangle Compass
STEPS:
Subdivide Shape
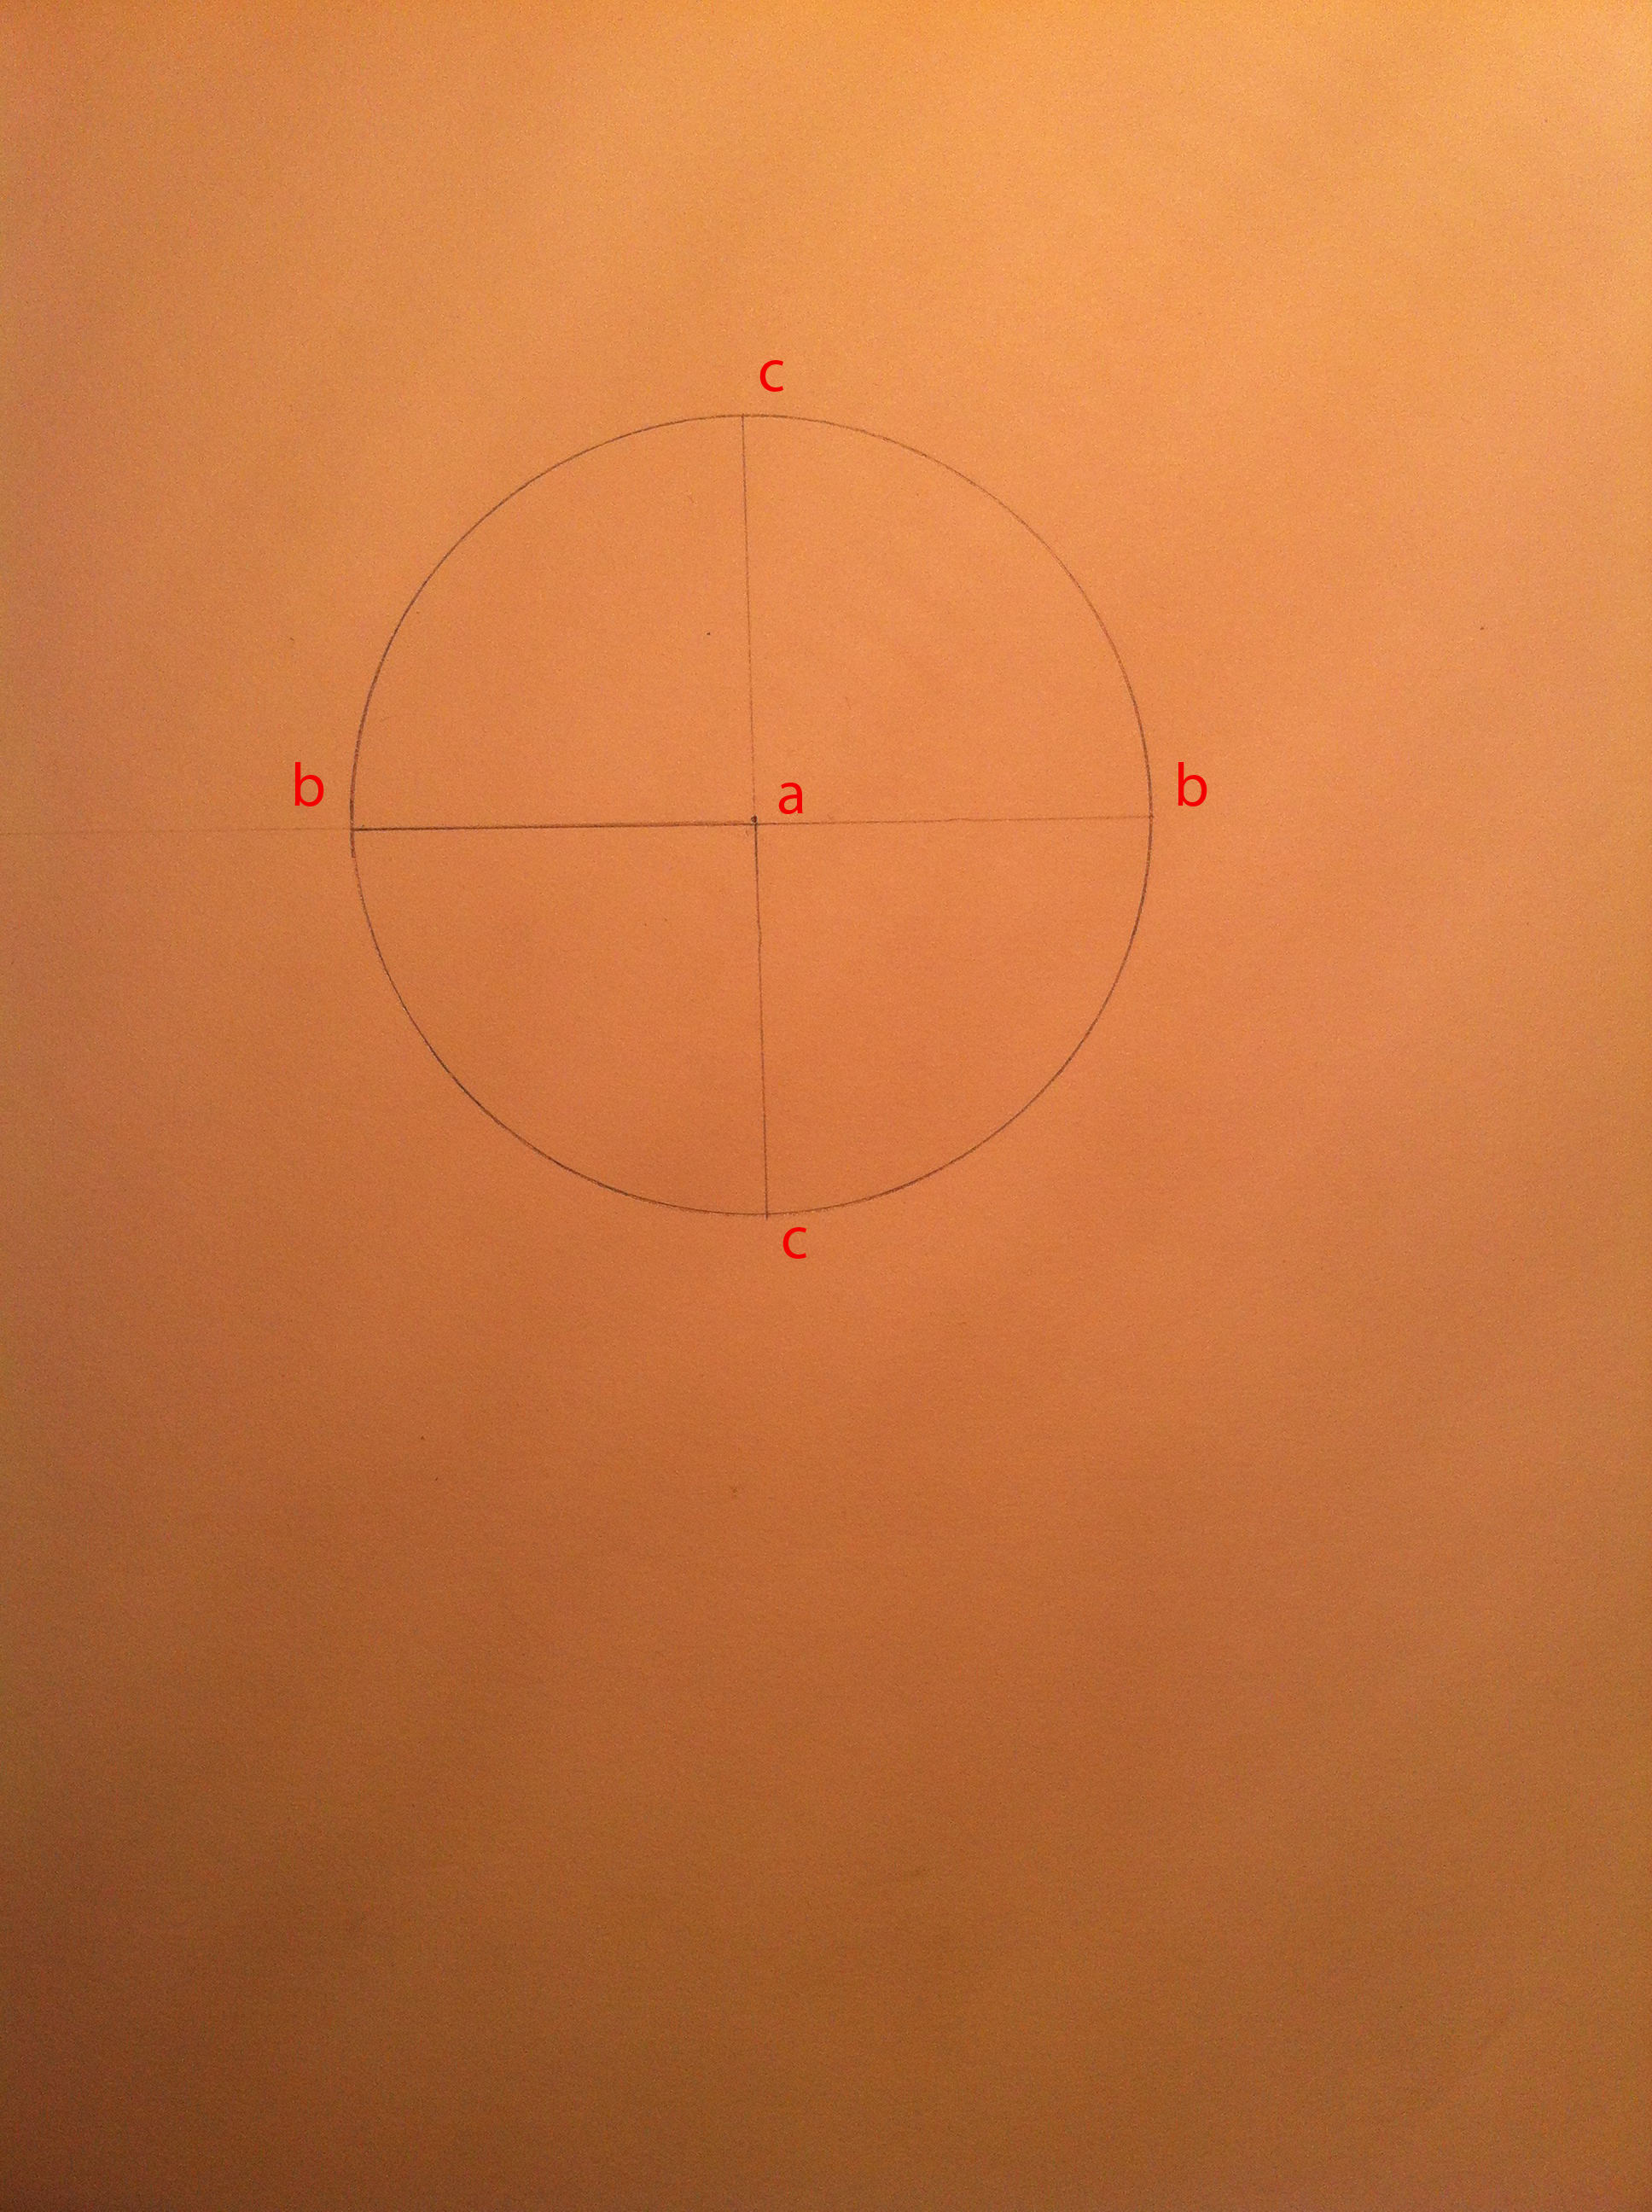
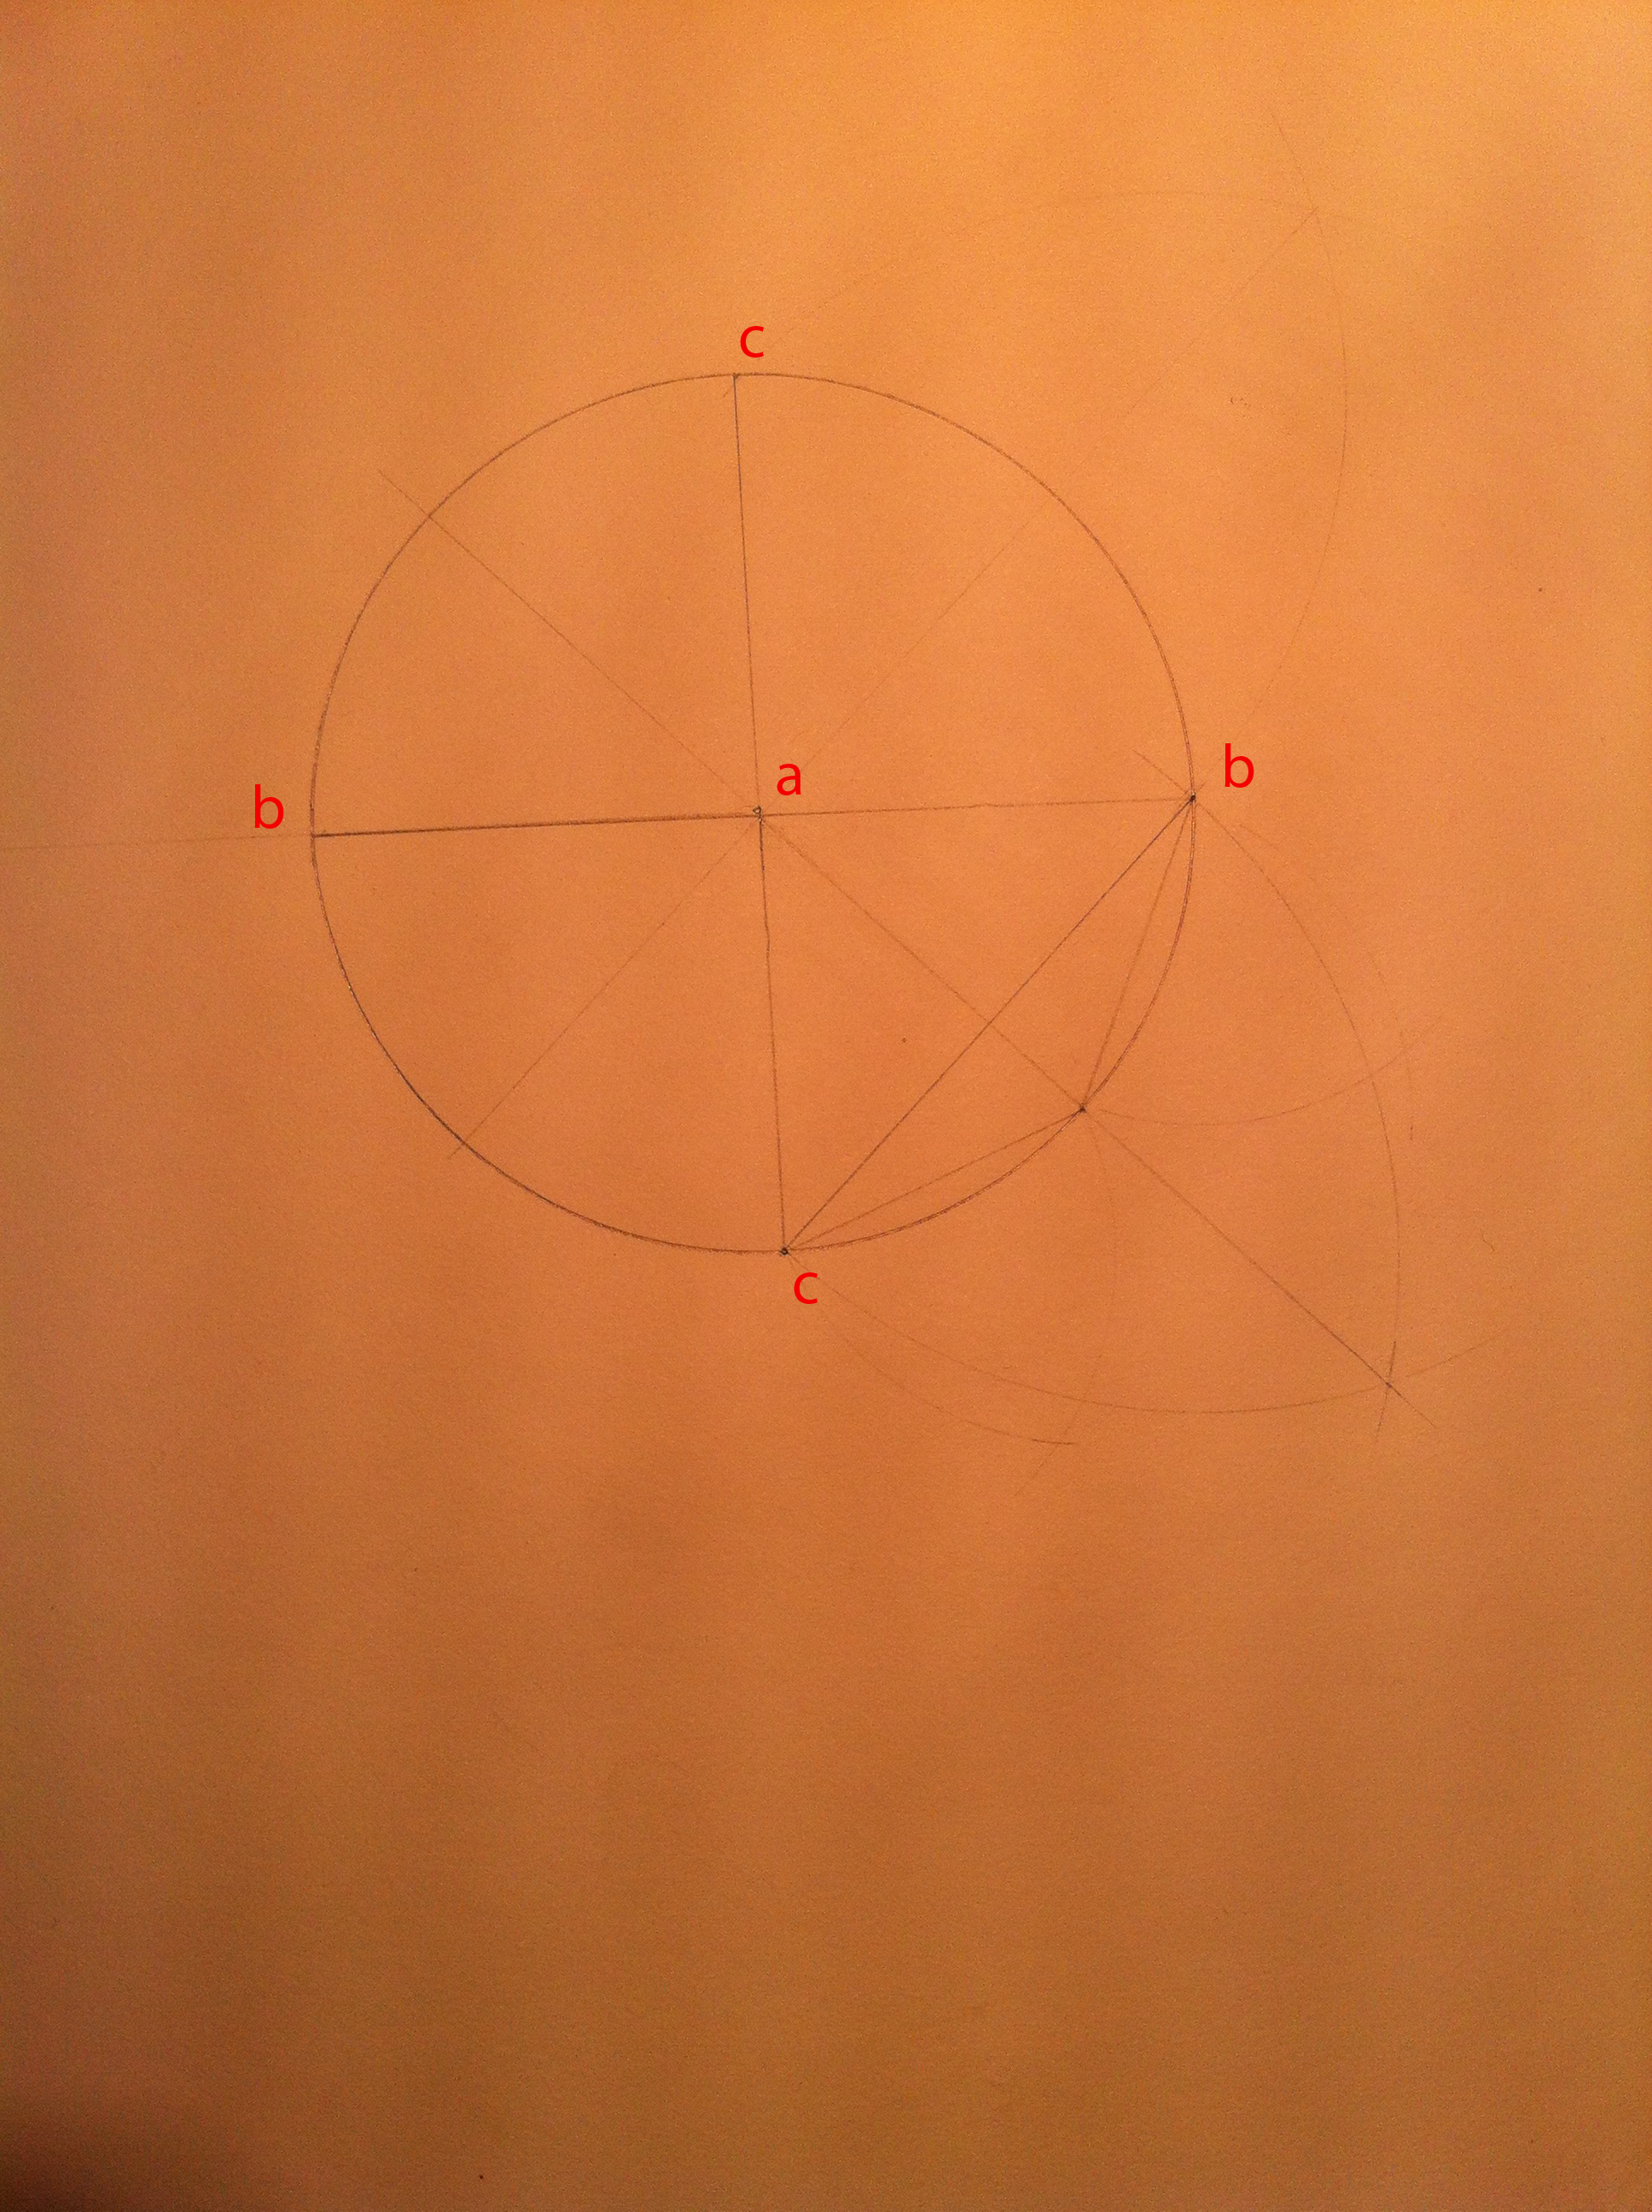
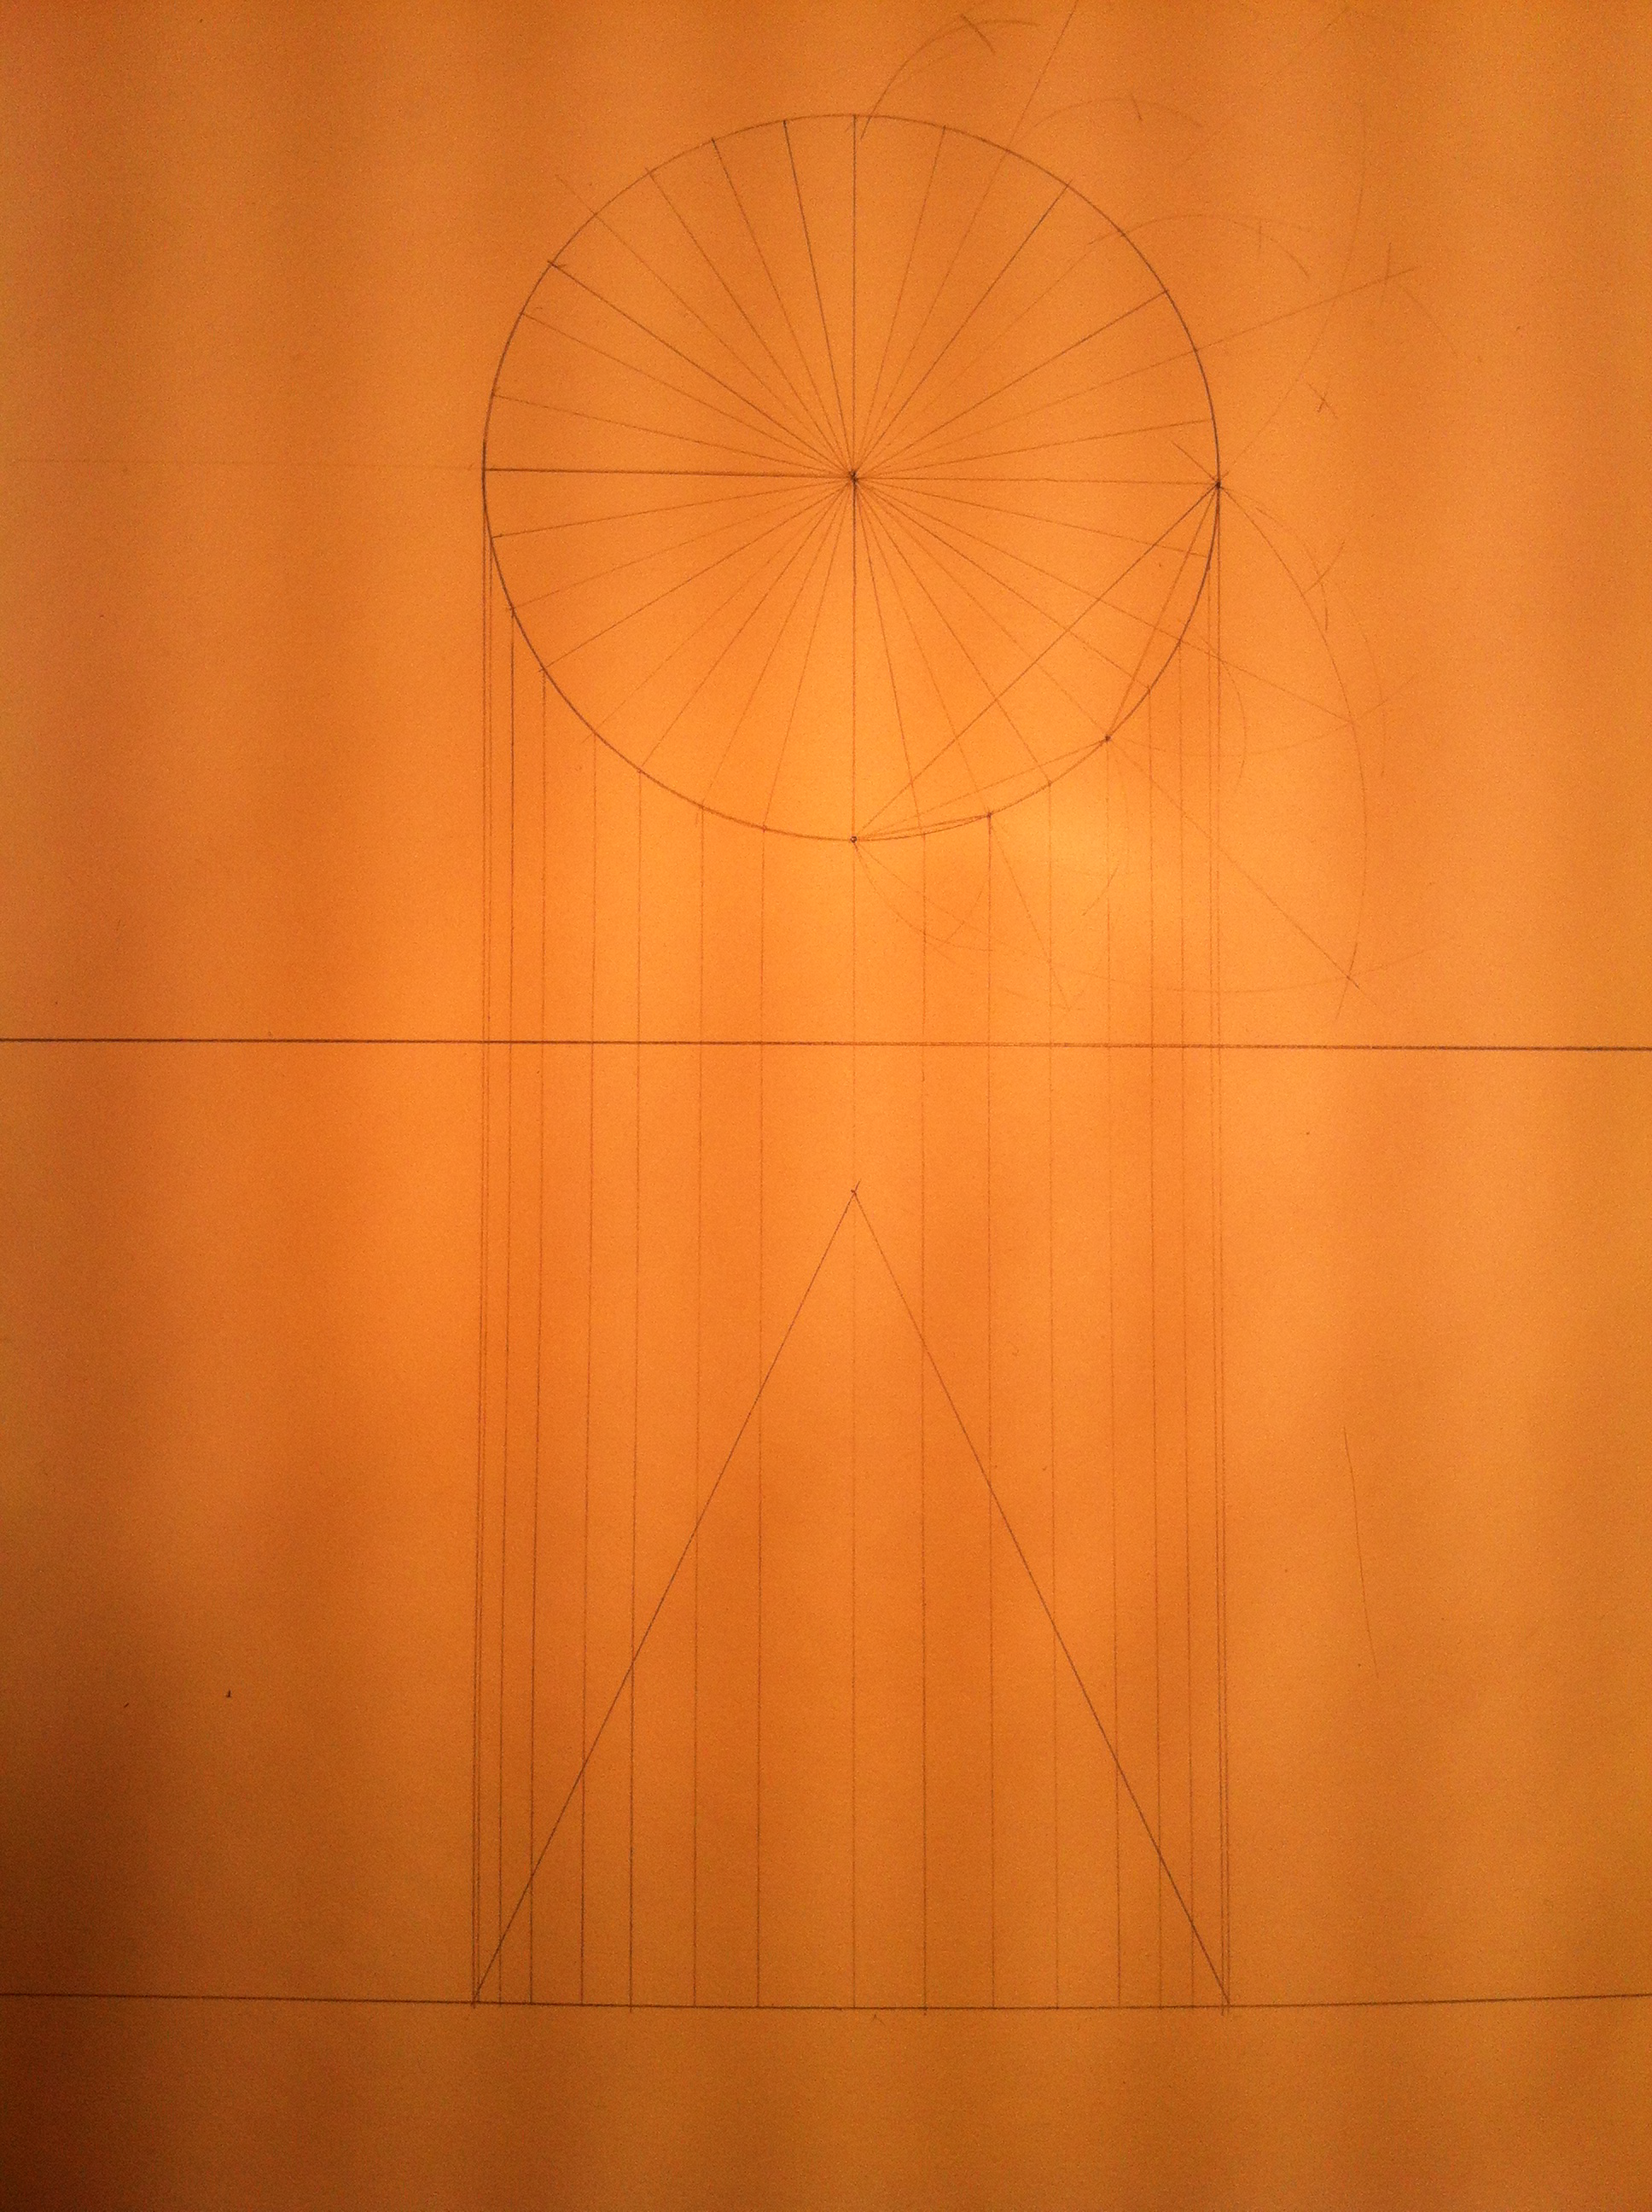
Start by inscribing a circle with the compass. Divide the circle into quarters by projecting a line 90° from the center of the circle (marked by the hole poked by the compass) and 180° horizontally from the center.
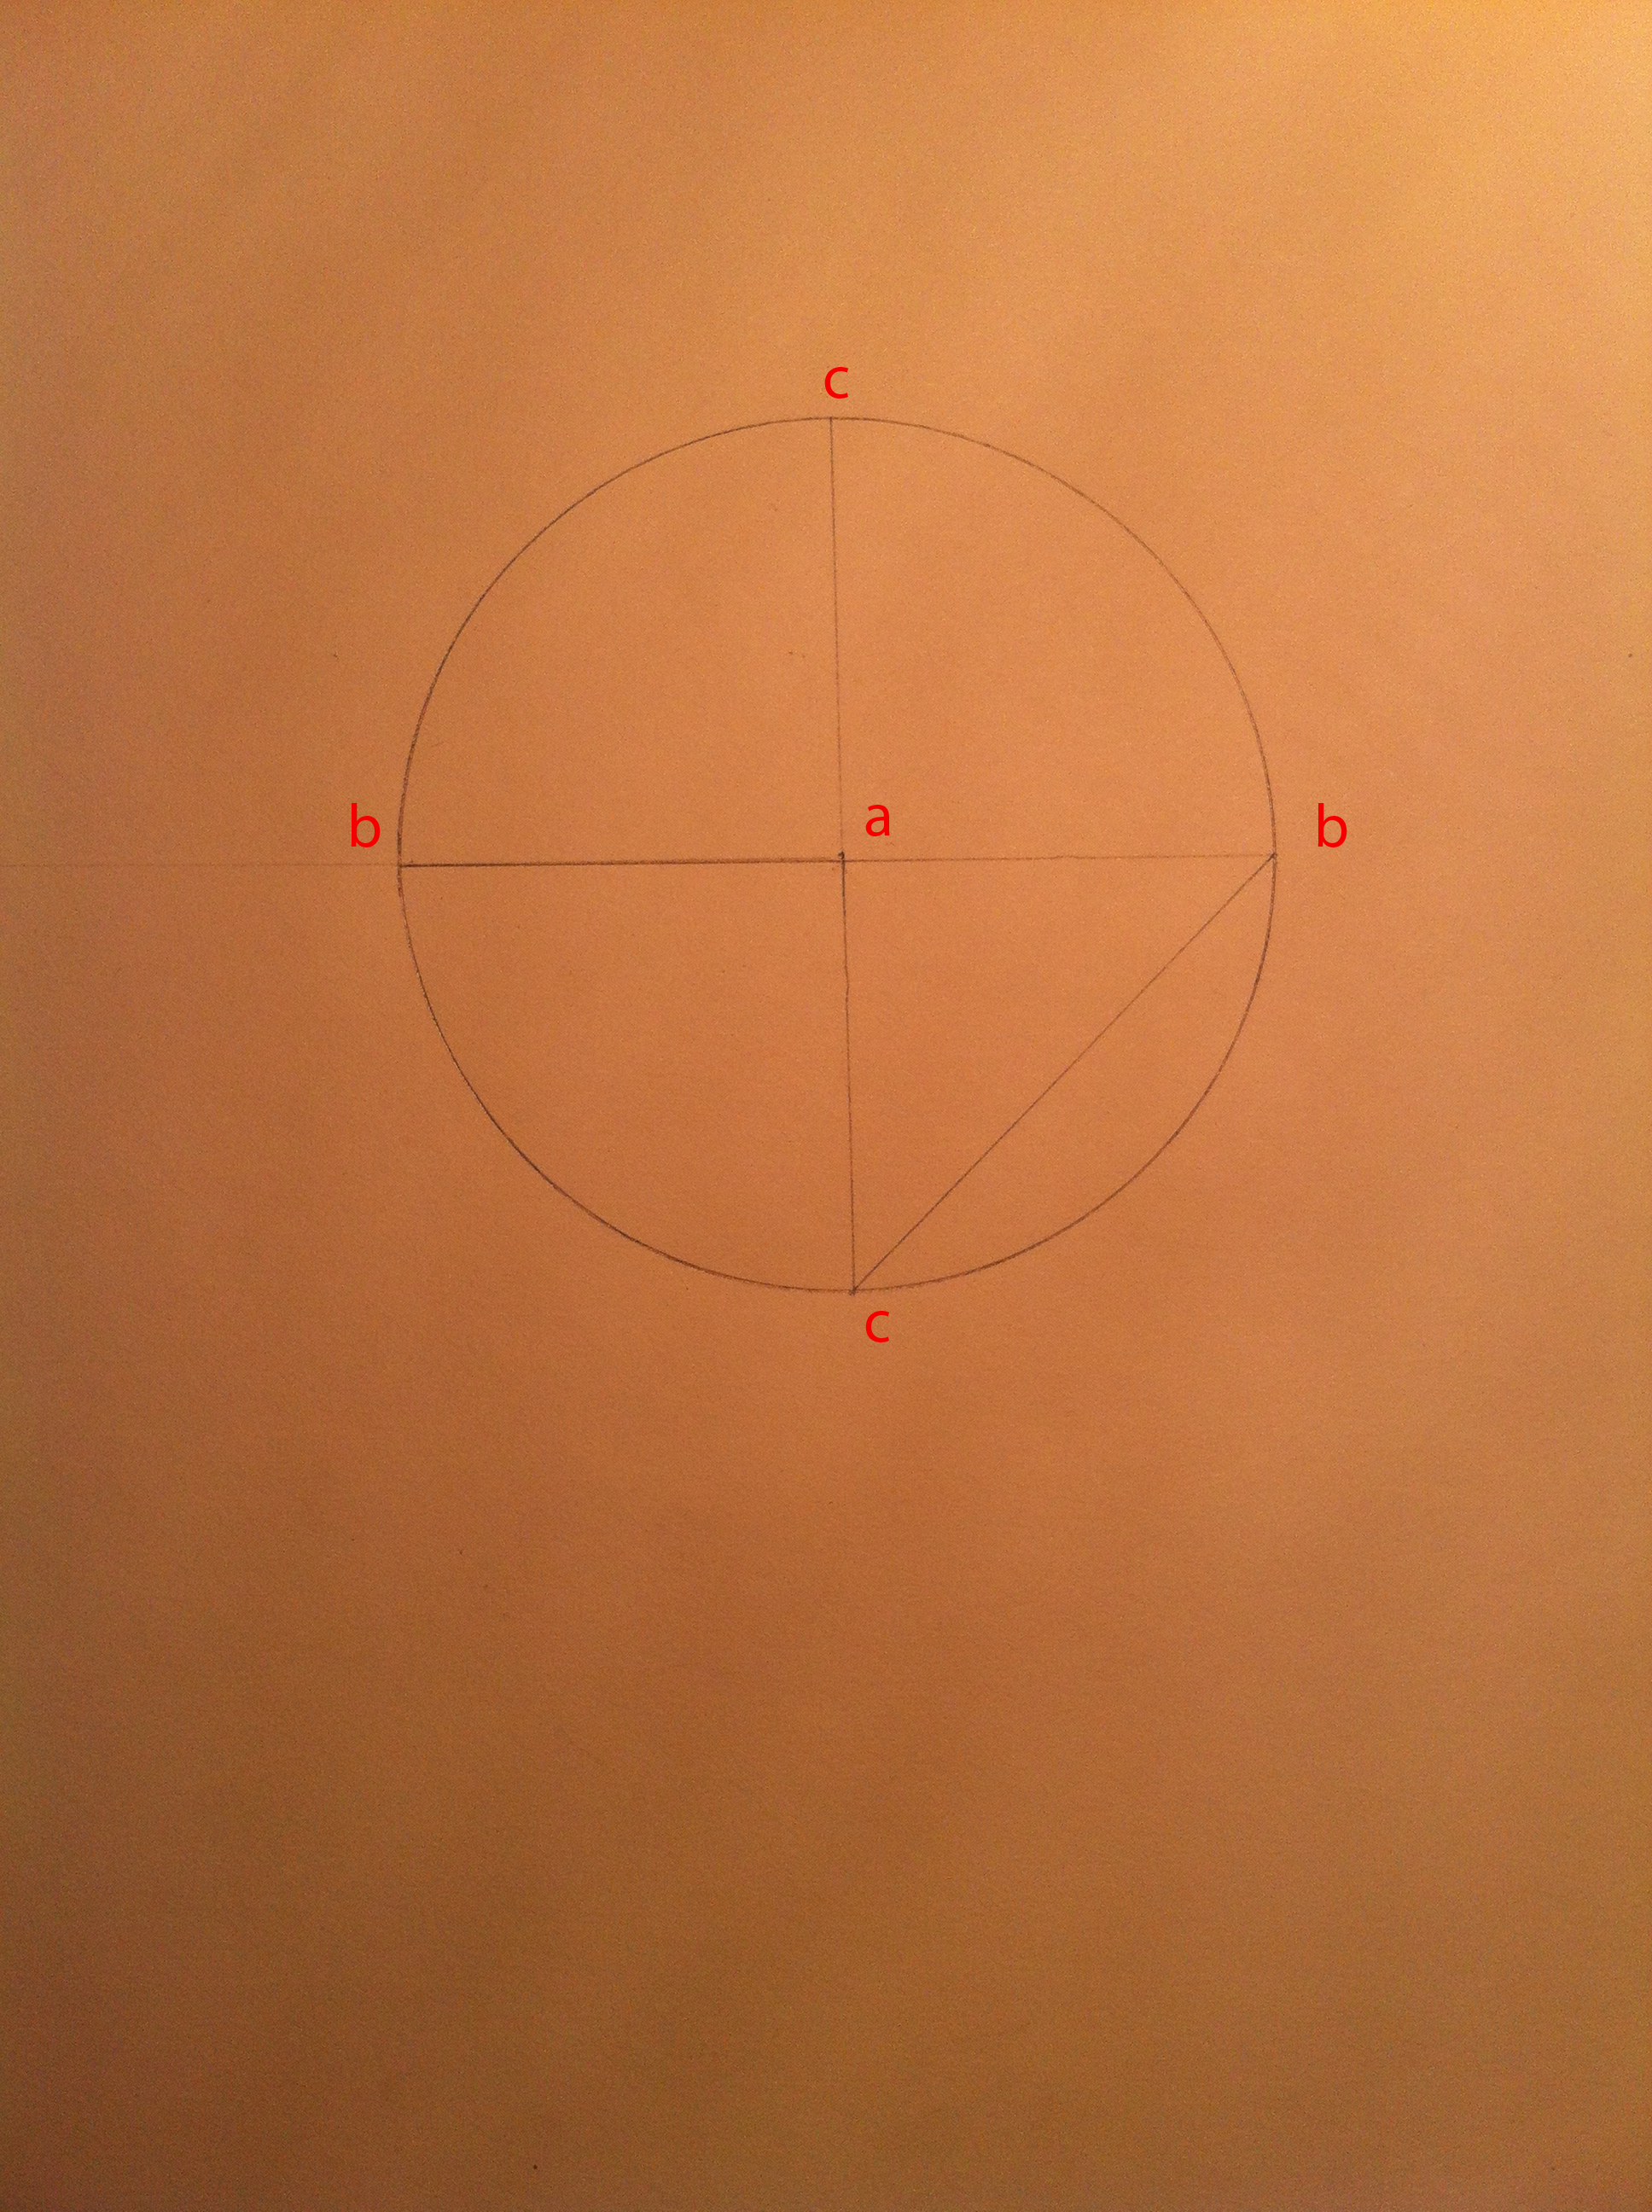
Draw a line that connects pt. a and pt. b
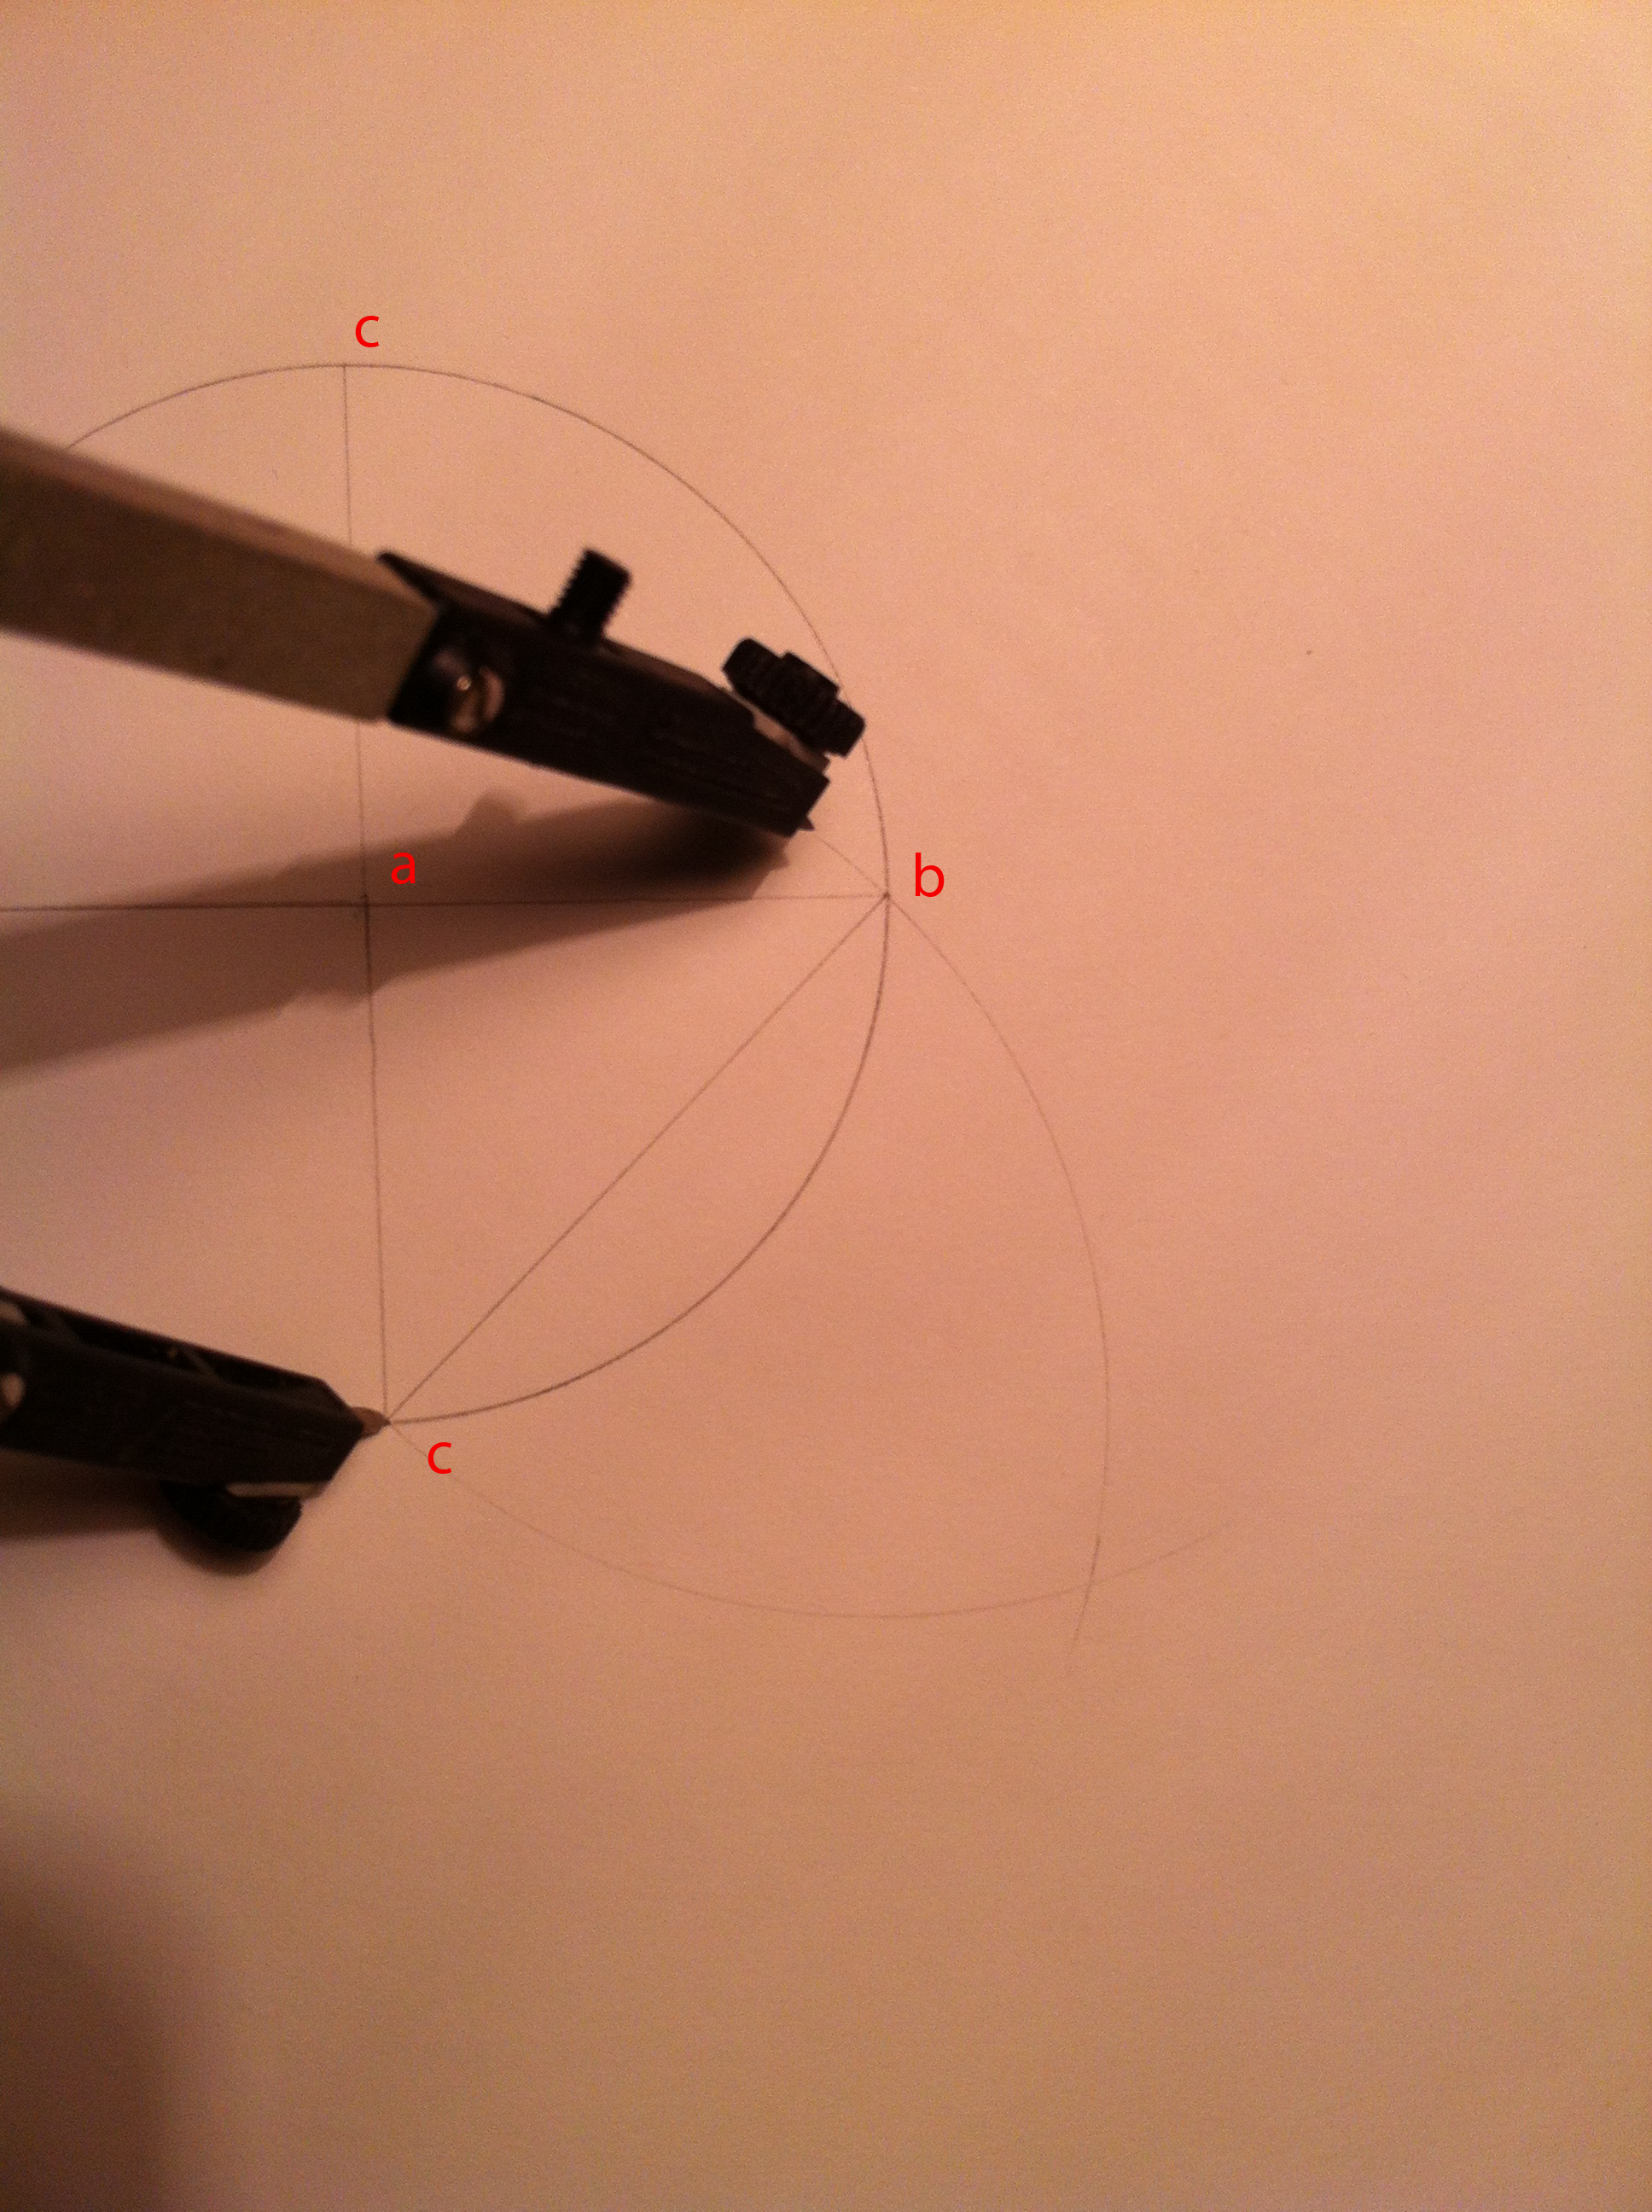
Grab your compass and set the radius to length ab (the line inscribed between the points of intersection). Place your compass on point c and inscribe an arc off point b. Do the same from point b off of point c.
Draw a line from the intersection of the arcs to the center of the circle. This is the midpoint of line bc.
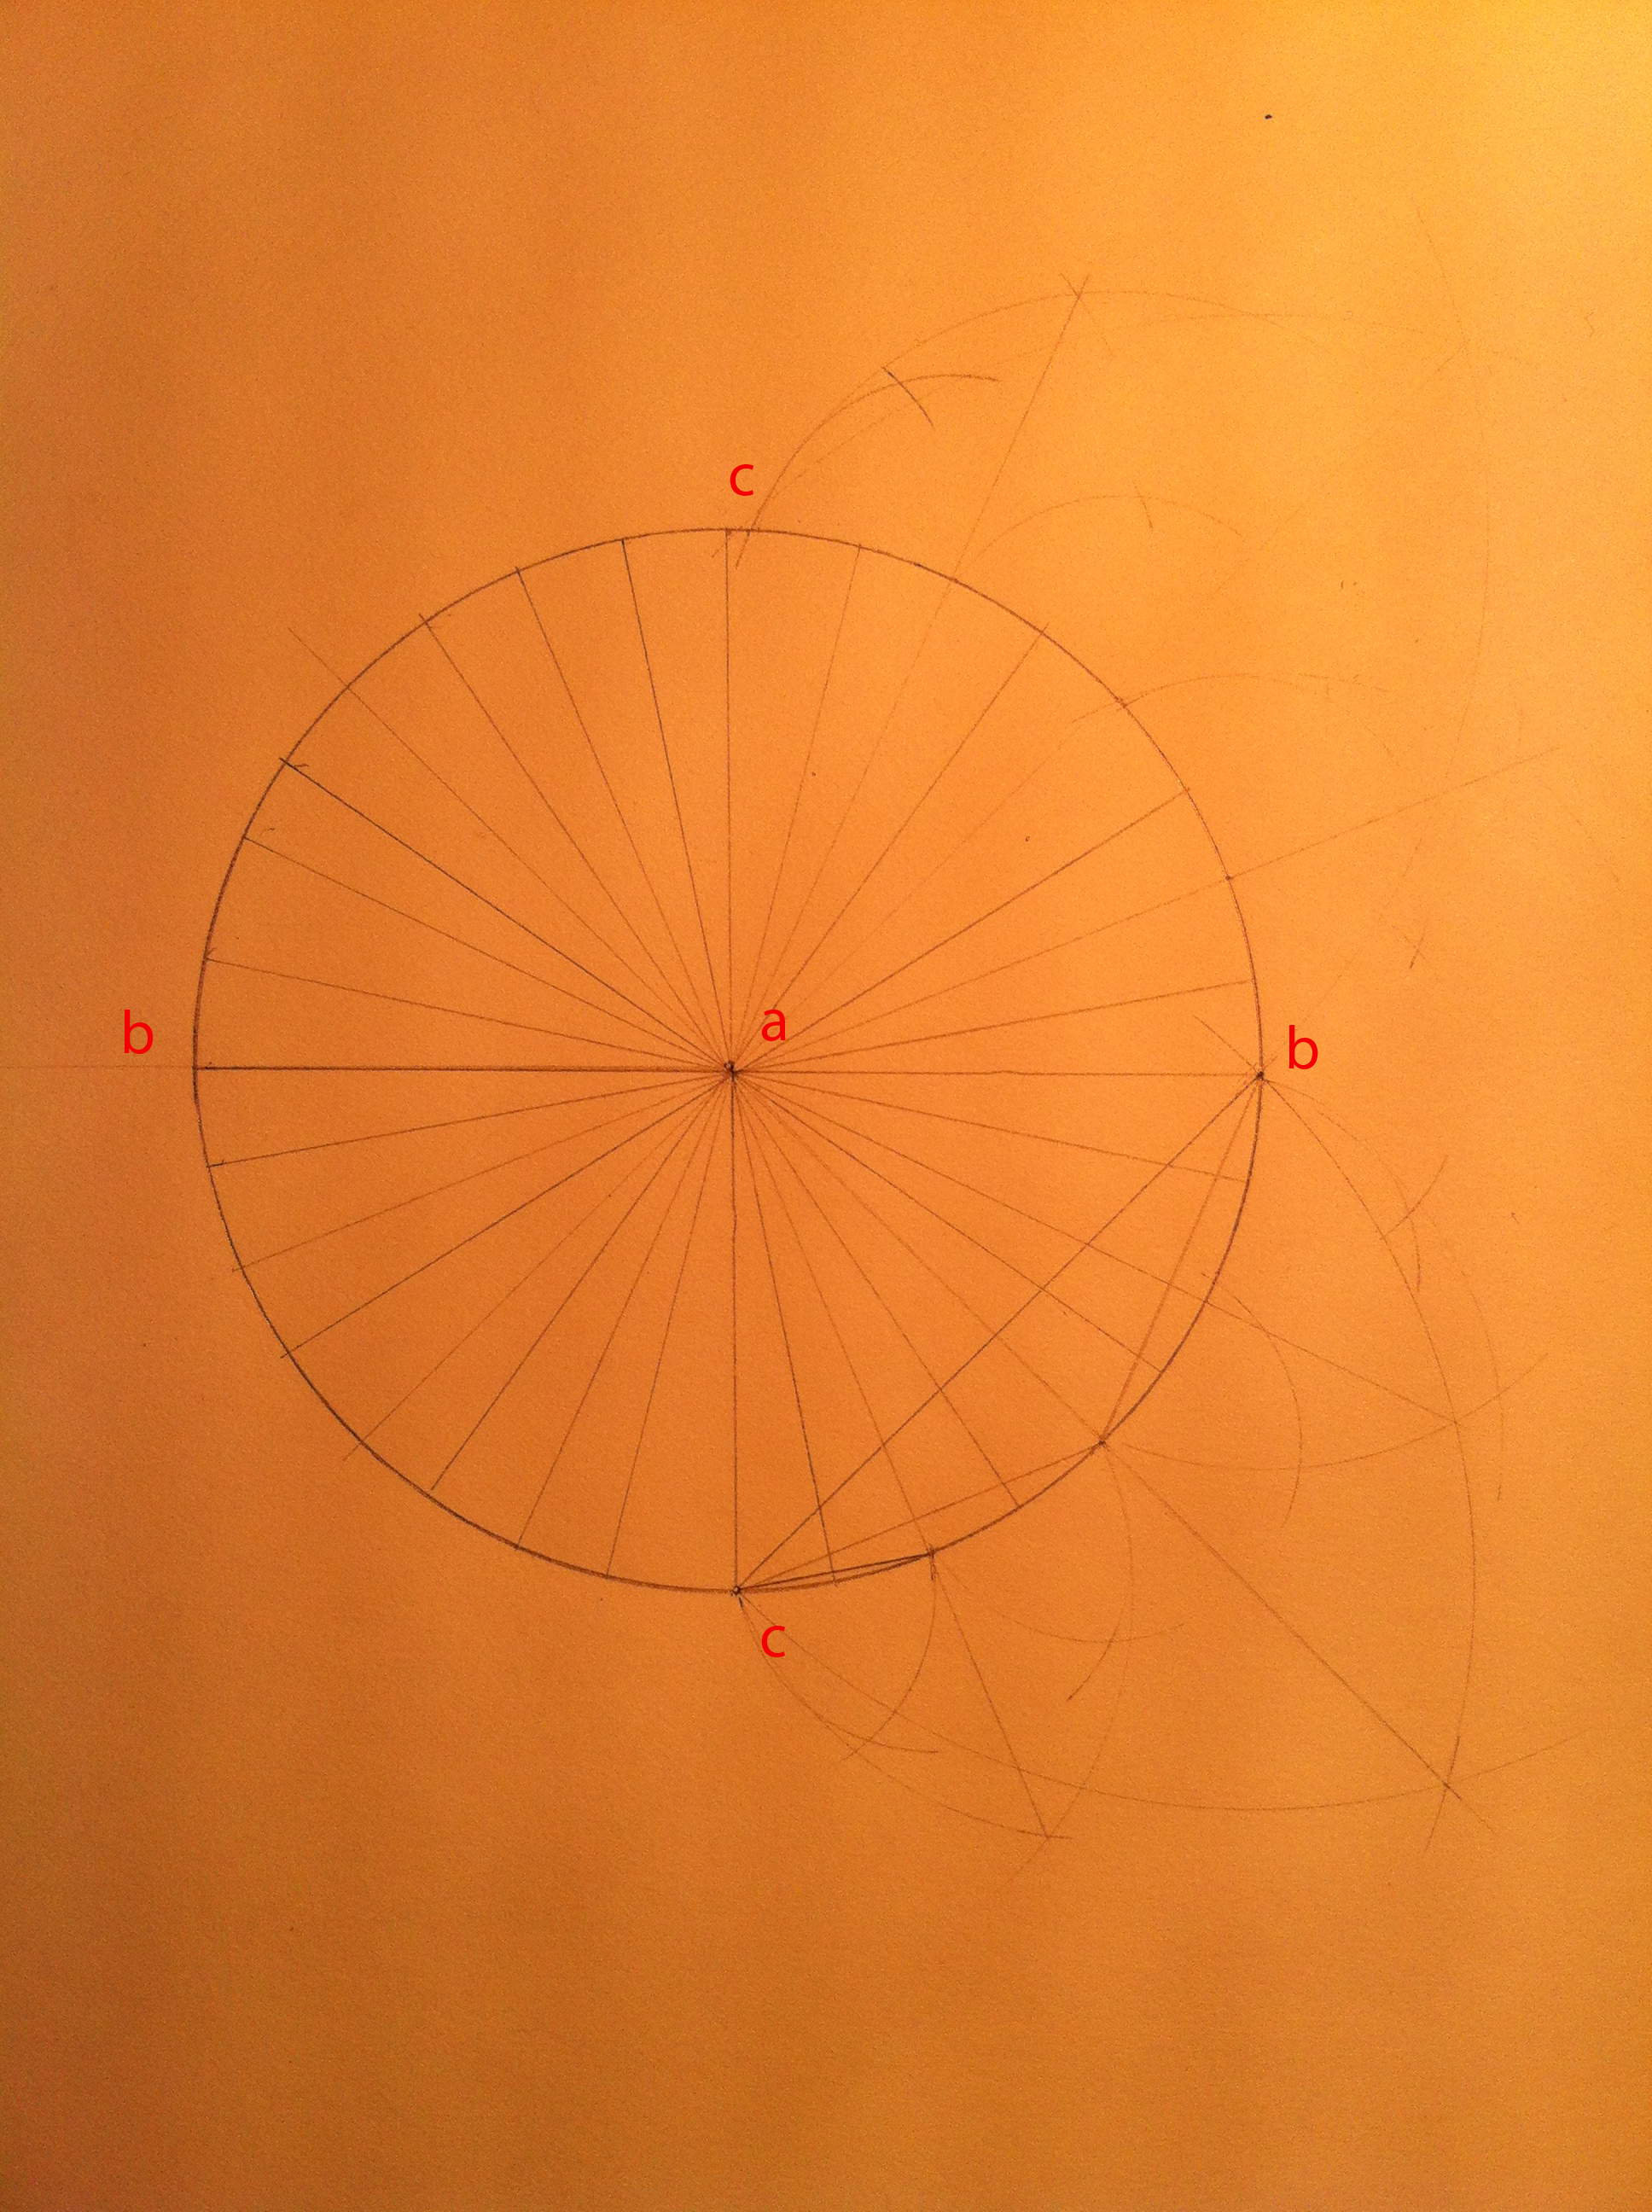
Continue this procedure until you reach a sufficient amount of divisions that will enable the cone to appear 3D (the more divisions inscribed, the smoother the curve). Use the compass division method on one half of the circle- you can extend the division lines to the other side of the circle.
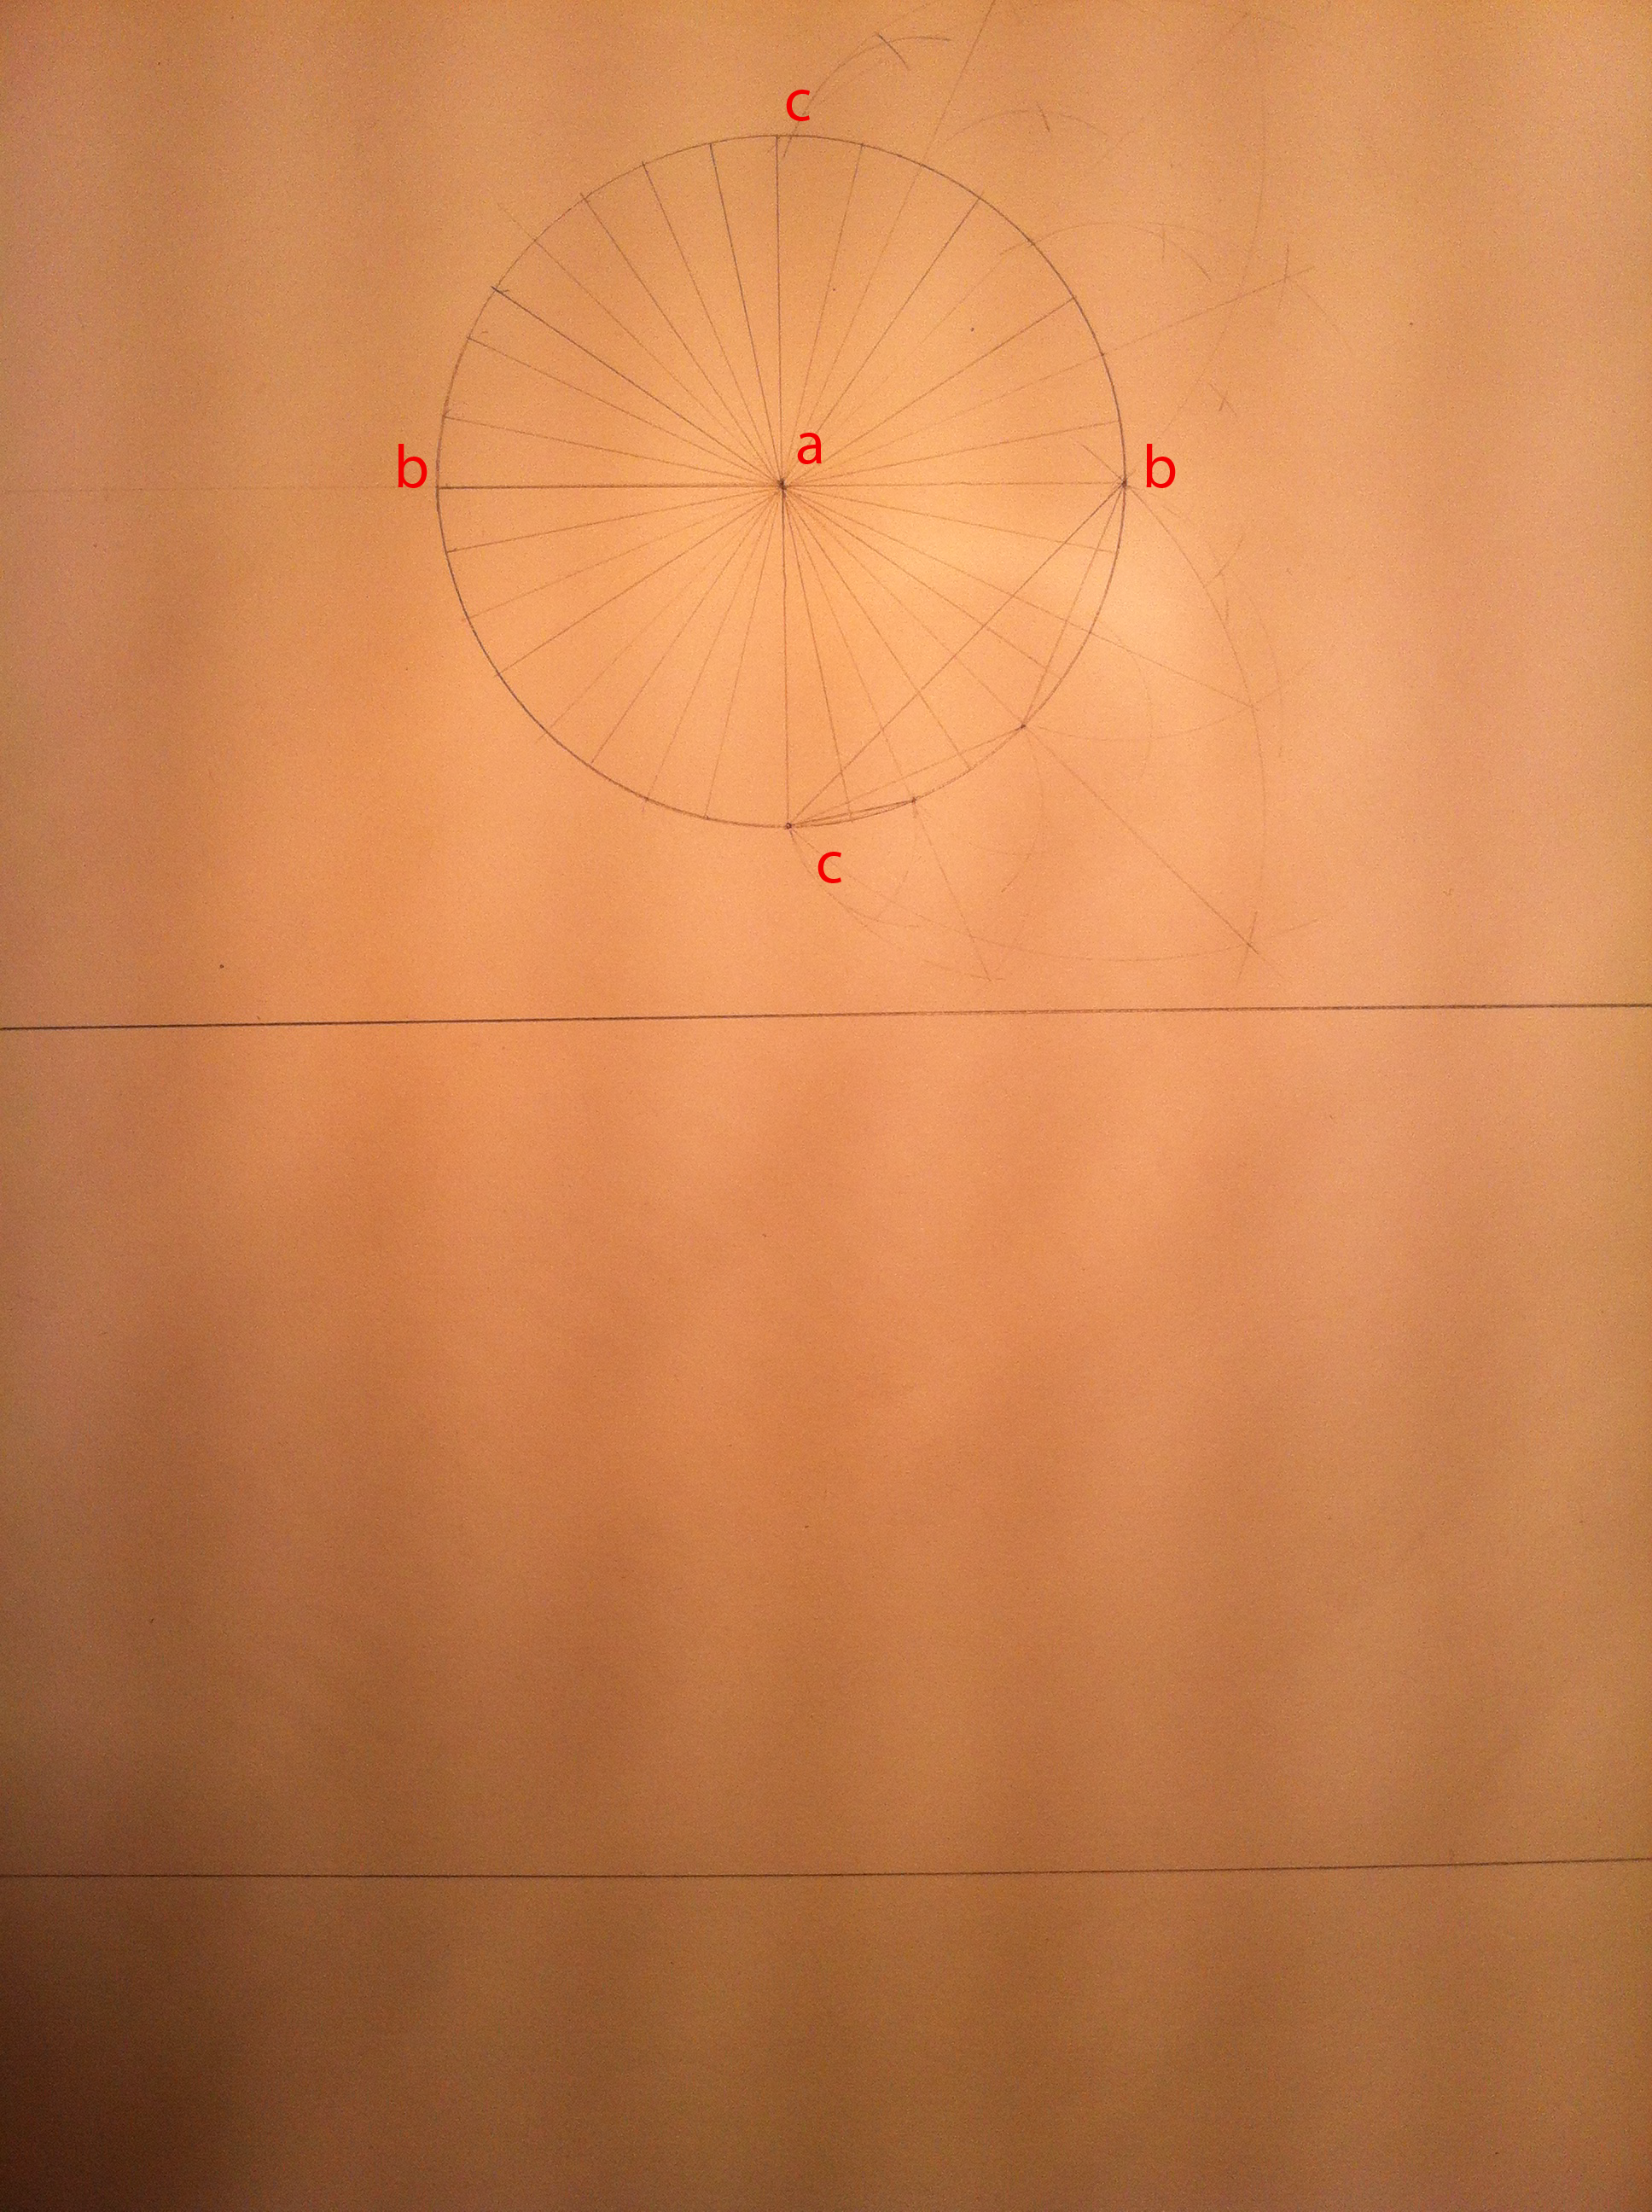
Draw a horizontal line below the cone-plan. This line delineates the work planes (plan & elevation). Draw a second horizontal line below the first with enough room for the vertical height of the cone to be inscribed. This is your ground plane.
Surface Projection
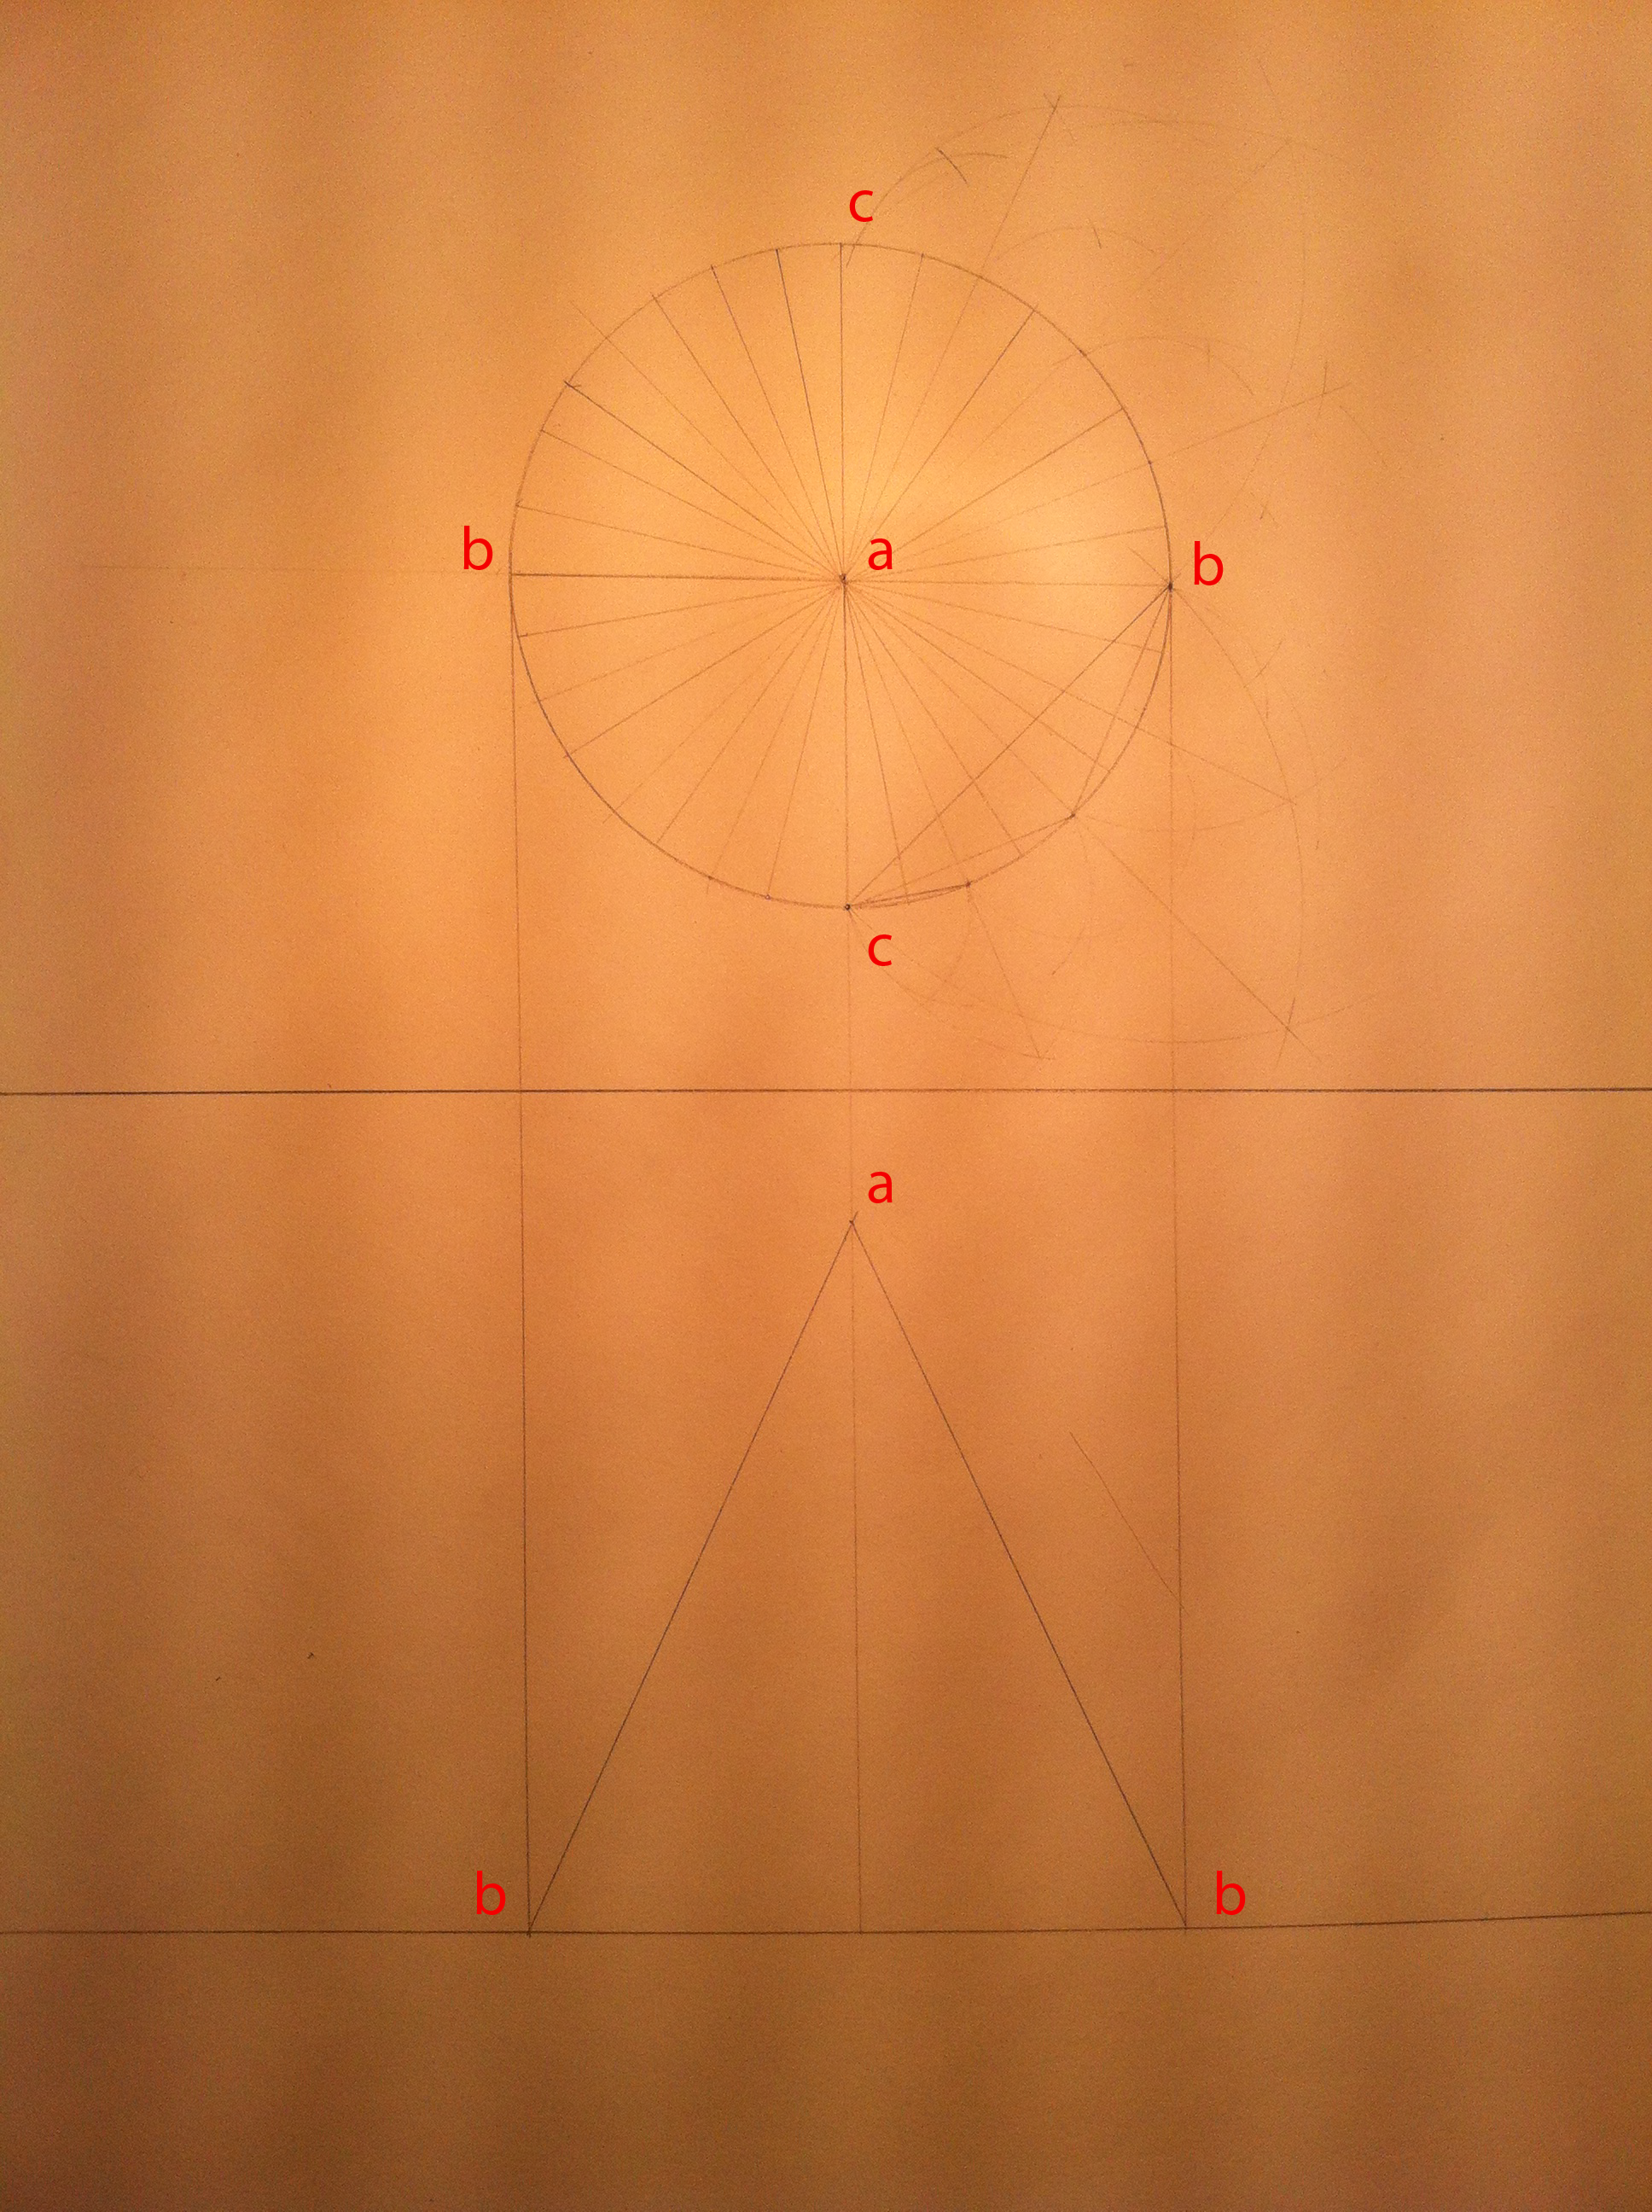
Project points a & b from plane 1 down into plane 2. These projections make the profile of the cone. The height of point a is up to you.
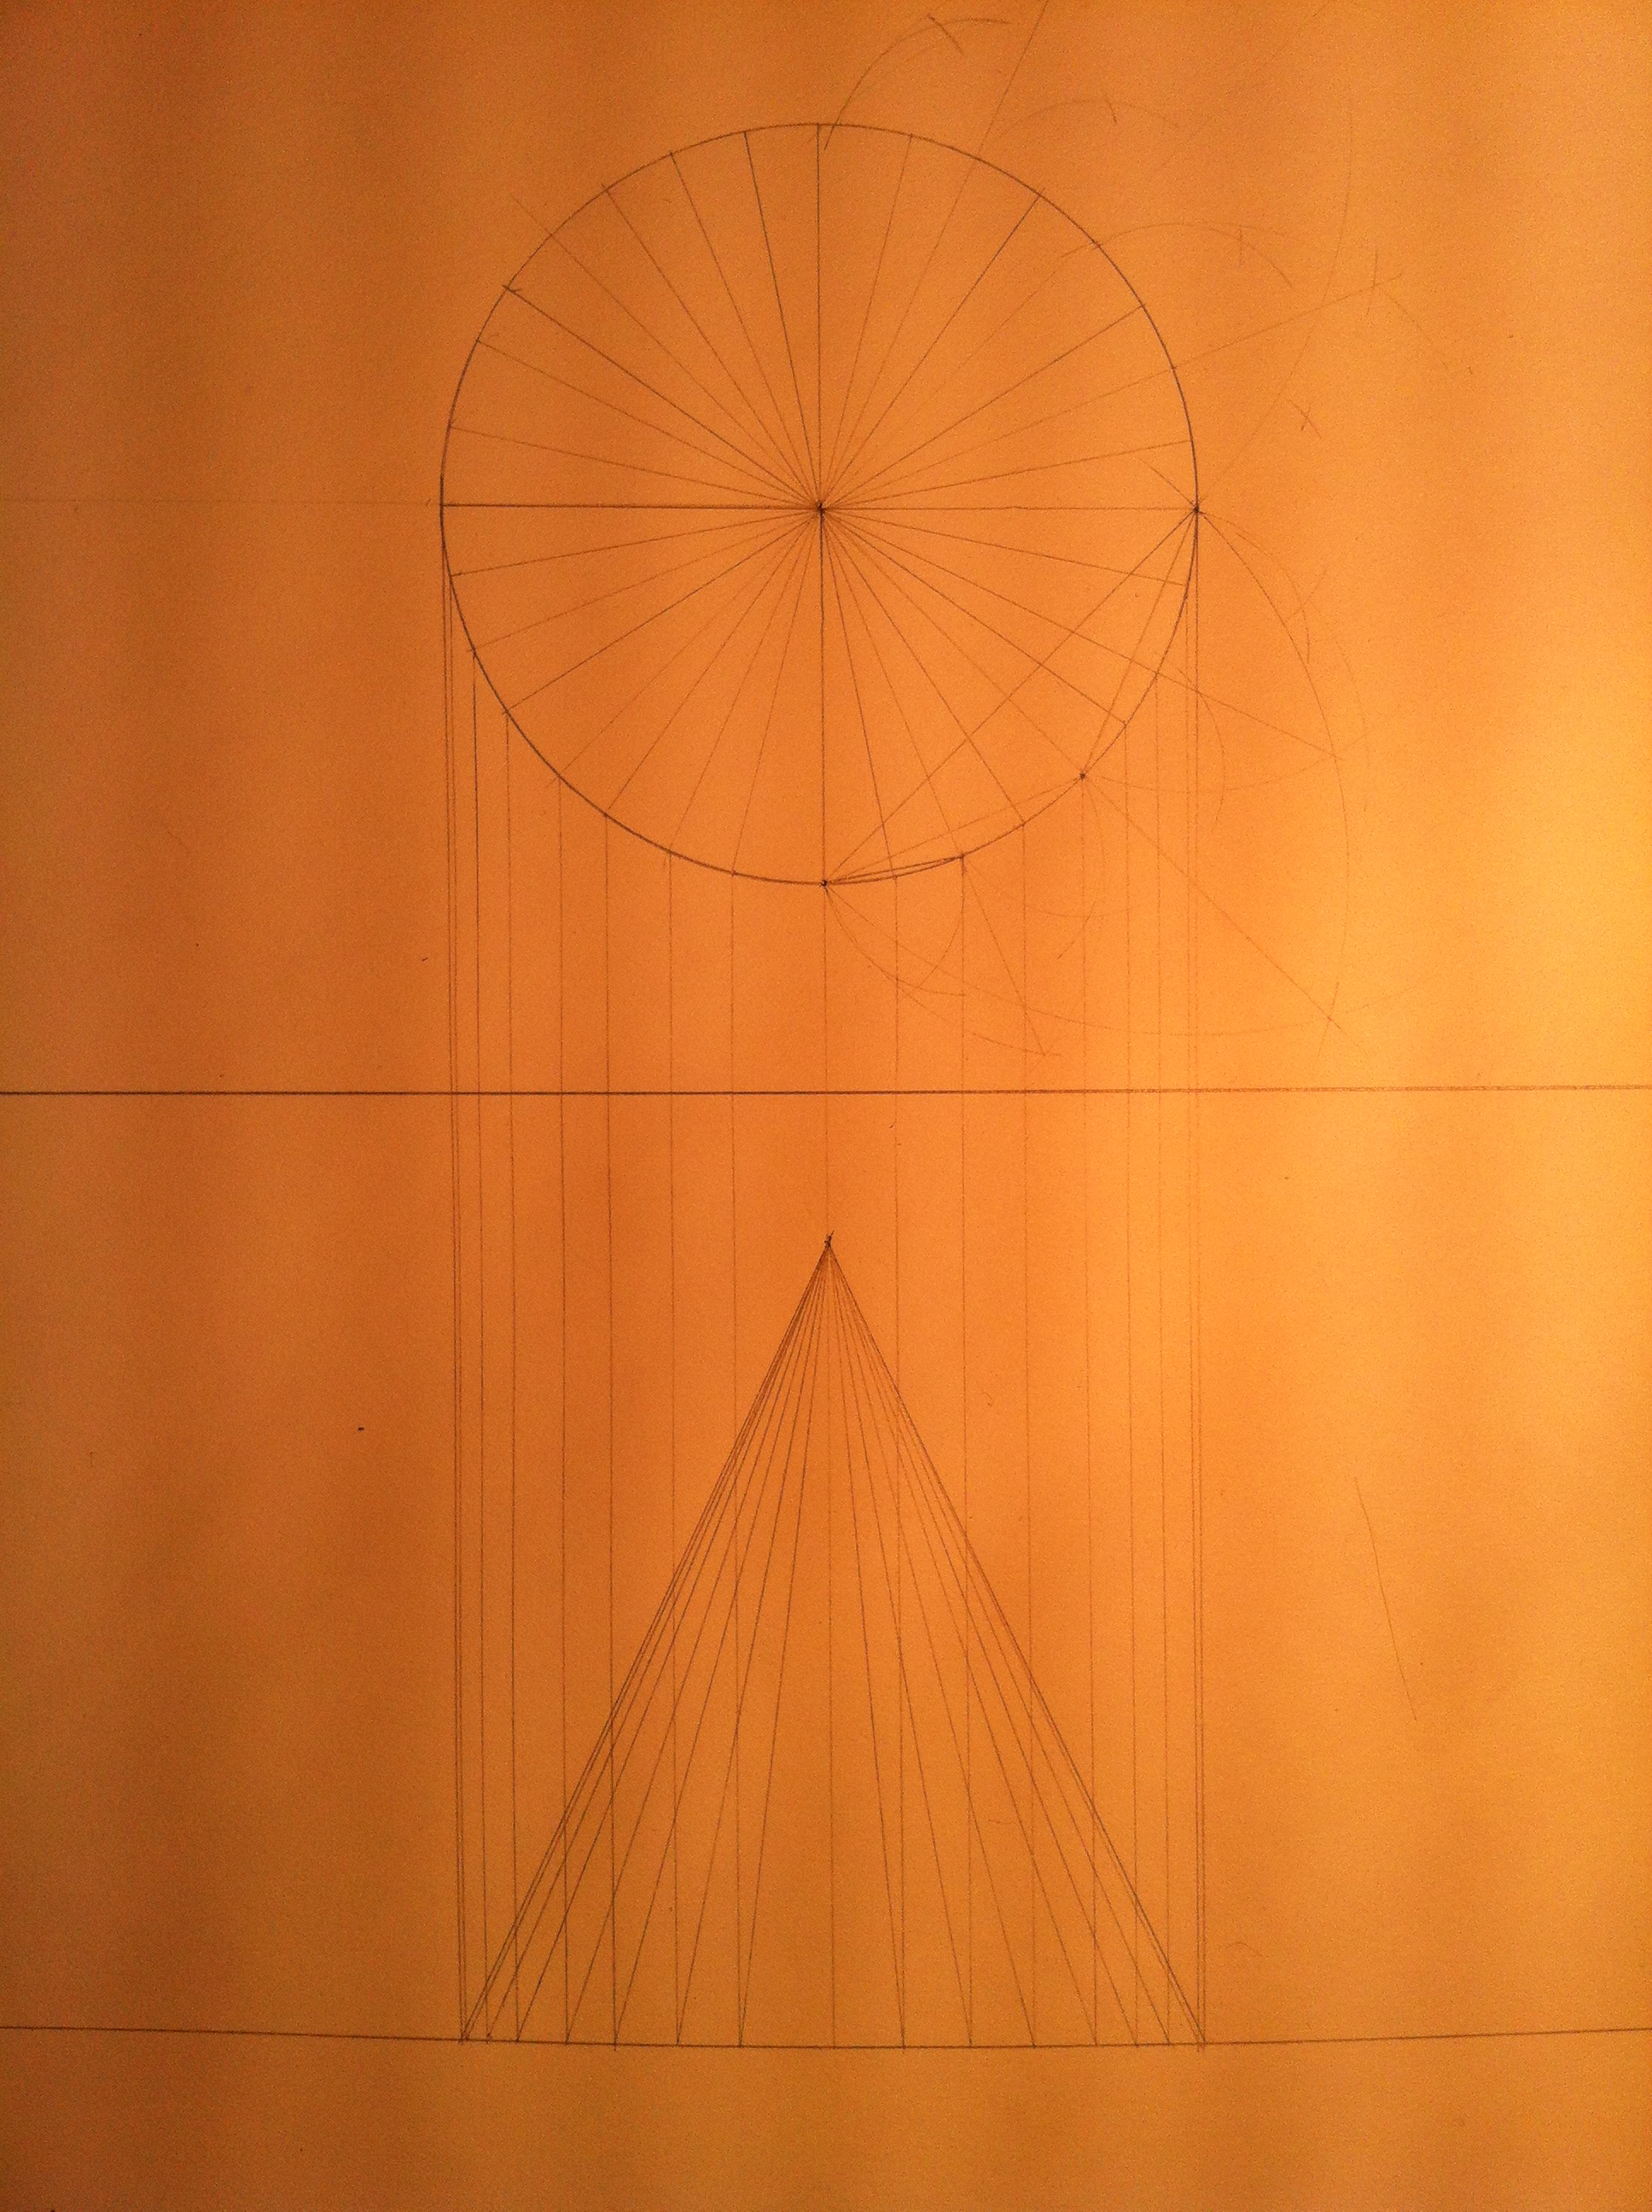
To describe the curved surface of this cone, we need to project the division lines from the plan onto the elevation in plane 2. Starting where the radial lines meet the perimeter, use your t-square to draw the projection lines perpendicular to the ground plane. Use a hard lead (4H) to project these lines- you don’t want construction lines to distract from the final depiction.
Now, draw lines from the points where the projection lines meet the ground plane up to the tip of the cone (point a).
Line Weights=
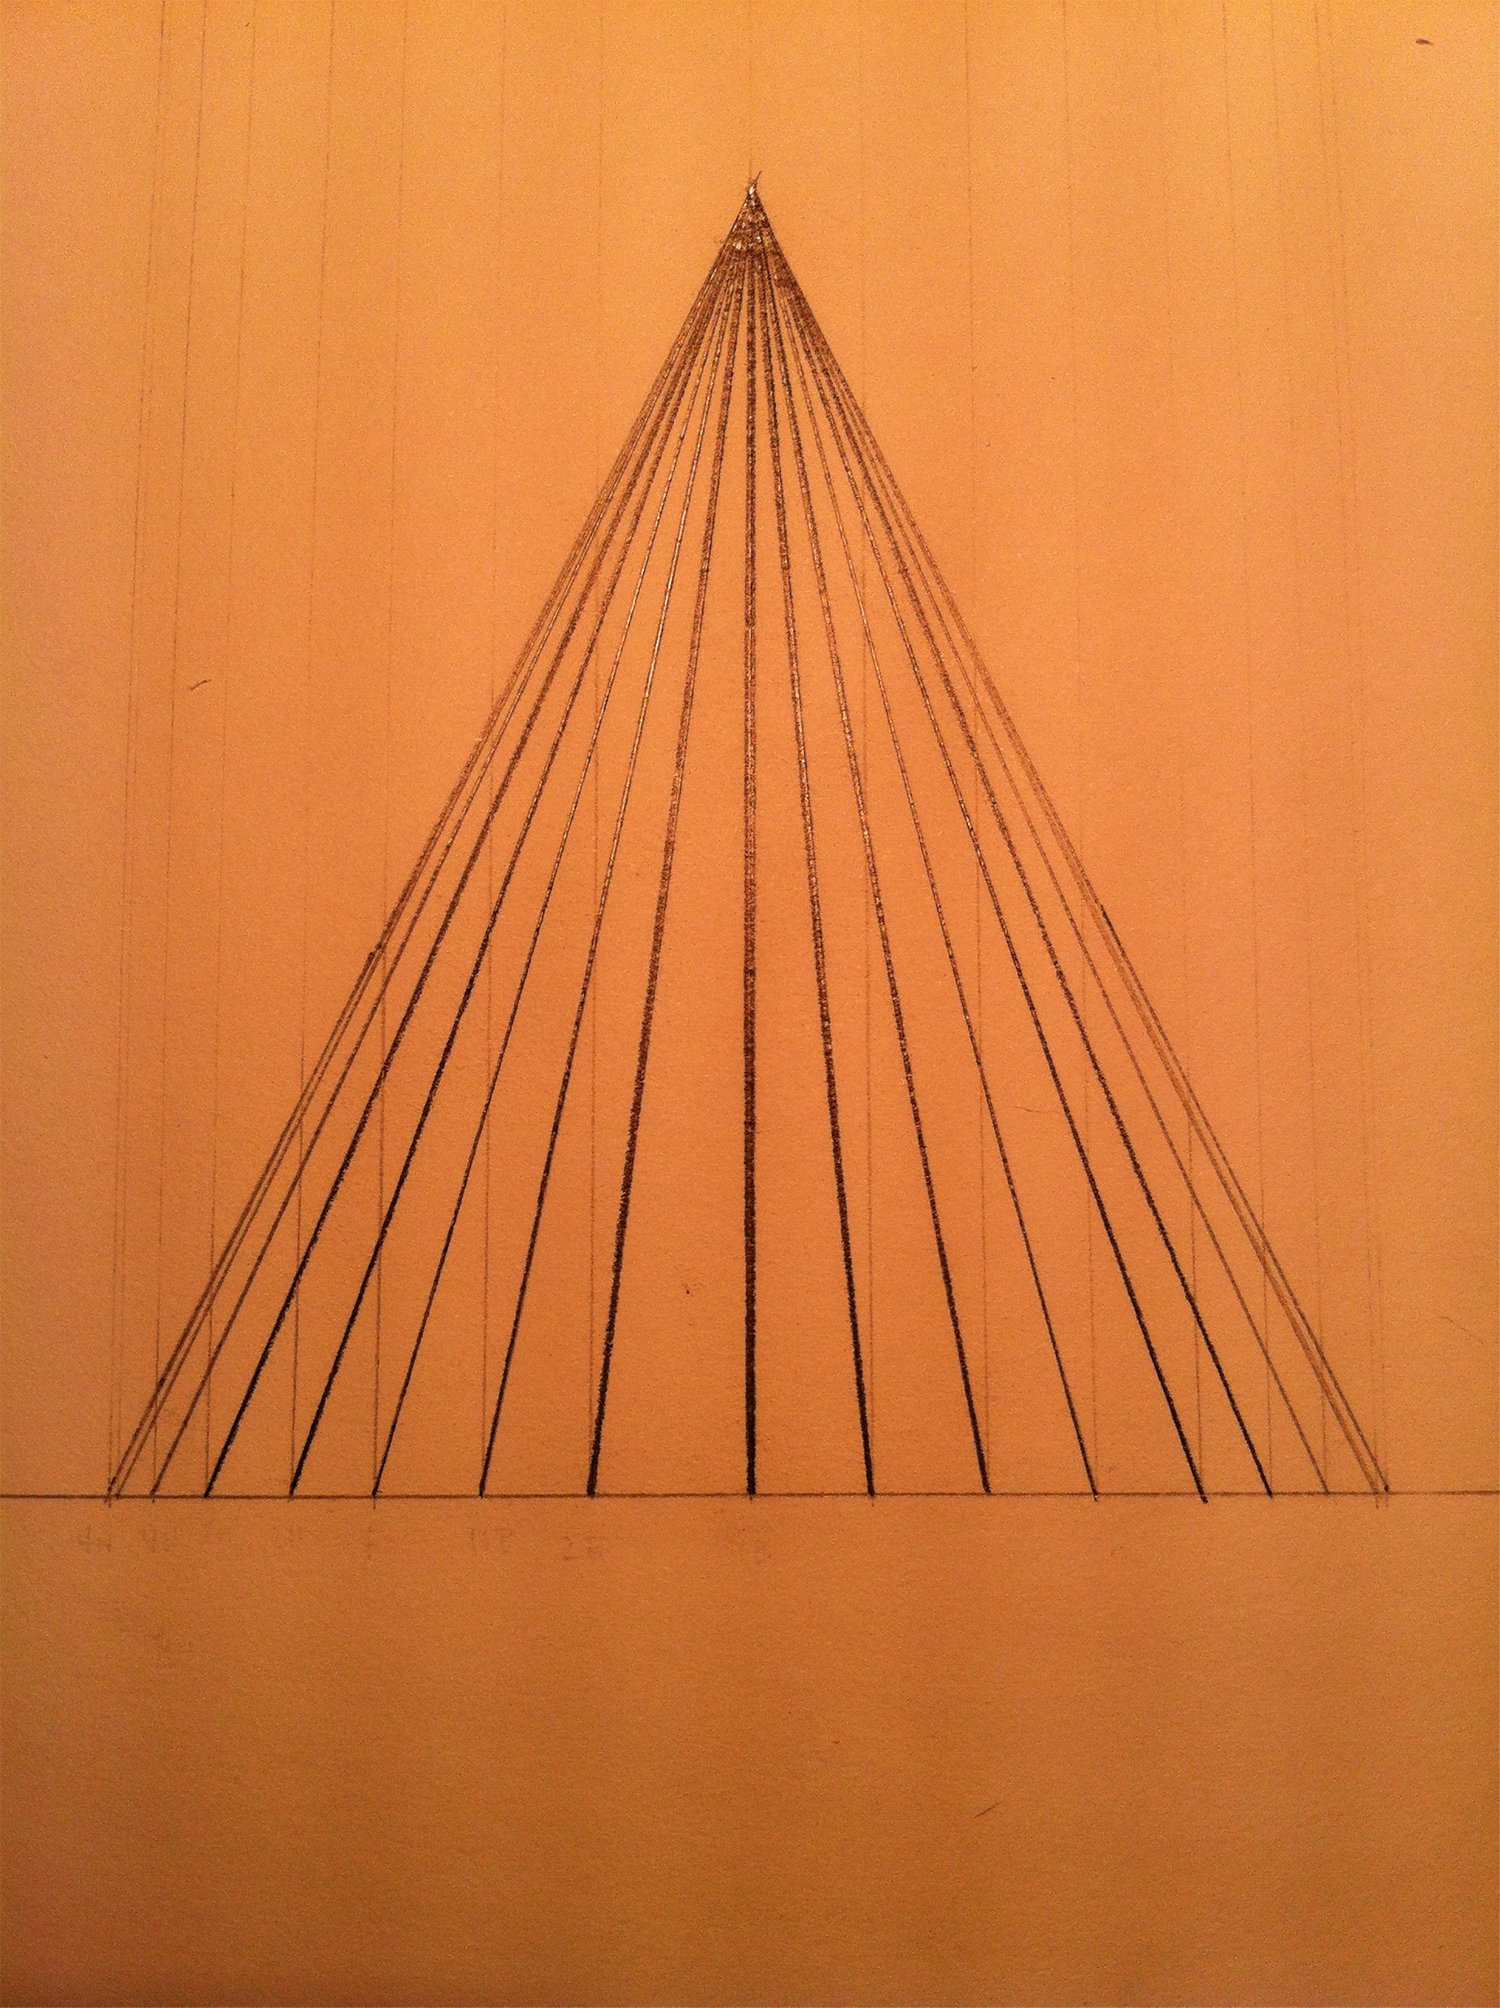
Once you have drawn all the lines toward the tip of the cone, it is time to add line weights to depict the curvature of the cone’s surface. Line weights are measured by their density- from hard lead (light line) to soft lead (dark line). Lines and planes that are closest to the viewpoint are dark (soft lead- 4B) and as they recede back into 2d space they should become lighter (hard lead- 4H). More on line weights here: Line Weights, Styles, and Types
Once you have added all the necessary renderings to your 2D cone, erase your projection lines to highlight your laborious line-work.
Voila! You have depicted a 3D surface in 2D by using orthographic projection from a plan and adding line weights to render 3D space on a 2D surface.
