|
Importing US Census and ESRI data into Grashopper using Heron |
|
|---|---|
| Screenshot |
|
| This tutorial uses the Heron plugin in order to bring in US Census data and ESRI Demographics into Grasshopper from the web for mapping purposes. | |
| Uses Tool(s) | Grasshopper |

Step 1 - Download and Grasshopper Setup
Heron Download and Installation
- The Heron plugin for Grasshopper can be found at the food for rhino website , or may be downloaded directly from Studiomaven . We recommend you do the latter, as it will ensure that you are working from a version discussed in this tutorial.
-
Once the .zip is downloaded, right click on the file and go to the Properties\General tab. At the bottom there should be a notice under Security that states that the file might be blocked. Un-check this tab before extracting, or you'll have to go through and repeat this process for each file in the .zip.
 Unblock the entire ZIP file!
- Copy/extract all the files from the .zip to your Grasshopper components folder. This can be found in the File\Special Folders\Components Folder in Grasshopper.

Human Download
While not Essential to the functionality of Heron, the Grasshopper Human/Treefrog plugin provides a few tools that make its usage much more practical, as well as some that are just nice to have around.
- The download location for HumanTreefrog can be located here .
- To install, just copy the .gha to the same components folder as above, and remember to make sure that the file is not blocked.
At This Point, on loading up Grasshopper, you should see both a "Heron" tab and a "Human" tab at the top of your panel.
Step 2 - Setting your Earth Anchor Point
Getting the Address Coordinates
In order for heron to know how to map the data it finds online to your grasshopper file, it needs to set the Grasshopper environment origin to represent a latitude and longitude in real geographic space. In order to do this, it sets an "anchor point" based on a given address This can be quite specific, since the more common the address name the more possible results might need to be filtered.
-
Create a panel in Grasshopper, into which you will type the location of the anchor point center of your map. Link it to to the address input of the
ESRI REST Service Geocode component
located in the "GIS REST" sub-tab of the "Heron" Grasshopper menu (Heron\GIS REST\).
 The ESRI REST Service Geocode component

- We will be creating an earth anchor point around the Embarcadero area in San Francisco. If we were to simply try to locate "Embarcadero" (by typing it into the panel), the first option that is output from "Candidates" will be somewhere else in California that is nowhere near the location that we want. However, we can get the anchor point that we are looking for by searching for "Ferry Building San Francisco", or "1 Market Street San Francisco".
- Once we have found the Candidate that we want (it could be two or three down in the list), we need to extract it's Latitude and Longitude from the data tree. In order to do this, we need to use a couple "Tree Branch" components, located in the "Tree" sub-tab of the "Sets" Tab of the Grasshopper menu (Sets\Tree\). Use another panel with the desired tree path, to get to the desired values. Alternatively, you may simply transcribe the exact Lat / Long coordinates into two panels, and proceed without messing with any of this tree stuff.
-
In order to set the anchor point and center our imported data around it in Grasshopper, we will need two components from the "GIS Tools" sub-tab of the "Heron" Grasshopper tab. Create a "Set Earth Anchor Point" and a
Decimal Degrees to XY
, and plug the latitude and longitude values to their respective inputs on both components. The
SetEAP
component will not run unless told to, so create a "Boolean Toggle"(Params\Input\) and connect it to the "set" parameter of the "SetEAP" component and switch it to "True".
 The Decimal Degrees to XY component
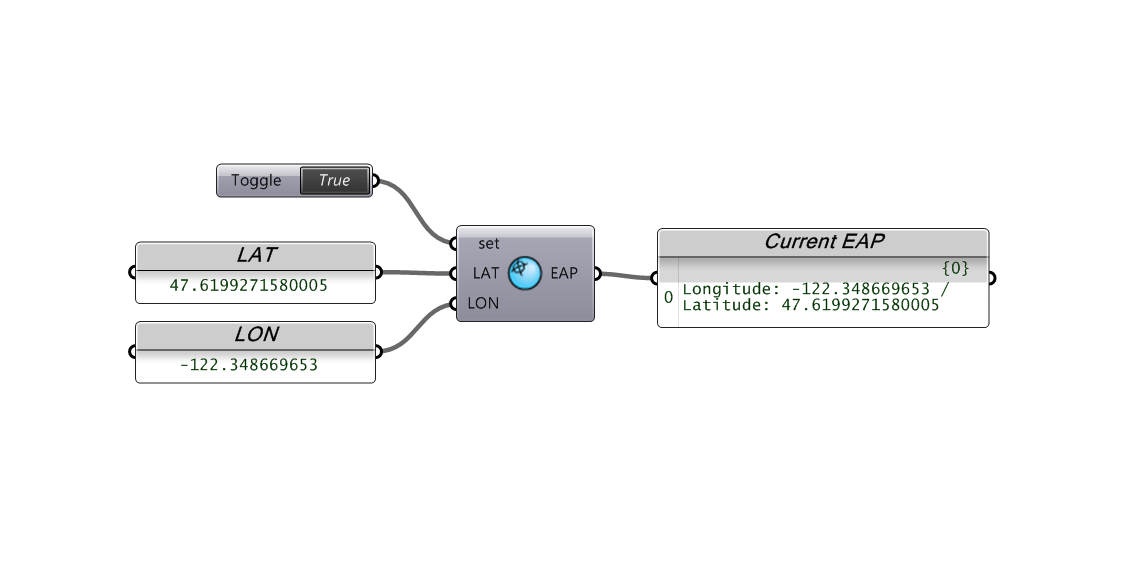 The SetEAP component


Step 3 - Accessing Census and ESRI(ArcGIS) Data
Now that the Earth Anchor Point has been set, we can start to bring in data from the web. We could create our own panel or value list that contains the URLs we need to link to , but the example file provided for Heron has a nice little drop down menu that does that for us.
-
We've prepared
a couple of Grasshopper drop-down components in a GH file for you
with URL value lists already setup. These provide links to various URLs, for different datasets collected by the US Census Bureau and ESRI.
 drop-down components with URL values

- Copy both value lists into grasshopper ,and create a "Data" container to plug one of them into. later down the line, we will need to come back and grab the URL a second time, and filtering through a data component allows us to switch off between the two data sets without having to re-wire our whole file.
-
Next, create a "Get REST Service Layers" component (Heron\GIS REST\). This component will be gathering data from the given site and parsing it out for us to use. Connect the "Data" component that we just made to the "serviceURL" input of the "RESTLayer" component.
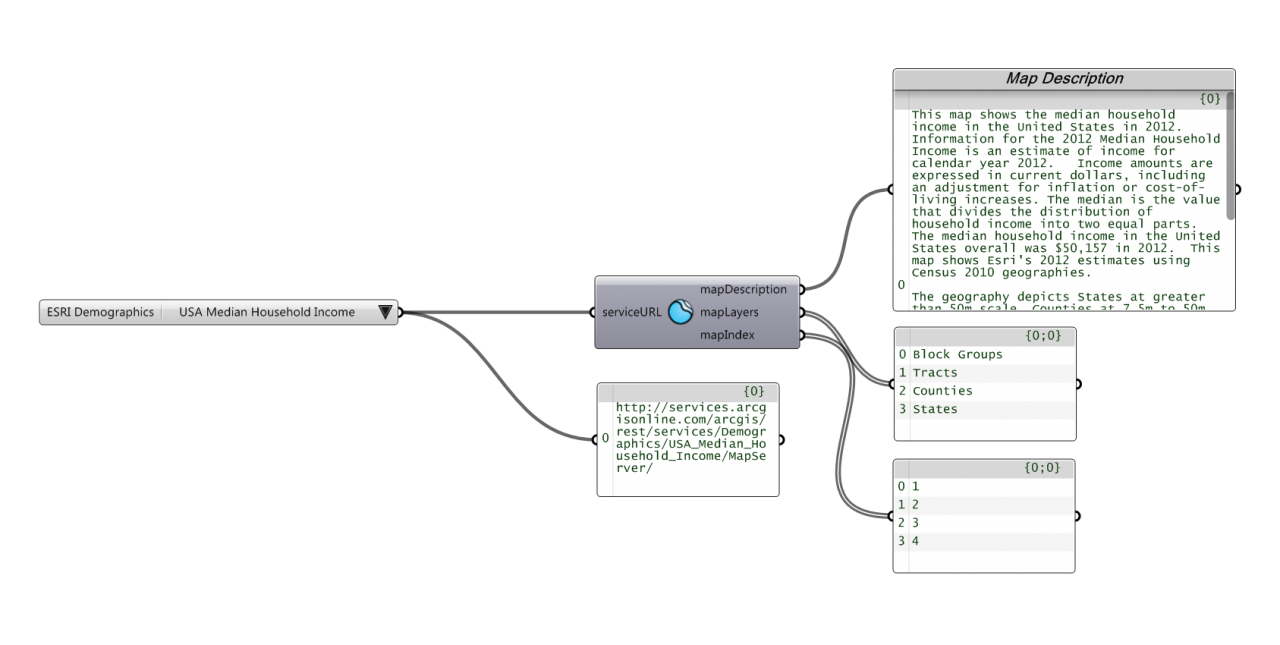 RESTLayer component

-
Now, it might be worth examining the outputs from the "RESTLayer" component:
- The first, called "mapDescription", does exactly that. Its output is a summary of the data resulting from the other two outputs.
- The second, called "mapLayers", is telling us what each layer of the map represents
- The third, which is what we will be using to filter our data, is the index of each of the maps stated above. NOTE that the index of the map does not necessarily align with its list index.
Step 4 - Working with Heron
Importing SHP Files

Importing Topography

Downloading Raster Imagery

Downloading Vector Data
