|
Interior Composite Render |
|
|---|---|
| Screenshot | |
| We will use Vray to render a Rhino model using artificial lights. Then use Photoshop to compile and edit the final image. | |
| Uses Tool(s) | Rhinoceros , VRay , Photoshop CS5 |
Setup 3D model
Find desired view
Considering the discussion of successful renders, determine where you want your camera to be in your Rhino model. Consider using walkabout to simulate walking through your model. You can use camera with the SHOW option to see the camera movement in other viewports. Consider changing the lens focal length in the viewport properties.
Edit model if necessary
You may need to make changes to your model to achieve your desired results. For instance, you might want to eliminate some walls behind the camera to allow more light in, or make a section cut right behind the camera and hide that part of the building. You you should hide all non visible geometry (unless they will affect the lighting) to speed up rendering time.
Save View
Dont forget to save your view before rendering. This is especially important if doing multiple renders to compile later on, or generating linework to add.
Edit and Assign Materials
Editing materials
Consider what type of materials you want to represent in your scene. Follow the steps from the course page to develop a set of materials in Vray
Material organization
A good practice is to save a copy of your Rhino file dedicated to you render if you plan to continue editing the model. This way you can assign objects to layers that are organized and named by material.
Assign materials
Follow the steps in the course page to assign materials to their corresponding layer
Setup Vray Options
Lighting
Consider the two general categories of Vray lighting: Direct and Indirect.
- Indirect: Vray is a popular render program because of its "Global Illumination" (GI) feature. This allows a scene to be well lit without manually adding lights. However, shadows are often soft and ambiguous.
- Direct: Various lights can be manually inserted into your scene for more descriptive or dramatic effect. The most versatile and effective is the "Rectangular Light." With normal settings enabled, the size that you create this light at, and the distance it is placed from your scene will affect the light it casts. Other options are directional, point, and spot lights.
Render Engines
Vray uses a primary and secondary render engine. There are several combinations you may choose by opening the "Indirect Illumination" panel in Vray options. We will use:
- PRIMARY: Deterministic Monte-Carlo (DMC) - the most accurate method of light calculation, but takes the most time (therefore use small output sizes or other engines for test renders). To improve DMC results, open the "Image Sampler" panel in Vray options. Change the IMAGE SAMPLER option from "Adaptive subdivision" to "Adaptive DMC." Then change the "Max Subdivisions" to 50.
- SECONDARY: Light cache
VFB Channels
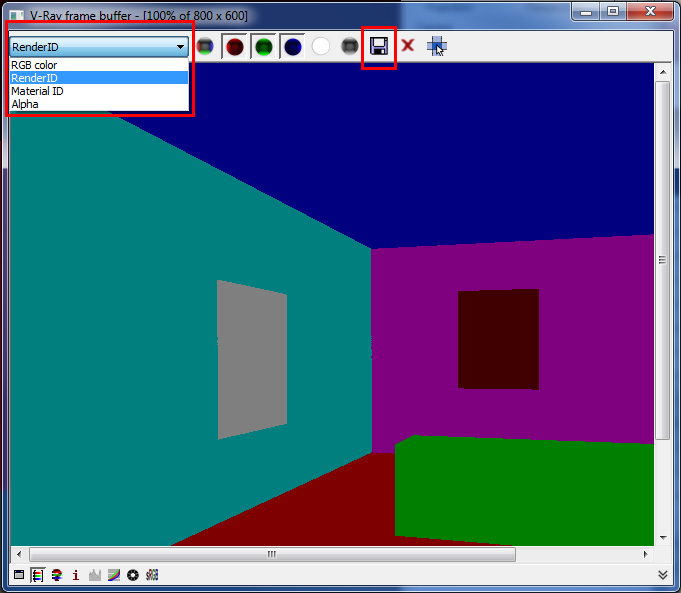
Make sure the necessary VFB channels are added to the render
Render!
Set your output to an appropriate size in the options menu and render. Make sure to save all the necessary channels. Access the various channels in the top left hand of the render. Save by clicking the disc icon.
Post production
Establish Photoshop layers
- Open the various saved channels and copy and paste them into one file.
Edit base RGB image as necessary
- Try auto tone, color, and contrast under "image" in photoshop. These may or may not improve your render.
- Edit levels and other adjustments with this tool:
Add entourage, furniture, background images, etc
- You can collect entourage from ; Here
Blend layers using channels
- Using the steps outlined in the course page, blend images that exist behind glazing or other effects as needed.
- Visit this tool for a comprehensive list of blending examples:
Put finishing touches on comprehensive image
- Adjust the final image as necessary. Consider these following tutorials for simple tricks that can make your render pop.
