|
Mocking up Presentation Boards Using Illustrator |
|
|---|---|
| Screenshot | |
| Mocking up final boards is an important step in not only preparing your work for plotting, but also in assessing which drawings take precedence in your presentation. Size and layout can determine which drawings take center stage as well as what drawings might need to be added or removed. Rather than creating generic layout boxes, this workflow uses Illustrator to create final boards with placed artwork. | |
| Uses Tool(s) | Illustrator CS5 , Rhinoceros |
Steps
Illustrator vs. InDesign
Both Adobe Illustrator and InDesign are helpful tools in laying out drawings for final boards. While Illustrator keeps the image and vector information, InDesign manages the file a bit easier by rasterizing the linked image. This allows for easy manuevering and quick organizational changes, which can be especially helpful when creating a portfolio or book filled with many images. Illustrator on the other hand, allows for multiple artboards of different sizes which can prove helpful when creating presentations boards.
Chosing which program for laying out your drawings is up to you and likely depends on which program you are most comfortable with. For help on laying out drawings in InDesign, see this workflow .
Create the Artboards
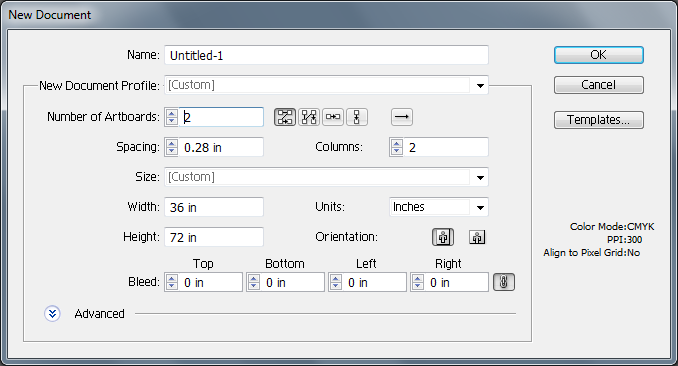
Start by creating the artboards of the actual printing dimensions. Typically, the largest width for plotting is 36" so consider how this will affect the layout. For example, if you're overall board layout will be 4 feet x 6 feet, you may want two sheets of 4 feet x 3 feet.
In the start-up menu, you can chose the typical artboard size, quantity and spacing.
 These can be easily edited later by selecting Document Setup, pressing the Artboard Tool on the toolbar, or pressing Shift + O.
Create Placeholders for Unfinished Work
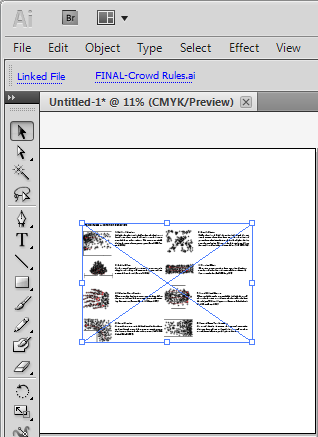
The next step is inserting all of your work on the boards. Rather than copying and pasting work, you can Place work so that it is easily grouped all together and updates as the file is changed. Go to File > Place to select the file from your folders. Once selected, your work will be previewed in a separate window. Then place the work on the artboard.
 Now when you select on this image, it should reference it as a link in the top left corner. You can easily edit the original file by selecting the file name that appears next to it. Anytime you edit the linked drawing, Illustrator will ask if you would like the link to be updated.
It is important to place images or drawings for every element on the board instead of boxes to understand the overall look of the presentation. If you have not started on some of the drawings, consider using some of the following:
- Old drawings such as plans or sections from previous iterations.
- Similar drawings - for example, if the building includes numerous levels but you only have one finished plan, copy this plan to replicate what the other plans will look like
- Screen grabs or scanned hand drawings for unfinished perspectives
- Create quick drawings from Rhino by drawing a section without clean-up or line-weight attribution
Organize Images
Once all the work is on the board, move the images to make sure everything is lined up and organized. Consider using guides or the Array tools to keep the drawings lined-up.
Important things to consider: What drawing is in the center of the page? What drawings can be scaled differently? Do any of the drawings have to span two pages?
Add Text
Text can be helpful to orient the viewer for different perspectives or sections as well as provide a very short explanation of the work. Text should be kept to a minimal and at a very small font. Be sure to spell-check everything twice and keep the font selection consistent.
Export to PDF
In order to plot, be sure to export to PDF by the desired page size. If working with artboards of different sizes, you may have to print each page one at a time.
Printing a quick copy in 11x17 format for a desk crit or for yourself? Print all the pages by the same reduced scale with Printers Margins so that you can cut them up in similar dimensions. Note that some of the lines may drop as the images become smaller.
Common Problems
- Anytime you link images or files within a document, be sure to remember where they are located if you ever move them. Anytime the file path changes, the links can be deleted. This happens often transferring files to a hard drive or back-up server. Once the links are relocated, Illustrator does a good job of finding similarly relocated files so that you do not have to re-link each one individually.
Resources
- Adobe's Help Page for Illustrator
- Thorough explanations of the parts of Illustrator
