|
Lofting Curves in Rhino |
|
|---|---|
| Screenshot | |
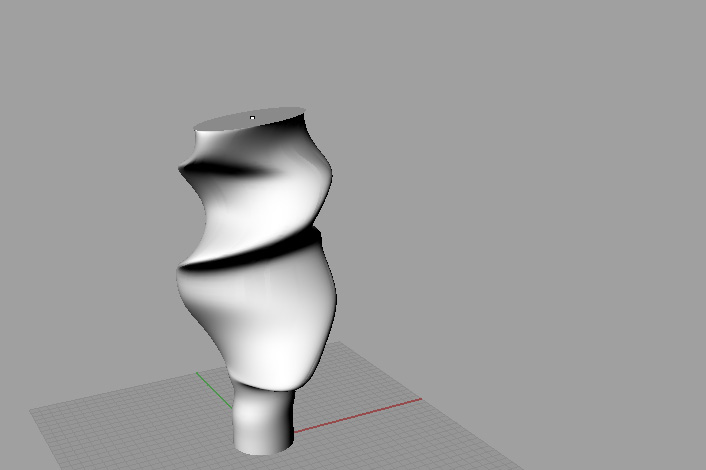
| The Loft command can be used to create a twisted or curved surface that cannot be achieved by simply extruding a curve. This tutorial goes over how to loft a series of curves and the options involved. | |
| Uses Tool(s) | Rhinoceros |
Steps
Introduction to Lofting
The Loft command creates a surface that connects two or more curves. So, first draw two or more curves in the Top viewport . Make sure they are on different planes by moving them vertically in 3D (the lines can also be moved horizontally, but they must be on different vertical planes). Then, use the Loft command, select the curves, and hit enter.
Loft Options
After pressing enter, the Loft Options window will appear. Here, you can choose the option that best fits the needs of your model. After changing options, press the Preview button to see what the surface will look like.
Under Style, a Loose loft will not follow the curves exactly. The Tight option will create a surface that is much more accurate to the curves. Straight Sections will create a surface that is not curvilinear, especially where the surface meets the curve, which is useful for translating a Rhino model into a physical model.
The Cross-section curve options affect how the surface is built perpendicular to the original curves. Rebuilding the surface with a greater number of control points creates a surface that is more accurate to the curves. Refitting the surface within a smaller number of units creates surface sections in that unit.
Sequence of Choosing Curves
The sequence in which the curves are chosen affects the final form of the loft. The loft will begin at the curve that is chosen first and end at the curve that is chosen last. If your surface does not look right, be sure to check if you are choosing curves in the correct order.
Curve Direction
The direction of the curves in the loft also affects the final form of the loft. The surface will begin its creation at the first point of the first curve and will connect to the first point of the second curve, and so on. If you are unsure what direction your curves were drawn or the loft does not look like what you expected, click on the Align Curves button, and click on the corners of the curves to change their direction until all of the curves are aligned properly.
Lofts in Action
The Loft command can be used to create quite complex geometry. In this example, a series of differently shaped ellipses are lofted to create a surface that could not have been achieved by extruding a single ellipse.
