| Workshop 1c | |
|---|---|
| Course | Arch 200c |
| Date | 2012/09/04 |
| Learning Objectives | This workshop will introduce the 1-pt and 2-pt perspectives as advanced graphic projection tools. We'll dive deeper into the creation of a 2-point perspective drawing using the "office" method. Strategies for depicting curves, receding surfaces, oblique views, and rectilinear forms in orthographic projection will be explained in order to expose you to the conventions within these common drawing types. |
| Agenda |
|
| Uses Tool(s) | Drafting Board |
INTRODUCTION
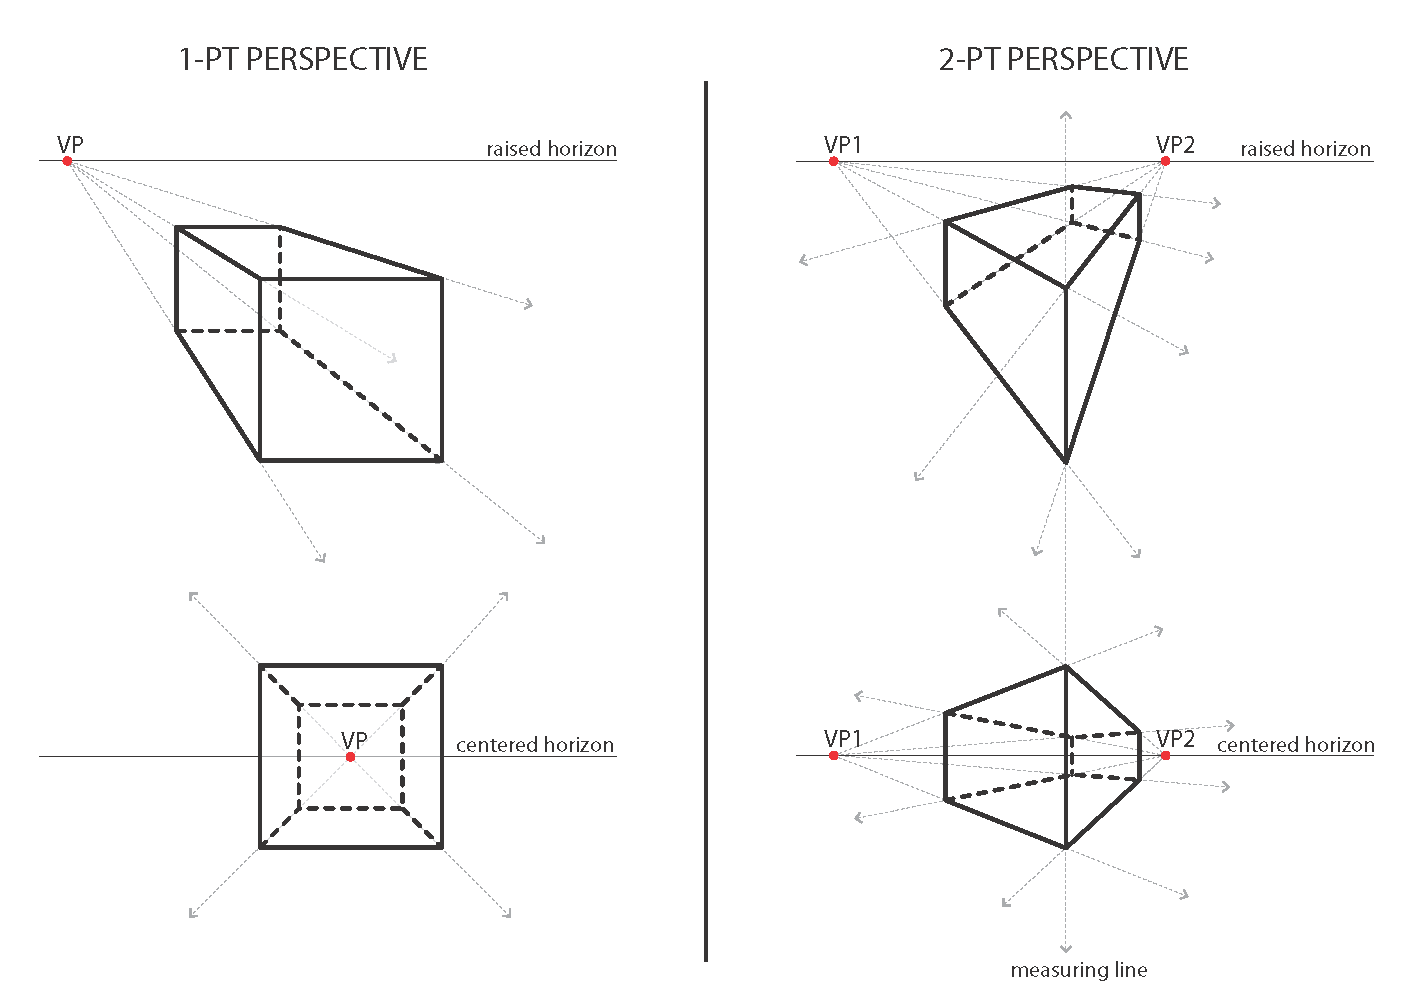
Examples of 1-pt and 2-pt perspectives:
Since the Renaissance, perspective drawing has been a powerful tool in visualizing 3d space for architects. The most commonly constructed perspectives contain either 1 vanishing point (1-pt) or 2 vanishing points (2-pt). While the 1-pt perspective focuses the view on a single , dominant trajectory, the 2-pt perspective involves, as you would assume, two , and so on.
This is why 1-pt perspectives are often focusing on hallways or toward doorways and windows, where one subject is being exposed, while 2-pt perspectives often use street directions as common vanishing points, such as those on corners or along a single street axis, exposing multiple points of interest.
As the above diagrams show, the chosen horizon line influences to a great deal the kind of perspective you draw. It is generally assumed that the horizon is at the level of the viewer, making a raised horizon a view looking down, a lowered horizon a view looking up, and so on. When deciding what the subject of the drawing is, like the roof or the facade or the ground condition, placing the horizon line accordingly will help showcase these elements.
In the 2-pt perspective, the addition of a "measuring line" to divide what lines are drawn to what vanishing point, can also help to showcase certain sides more than others. Placing the measuring line appropriately will further your ability to focus the perspective accordingly.
Loom - Movement 4, Unfolding House

Loom - Movement 6, Unfolding House

As you can see, the above 1-pt perspectives showcase interior spaces well, pulling you in and focusing your view.
The below 2-pt perspectives reveal how they are well-suited for exterior shots, revealing the form of the project in x, y, and z space. However, both 1-pt and 2-pt perspectives can be adapted to fit your needs, and need not be limited to only "interior" or "exterior" conventions. You should feel free to play with them and find what works best for you. Perhaps, if you feel daring, you may even try a 3-pt perspective!
LTL Architects - West Avenue Lofts

Diller Scofidio + Renfro - Alice Tully Hall

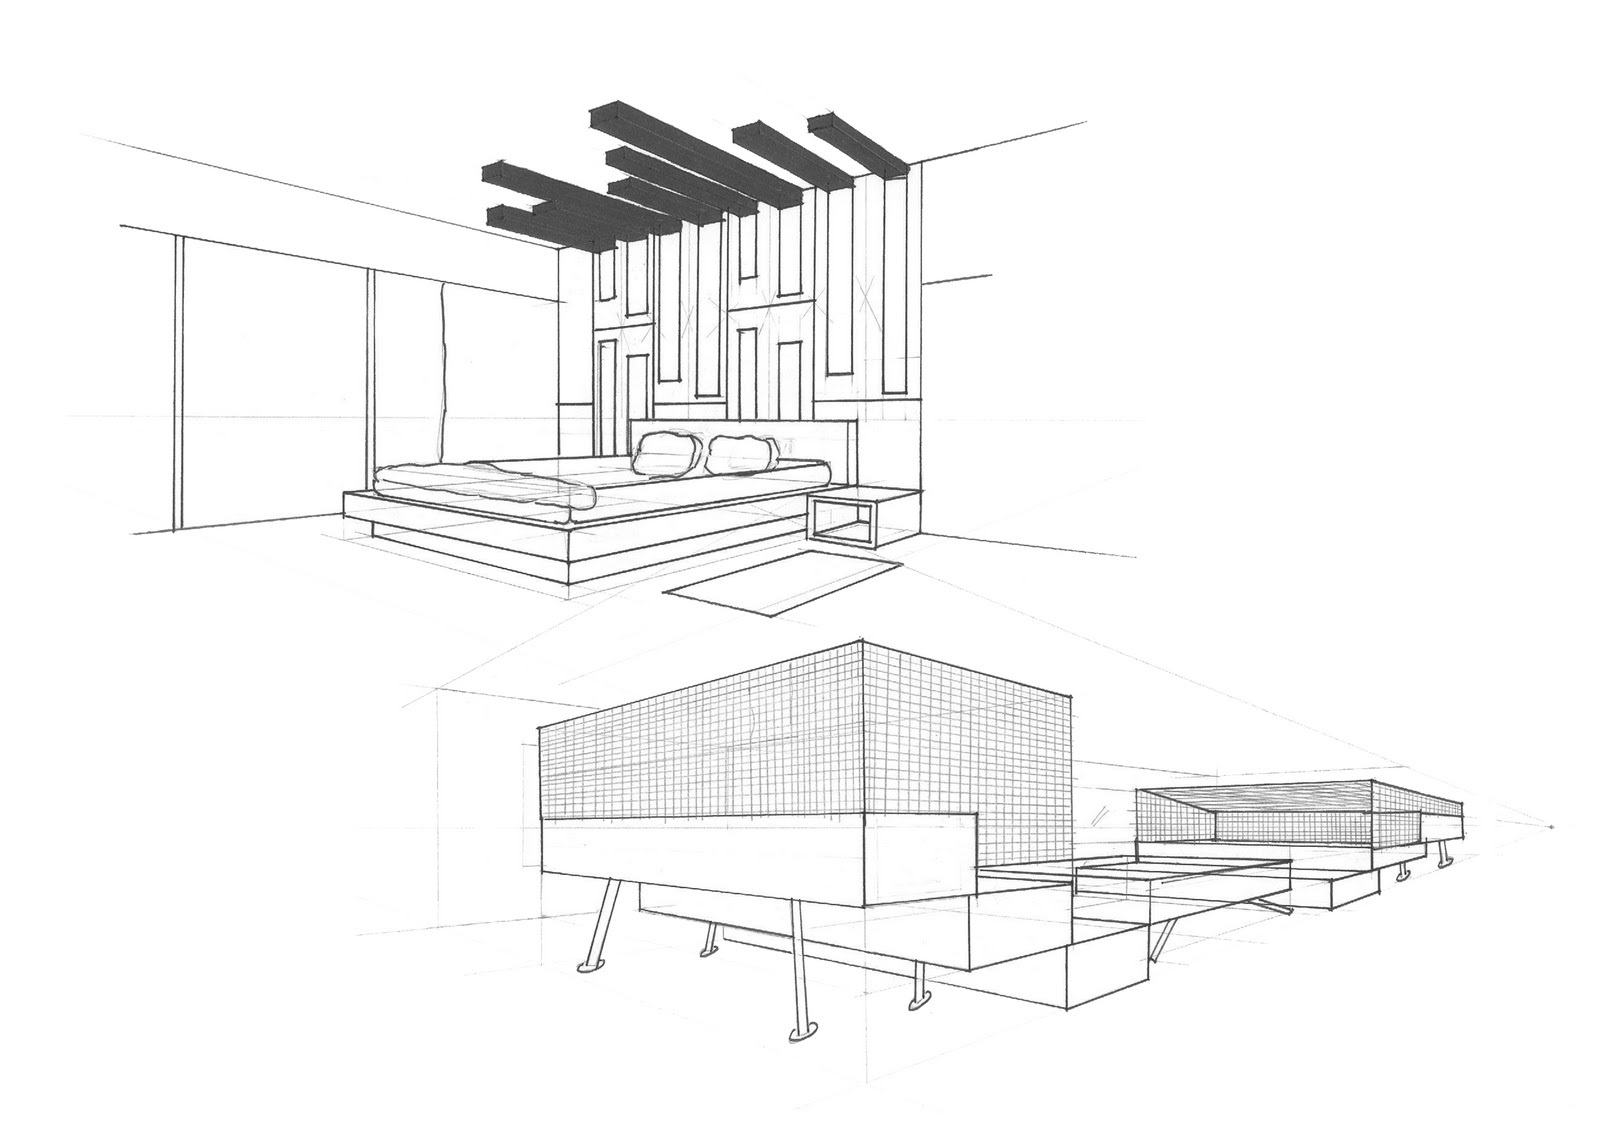
Student drawing I found on the internet
WORKFLOW: Creating a 2pt Perspective Hand Drawing
This workflow will walk you through how to create a 2pt perspective by hand. Understanding that a tacit intimacy with your work can arise out of hand drawing and can serve the development of anything from details to larger formal manipulations, the 2pt perspective provides an added means to facilitate this development, over and above the sketch or orthographic drawing. A plan and an elevation will used to represent a measured design rather than a sketch in the workflow.
Related Pages
Perspective Drawings
Tool:Drafting_Board
In-Class Exercise

At your studio desks, you will draw the CCTV Building by OMA in 2pt perspective. A plan and elevation will be provided.
This exercise is due at the end of class (2pm).
HOMEWORK, Due: Thursday, Sept. 6th
- Scan plans and sections in prep for Workshop 1D

