| Week 4 - July 18th - INTRO TO RENDERING/TOPICS | |
|---|---|
| Course | 124a |
| Date | 2014/07/18 |
| Learning Objectives | This week we will introduce rendering with Vray for Rhino. We will look at how to set up basic sunlight system, saved views, and how to render for shadows. As this week also marks the halfway point in the term, we will go over any topics from the first half that need additional attention. |
| Agenda |
|
| Uses Tool(s) | Rhinoceros , VRay |
Introduction
VRay is a photo-realistic render engine plug-in for a variety of 3d modeling programs, including Rhino. While it is an extremely powerful rendering engine with global illumination, irradiance maps, and ray-tracing, it's also a complicated one. There are many different variable settings that can change how your rendering comes out and it will take many rounds of trial and error to get exactly what you want out of the render. This may be time-prohibitive, especially when you are just beginning to use VRay. Our goal is to use the software as a set-up of lighting, shadow, and perspective, then take the result into Photoshop or another photo editing program to get finer details.
Interface
The toolbar for VRay consists of the following buttons (listed from left to right):
- Material Editor
- Create, edit, and assign materials to objects.
- VRay Options
- Edit VRay settings and load preset settings. Options shown here include settings for Camera, Output (image), Environment, Displacement, and Indirect or Global Illumination.
- VRay Frame Buffer
- Open rendering window.
- Add Sunlighting System
- Create a system based on physically based daylight, or set it to a specific location and time.
- Add Infinite Plane
- Creates an infinite plane along the XY plane at the Z zero location, creating a horizon.
- About VRay
- Information about VRay
Cameras
When setting up your rendered views in Rhino, you want to think about how the camera is being used to helpfully depict your scene, for whatever purposes. You may wish to focus on circulation and get a close up of the stairs and passages into a space, or you may be interested in a sequence of spatial experiences as you move through a space or series of spaces. Regardless of your focus, a healthy understanding of how to set up your camera shots will be imperative in helping you reveal these various conditions clearly.
Saving Views
- Saved Views
- In Rhino, you can save views so that you'll be able to come back to them at any point later on, even if you've shifted your view around in any of the viewports. Right click on each viewport title and you'll see a drop down menu; go to Set View and click on Named Views.... Here you'll be able to save your current view in the currently selected viewport and give it a name.
- Orient Camera to Surface
- The OrientCameratoSrf command allows you to set up a surface for the camera to lock on. This can be very helpful when setting up exact views, such as axonometrics.
Controlling Views
- Setting up Views
- Eye level - this should be approximately 5 feet above the ground plane
- Birds Eye - this view if from above, looking down at the overall context of the site and the design.
- Interior view (looking out from library) - similar to the bird-eye view, this view is specific to the Potrero Library project because it's a familiar view. When creating this view, consider how a window or interior scene might frame the final viewpoint
Saved Views
As you should know by now, by clicking View>Set View>Named Views, you can Save your Camera View and access it again later. You may find that much of your model is not needed for the particular render your putting together. To save file space, you can delete the superfluous geometry and re-save the file as the render name or whatever you like. Below is an example of when a particular shot requires only a piece of the whole model.
(Left: Saved View, Right: Simplified Model (200C, 2011):

Walkabout
If you make a 5' tall vertical surface off of the ground plane and OrientCameraToSrf, your camera will be 5' off the C-Plane. From here, if you type Walkabout your z-axis height locks, but you can zoom in an out along the 5' tall plane, as if you were walking around in 3d space. You can tell you're in WalkAbout mode by a small cross-hair in the middle of the screen, shown in the image below. To exit WalkAbout mode, type it again.
With WalkAbout turned on, you can also look around or "LookAbout", though that's not a command. Without zooming, you simple orbit around and the point you are at will be held, while the rotation around that point will be adjusted, like you were looking around without moving.
View Camera / Set Camera
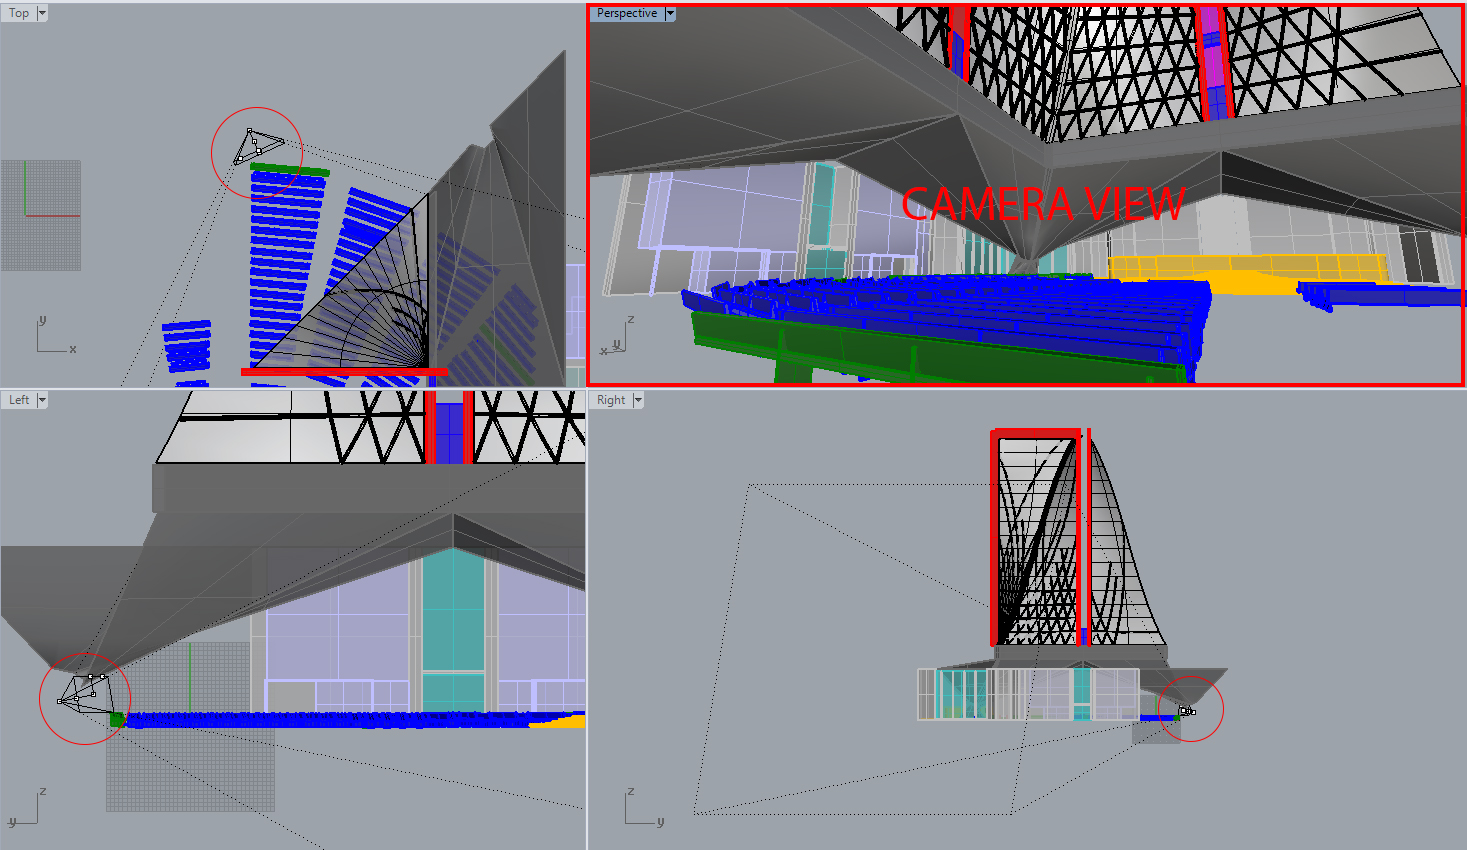
To properly set you camera, you'll probably want to see where it is in 3d space. This is viewport specific, fyi. By simply typing "Camera", you can show the camera in the viewport you are in. The camera will show up in the other viewports, so make sure you open all 4 viewports to accurately see the camera.
For example, if I type Camera>Show, and I'm in the perspective Viewport (shown below), the camera will appear in all three other viewports, exposing how it's framing the perspective viewport. If I type Show for another viewport, like Front View, the same thing will happen, and the other three viewports will pick up that camera scene.
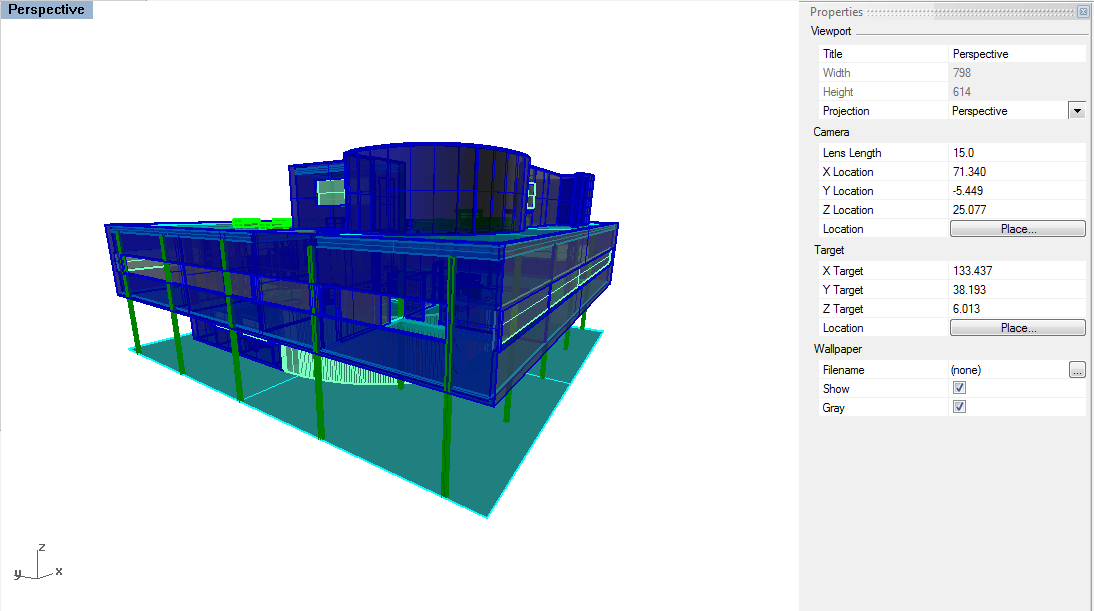
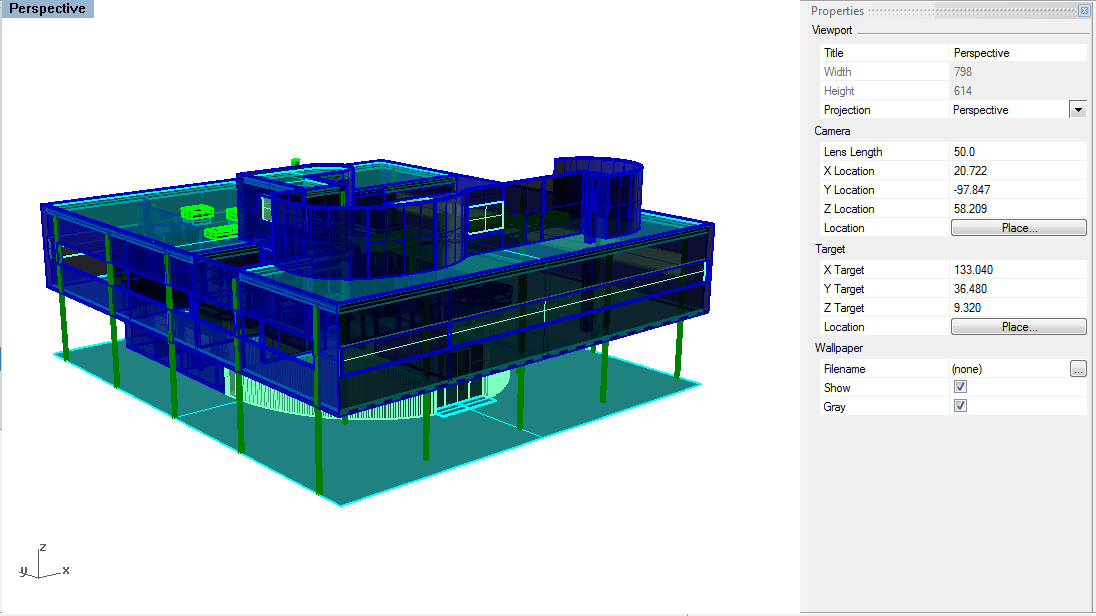
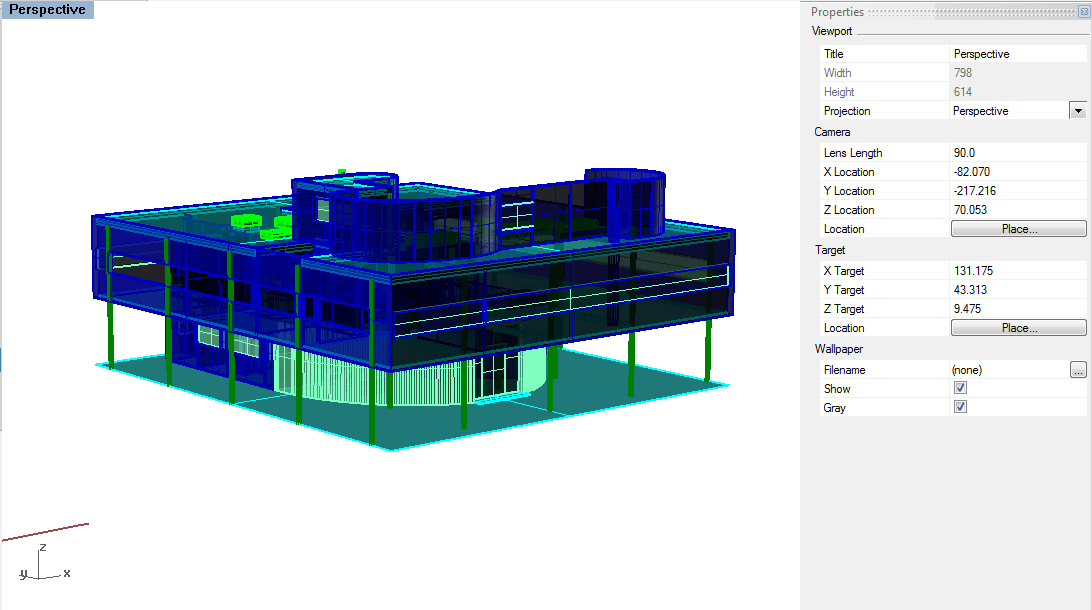
- Lens Length
- The perspective camera in Rhino is set to 50 mm by default, replicated the approximate amount of perspective we see in real life. Look at this value in the Properties menu. As the value increases, the lines of perspective become more parallel. As the value decreases, the lines of perspective increase which could be helpful for an interior view. See examples below.
Basics of Lighting
Lighting plays the most important role in rendering because it affects the color, shadow, reflection, and refraction among objects and materials in the scene. V-Ray comes equipped with Global Illumination , which is the natural lighting in a scene. It can be difficult to produce a specific lighting effect because of the many ways to create lights, as well as to change a light's appearance in a final render.
Be sure to choose a light that's best for the type of lighting needed for the scene. Lights can be created using Rhino commands. Or, use the sun and sky tool that is built into V-Ray to position a directional light.
There are two main ways to change lighting options. The first way uses the Properties panel in Rhino to change the properties of a selected light. This is helpful for controlling specific light objects. The second way uses Light Options in V-Ray, which controls the ambient light in the scene--that is, the lighting for the entire scene, not just one specific light.
Settings for all lights are controlled in V-Ray Options.
Environment
- GI (Skylight)
- This controls the Global Illumination . A V-Ray Sky can be added for illumination.
- Background
- This controls the color of the background in the render. It can be changed to an image by clicking on the m next to the color selection.
Typically, exterior renderings can quickly be made by using the default GI. However, to light a scene specific to a time and day, the sun and sky can be set. Interior renderings require a different set of lights. There are several different types of lights in Rhino , but only a few are especially helpful for rendering interior scenes .
Sunlight System
The Sunlight System, when partnered with the Physical Camera settings and various options within Vray, give the user a great range of flexibility in creating accurate daylighting renderings for 3d models. First off click the Sunlight System button at the V-Ray menu to bring up the dialogue box. Here you have the option to manually position the sun with horizontal and vertical angles (be sure to keep the sun above the horizon or you will not get illumination). You can also choose a specific location and specific time if you want to place the rendering within your given site.
You can also adjust the settings of the sunlight by selecting the light within the rhino screen. Once selected input properties or click the object properties tab in the tools menu. This will bring up the Object Properties Dialogue Box, here click on the drop down menu and select Light under object. This box gives you the option to re-position the light with the modify button. Below this there are other buttons that effect the way the sun performs in the renderings.
Turbidity, when the value is raised increases the atmospheric haze creating a smoggy effect, and a warmer color cast (3 default - 6-12 warm - 20 heavily altered) Ozone, when raised gives a blue cast to the scene (0.35 default - 1.0 blue cast) Intensity Multiplier, when raised the sun's strength becomes stronger (levels depends on camera settings) Size Multiplier, when raised creates softer shadows (1 default - 6 soft shadows -12+ very soft shadows)
Resources
- VRay for Rhino Manual
- The official manual for VRay


