| Workshop 4a & Graphic Pinup | |
|---|---|
| Course | Arch 200c |
| Date | 2014/10/28 |
| Learning Objectives | A review of work presented in 200a, and an introductory workshop on architectural visualization using VRay. The basic VRay workflow will be reviewed and expanded upon. Basic lighting controls will be covered. By the conclusion of this workshop, students will be expected to be able to produce simple daylight renderings of 3d models with basic materials and textures applied. |
| Agenda |
|
| Uses Tool(s) | VRay |
Graphic Pinup for 200a Assignment 3
A portion of today's class is dedicated to a 'graphic dress rehearsal' of your work for 200a. Please be pinned up in room 901 prior to the start of class so that Eleanna, Jeremy, and Kyle can assist you in improving the graphic quality of your work.
The Mechanics of Ray Tracing
A broad-strokes overview of Ray-Traced Rendering, including its history, technical definition, and common applications.
Introduction to VRay
Cameras and Views
Saving Views
- Saved Views
- In Rhino, you can save views so that you'll be able to come back to them at any point later on, even if you've shifted your view around in any of the viewports. Right click on each viewport title and you'll see a drop down menu; go to Set View and click on Named Views.... Here you'll be able to save your current view in the currently selected viewport and give it a name.
- Orient Camera to Surface
- The OrientCameratoSrf command allows you to set up a surface for the camera to lock on. This can be very helpful when setting up exact views, such as axonometrics.
Controlling Views
- Setting up Views
- Eye level - this should be approximately 5 feet above the ground plane
- Birds Eye - this view if from above, looking down at the overall context of the site and the design.
- Interior view (looking out from library) - similar to the bird-eye view, this view is specific to the Potrero Library project because it's a familiar view. When creating this view, consider how a window or interior scene might frame the final viewpoint
- Lens Length
- The perspective camera in Rhino is set to 50 mm by default, replicated the approximate amount of perspective we see in real life. Look at this value in the Properties menu. As the value increases, the lines of perspective become more parallel. As the value decreases, the lines of perspective increase which could be helpful for an interior view. See examples below.
-
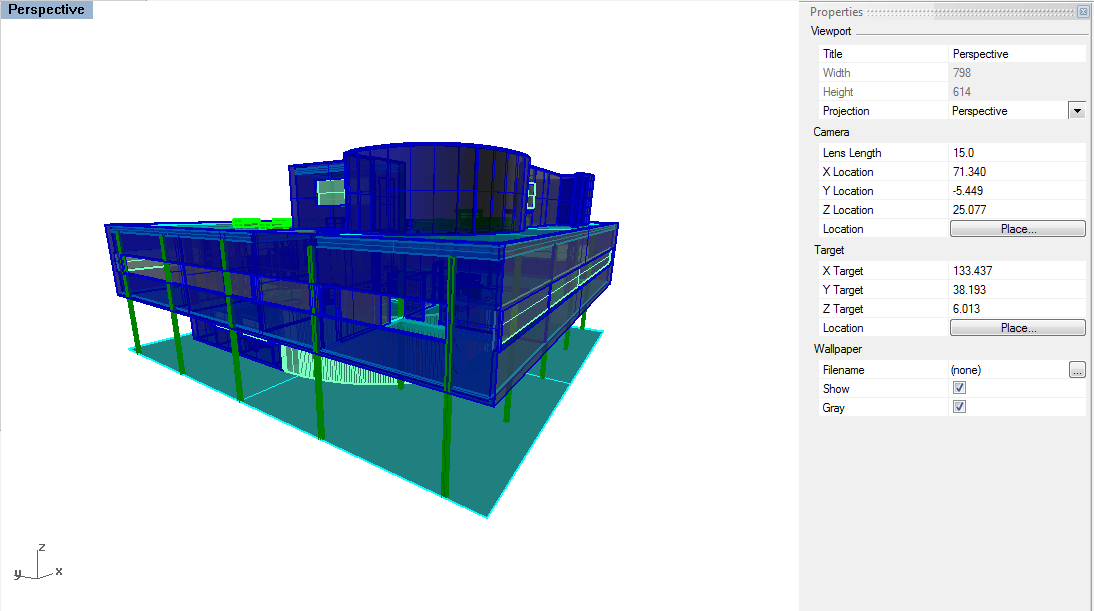
Lens Length at 15 - extreme perspective
-
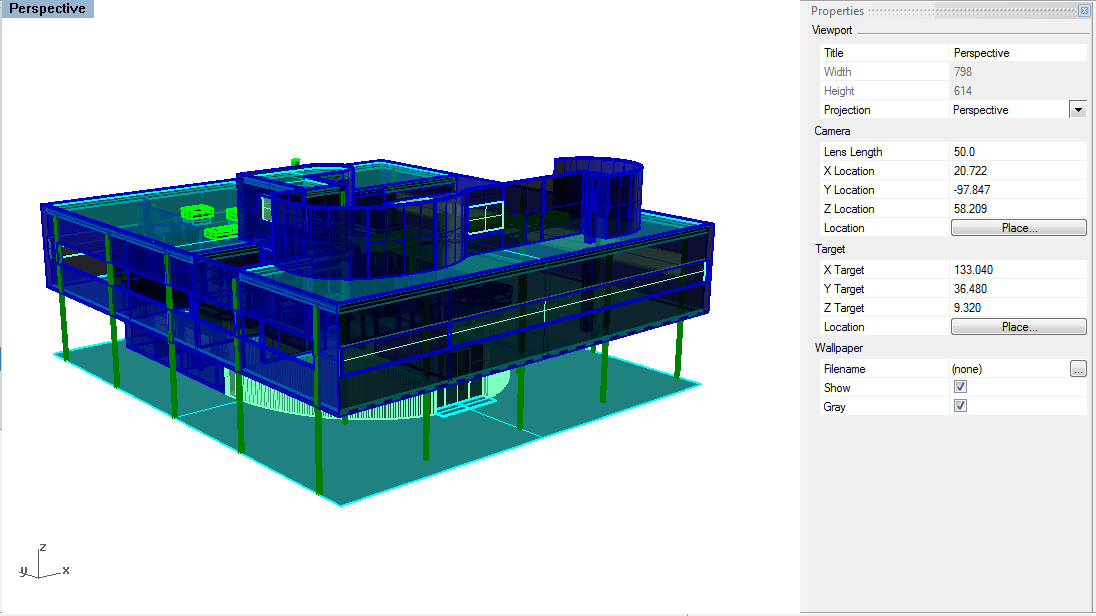
Lens Length at 50 - default
-
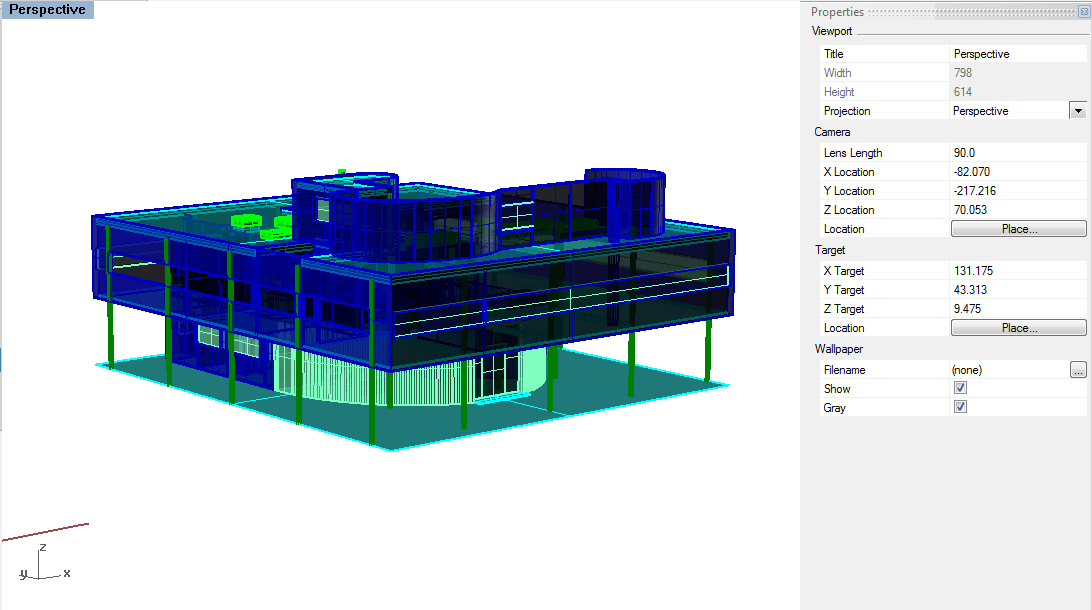
Lens Length at 90 - less perspective, close to Parallel view


Lighting
Lighting plays the most important role in rendering because it affects the color, shadow, reflection, and refraction among objects and materials in the scene. V-Ray comes equipped with Global Illumination , which is the natural lighting in a scene. It can be difficult to produce a specific lighting effect because of the many ways to create lights, as well as to change a light's appearance in a final render.
Be sure to choose a light that's best for the type of lighting needed for the scene. Lights can be created using Rhino commands. Or, use the sun and sky tool that is built into V-Ray to position a directional light.
There are two main ways to change lighting options. The first way uses the Properties panel in Rhino to change the properties of a selected light. This is helpful for controlling specific light objects. The second way uses Light Options in V-Ray, which controls the ambient light in the scene--that is, the lighting for the entire scene, not just one specific light.
Settings for all lights are controlled in V-Ray Options.
Environment
- GI (Skylight)
- This controls the Global Illumination . A V-Ray Sky can be added for illumination.
- Background
- This controls the color of the background in the render. It can be changed to an image by clicking on the m next to the color selection.
Typically, exterior renderings can quickly be made by using the default GI. However, to light a scene specific to a time and day, the sun and sky can be set. Interior renderings require a different set of lights. There are several different types of lights in Rhino , but only a few are especially helpful for rendering interior scenes .
Light Types
This is a quick overview of the different lights Rhino offers, but for a more in depth look at lights look at Types of Lights in Rhino , and learn how to better light interior scenes . No matter your level of comfort with lighting in Rhino, it's always a good idea to test render your scenes or render portions of scenes before finalizing your lighting setup.
- Directional Light
- For directional light, the direction of the arrow is the direction from which the light will shine. While spotlight intensity and range can be edited, directional light is different because it emits uniform parallel rays in a specified direction, simulating sunlight. The exact location of the light object does not matter as the light object only indicates the direction of the light.
- Linear Light
- A linear light object emits light similar to a fluorescent tube light.
- Rectangular Light
- A rectangular light object emits light in one direction. Unlike the Spotlight, with Rectangular Light the angle of the light cannot be changed. The size of the light object affects its lighting range. If a larger range with the same light intensity is needed, then the intensity of the light will need to increase. A larger rectangular light will spread the light out over a larger area, so the shadows will become more diffuse.
- Point Light
- A point light emits light from a single location in all directions, also known as omni light. It is useful for interior scenes that require artificial lighting (such as from a light bulb). Especially important when working with point lights is paying attention to the light's intensity and decay settings.
- Spotlight
- The spotlight will appear in the model as a cone shape. The direction of the cone will be the direction of the spotlight. Spotlights with a narrower cone will produce a more concentrated light than spotlights with wider cones. The width of the spotlight does not determine the range of light (how far the light will reach), but the length and width together control the shape of what is illuminated by the spotlight.
Basic Materials
There are two ways to access the Material Editor in V-Ray: from the toolbar and from the Object Properties panel. Using the V-Ray toolbar, left click on the icon that looks like a tag with the letter "M" on it. Or, select the object(s) to create a V-Ray material for. Use the Properties command and select Material from the drop-down menu. Assign by Plug-in and then click Create.
Creating Materials
Open the Material Editor in V-Ray. Right click on Scene Materials and select "AddVrayMtl."
Assigning Materials
Materials can be attributed to both layers as well as individual objects by using the Material Editor. Materials can be made up of different layer attributes (such as texture, transparency, bumps, etc) in effort to not read more than a flat texture mapping. Sometimes these layers depend on a value (such as intensity or a percentage of transparency) while other times they come from a gray-scale image.
You can quickly view what these materials look like by changing the view to Rendered View which offers a simplified version of the texture maps on the object. However many of the details will change once you actually render the image so it is important to test render throughout the process to check your work.
The next step is to attribute the material to objects or layers. Materials can be applied in two ways: from within the V-Ray Material Editor, or within an object's Properties in Rhino.
In the V-Ray Material editor, right click on the material name, and then click on either "Apply material to layer(s)" or "Apply material to object(s)".

To attribute the material to objects or layers in Rhino, select the objects or layers. Then, use the Properties command and select Material from the drop-down menu. Assign the material by Plug-in, and then click Browse to select the desired material (in the case of this workflow, the material is called Screen1).

In-Class Follow-Along
- The Basic Vray Rendering Workflow
- This workflow will showcase the steps necessary to create a basic interior rendering with the Vray for Rhino plug in. The workflow will cover basic camera setup, sun and sky, and materials to create a convincing, high quality rendering.
Resources
- VRay for Rhino Manual
- The official manual for VRay
- Render Textures
- A great collection of texture map ensembles. Each material consists of different matching material maps (such as diffuse, bump, displacement, transparency). This is a good place to go if you want to create your own material from scratch.
- Flying Architecture
- VRay for Rhino Materials] : This website has some good materials for free download, such as concrete, wood and glass. Be sure to save the whole unzipped folder in an easy to find location.
- CGTextures
- Vast library of high-resolution textures for download. Account registration required.
- Maya NG's Textures
- Over 4250 free, high-resolution textures. Limited to 20 downloads per day.
Related
- Analogous 2013 Session
- The above content roughly corresponds with this class session from last year.
- Analogous 2012 Session
- The above content roughly corresponds with this class session from two years ago.
- Analogous 124a Session
- The above content roughly corresponds with this class session from Summer 2014.
- Creating various rendering effects with Vray
- This workflow shows how to use Vray for Rhino to create various rendering outputs, using the Sunlight System and the numerous options with the Render Options Dialogue box and the Light Properties Dialogue box.
- Rendering with Hidden Geometry in Rhino & VRay
- This workflow shows a simple method for rendering 3d models to show cut sections or plans while maintaining true lighting. We will utilize specific tools in Rhino to split our model, than create transparent materials in VRay to "hide" our cut-away model while leaving its ability to block light.
- Best Practices in VRay Rendering
- VRay is a powerful tool for rendering realistic scenes from a 3D model. Generally, a model is built, a point of view is chosen, the scene is rendered, and the resulting image is edited. This workflow will show the basics of rendering in VRay, including render settings, material selection, and texture mapping.