| Workshop 1a | |
|---|---|
| Course | Arch 200c |
| Date | 2014/09/11 |
| Learning Objectives | First workshop on orthographic projection. Guides students through the production of their first hard-line 3-view drawing. After this workshop, students will be expected to have a clear understanding of fundamental techniques in orthographic projection, including drawing in plan, section, and elevation; the procedures of producing these drawings digitally in two dimensions from drawing setup to producing a finished drawing; and the appropriate use of construction lines, guide lines, and drawing using layers. |
| Agenda |
|
| Uses Tool(s) | AutoCAD 2012 |
To start this workshop, we first take a look at this overview of architectural drawing types and methods to orient ourselves with the general concepts of graphic projection in architectural design. Next, we'll learn the basic interfaces and commands necessary to apply these concepts in AutoCAD. Finally, we'll leave you with a short exercise to complete for the next time we meet.
Overview of Architectural Drawing Types
Here , we present a broad overview of architectural drawings, organized by the type of graphic projection each employs.
Relating Multiple Drawings
Drawing Layout and Registration
Related
- Analogous 2013 Session
- The above content roughly corresponds with this class session from last year.
ACAD I: Intro to Orthographic Drawing Process
This workshop introduces the basic process of producing 3-view orthographic projection drawings in AutoCAD, including a general discussion of line weights and views.
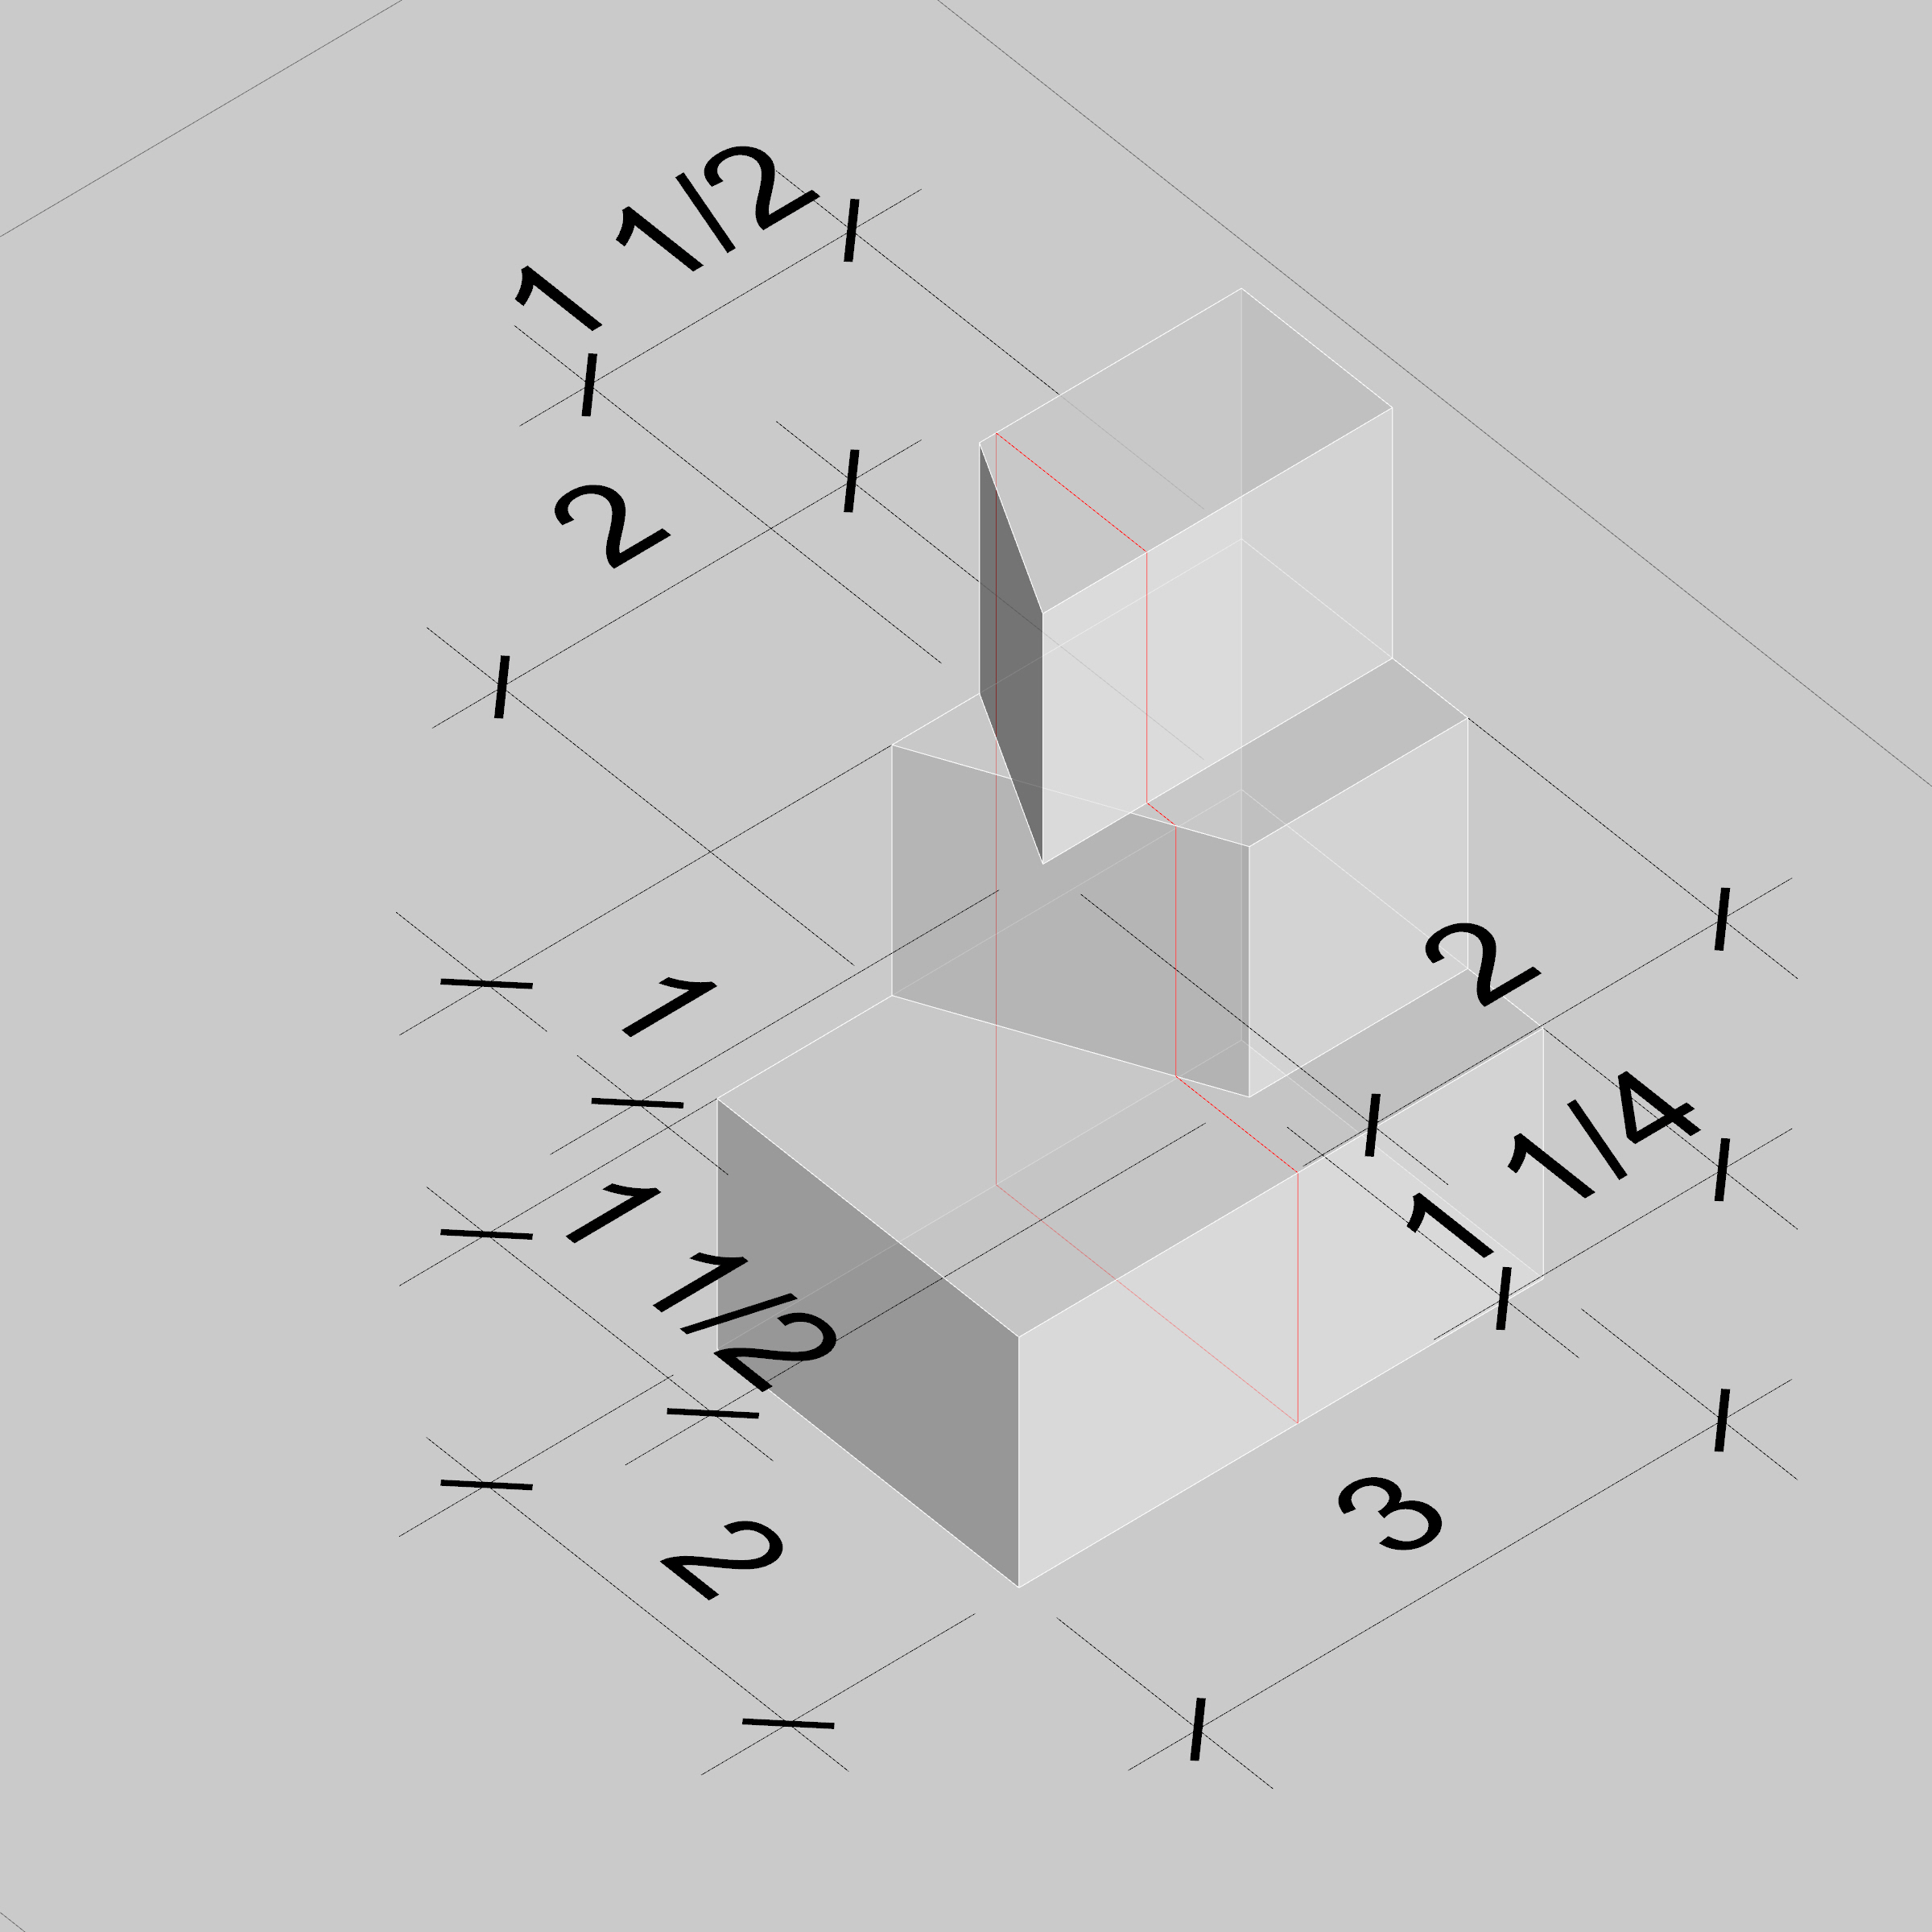
We're going to draw the image below today in class using three orthographic drawings - a top view, a front view, and a side view. There will be a take-home exercise based on what we have done for you to complete by next Tuesday.

Overview of AutoCAD
We begin with an overview of the AutoCAD interface and basic 2D capabilities, which can be found here . if you need a refresher or want to follow along. This will include how to make navigate the program, how to make line work, how to make layers and assign line work to them, and how to plot/print.
We will learn about the AutoCAD Interface , creating and modifying layers , creating linework, applying layers to that line work, and finally the difference between model space, paper space and how to plot .
In-Class Exercises
These exercises are intended to introduce the process of creating orthographic projections of objects with known dimensions.
First, we will create orthographic projects of this object.

This object needs only two drawings to describe it - a top view and a side view. In order to allow other people to interpret what we mean, registration lines are often very important. The final object should look something like this:

Other more complicated objects need more drawings to describe them. The main one we are trying to draw needs at least three.
While working on drawings, it is very important to consider line weights. A great overview of general line weight rules and restrictions can be found here . After creating the necessary line work for our drawings, we will change line weights to the appropriate thickness and then do one final plot.
Related
- Analogous 2013 Session
- The above content roughly corresponds with this class session from last year.
- AutoCAD I
- A general introduction to AutoCAD.
- AutoCAD II
- A general introduction to AutoCAD.
- Rhino 2d
- A general introduction to working with Rhino in 2d.
Take-Home Exercise
As a way of warming up our drafting skills, today in class we'll start to draw an orthographic representation in AutoCAD of a given massing model, which can be found here . We'll create the three main architectural views of plan, section, and elevation. All necessary measurements are marked in the image.


