| Week 7 - Intro to rendering+post process | |
|---|---|
| Course | Arch 100a |
| Date | 2012/10/12 |
| Learning Objectives | Introduction to Vray. Understanding of light tools including sunlight. Adjusting the image and adding material in Photoshop. Composite drawing with linework. |
| Agenda |
|
| Uses Tool(s) | Rhinoceros , Photoshop CS5 , Illustrator CS5 |
Week 6 Exercise : Recap
-
Common Mistakes - Exercise 6
- Duplicated surfaces - students may not have realized some surfaces were already modeled in the design addition. In your own work, make sure to not overlap surfaces because this can create additional linework and more clean-up when creating drawings. If the surfaces are exact duplicates, they can be easily removed by using the SelDup command.
- Precision - KEEP NEAR OSnap OFF!
- Empty holes in the landscape - after trimming or splitting the landscape surfaces, make sure to rebuild them so that no holes are appearing in the ground.
-
Additional Drawing Mistakes
- Lineweight Hierarchy - lines must be attributed lineweights in Illustrator to convey depth in the drawing.
- Section poche should all be the SAME COLOR.
- Annotation lines should not distract from the actual drawing. Keep them light and simple.
Monday Review:
- TEST PRINT + PRINT EARLY
- Feel free to email files to check lineweights and standards
Introduction about rendering
Controlling Views
- Setting up Views
- Eye level - this should be approximately 5 feet above the ground plane
- Birds Eye - this view if from above, looking down at the overall context of the site and the design.
- Interior view (looking out from library) - similar to the bird-eye view, this view is specific to the Potrero Library project because it's a familiar view. When creating this view, consider how a window or interior scene might frame the final viewpoint
- Lens Length
- The perspective camera in Rhino is set to 50 mm by default, replicated the approximate amount of perspective we see in real life. Look at this value in the Properties menu. As the value increases, the lines of perspective become more parallel. As the value decreases, the lines of perspective increase which could be helpful for an interior view. See examples below.
-
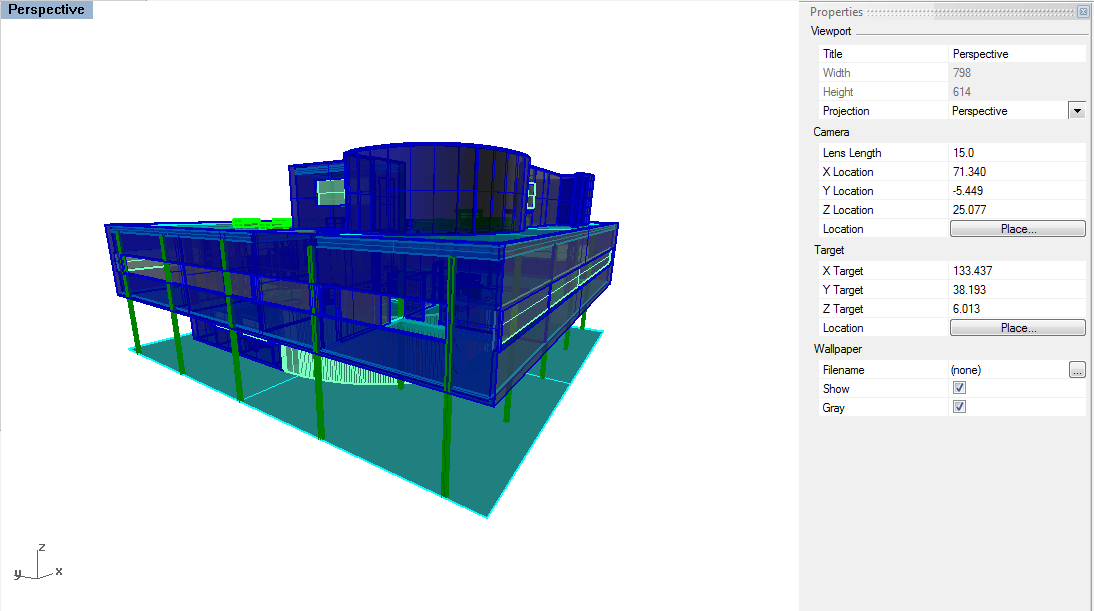
Lens Length at 15 - extreme perspective
-
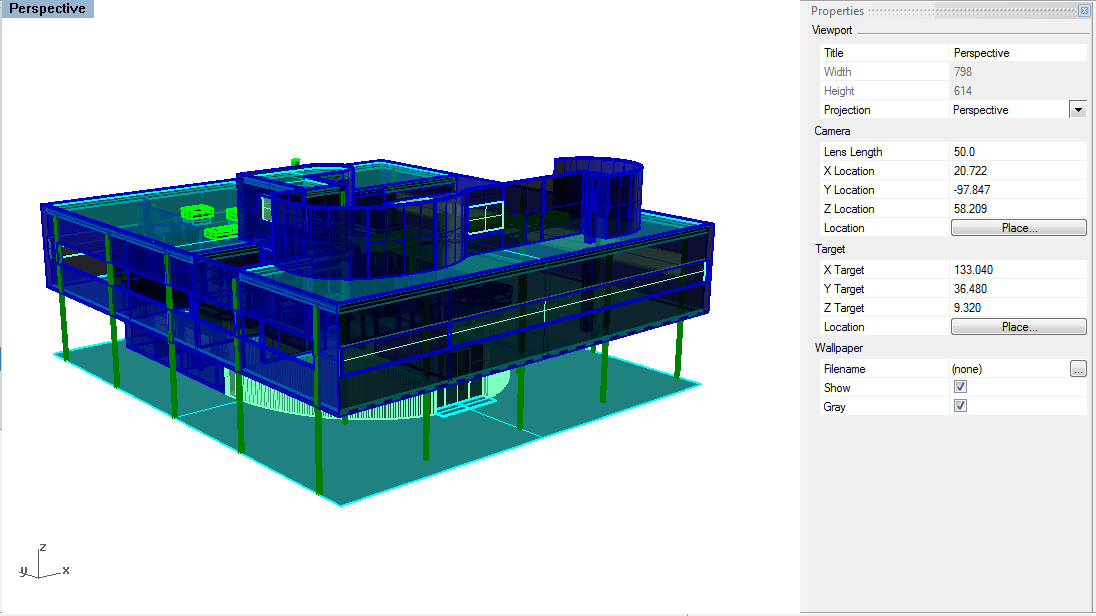
Lens Length at 50 - default
-
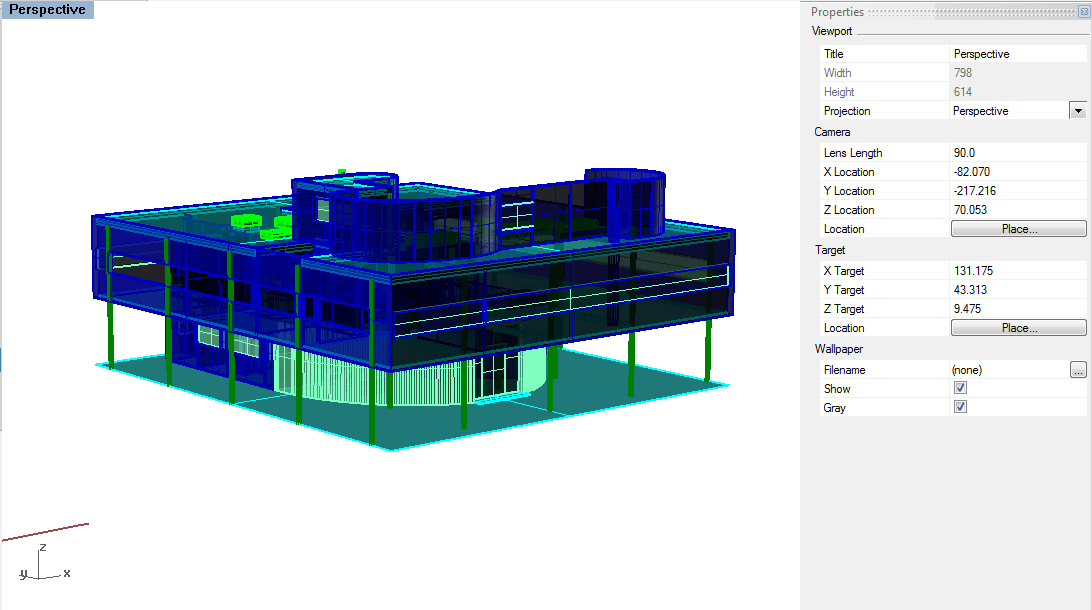
Lens Length at 90 - less perspective, close to Parallel view


VRay
Vray is a rendering engine that works with a variety of 3d modeling programs (Rhino, Sketchup, 3dMax, Maya, etc). The options in each program vary slightly but this course will focus solely on VRay for Rhino.
There are various ways to set up renders that will depend on what you are rendering. Today we will go through the following:
- Sketchy Render - good for quick renders for class and diagrammatic renders when sunlight is not needed
- Environmental Renders with Sun - good for daytime renders with strong shadows, pretty typical render
- HDRI plus sun/shadows - similar to previous option but getting various environment lighting
- Rendering with HDRI for interiors - good for controlling additional light in closed spaces
Having trouble rendering? Try uploading the following settings and load them in your VRay options bar:
Photoshop
- Levels
-
Levels allow for basic tuning of the tonal range of an image. This can change the brightness and contrast of an image. It has the power to change highlights in the image to be white, and dark areas to become black. Move the sliders at the bottom to see how the image changes. This can be edited as a whole image as or per layer as an Adjustment clipping.
-

Levels dialogue box
-

Original level settings. Image lacks contrast.
-

White and black points moved. Contrast has improved.
-

White and black points too close - too much contrast.


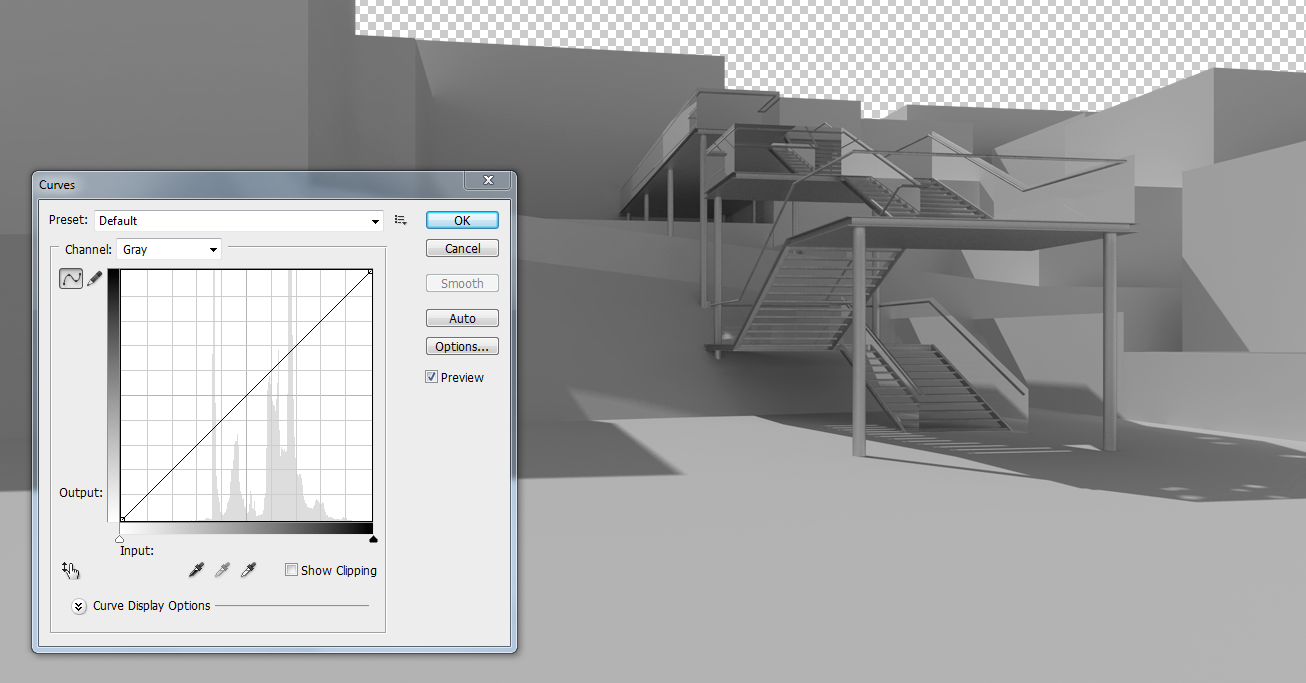
- Curves
- Curves allows for much more tonal adjustment than the levels command. Rather than just changing the high, medium and low tones value, the Curves menu allows to set up fifteen anchor points within the images original tonal range. This can be edited as a whole image as or per layer as an Adjustment clipping.
-

Curves dialogue box.
-
Original curves settings.
-
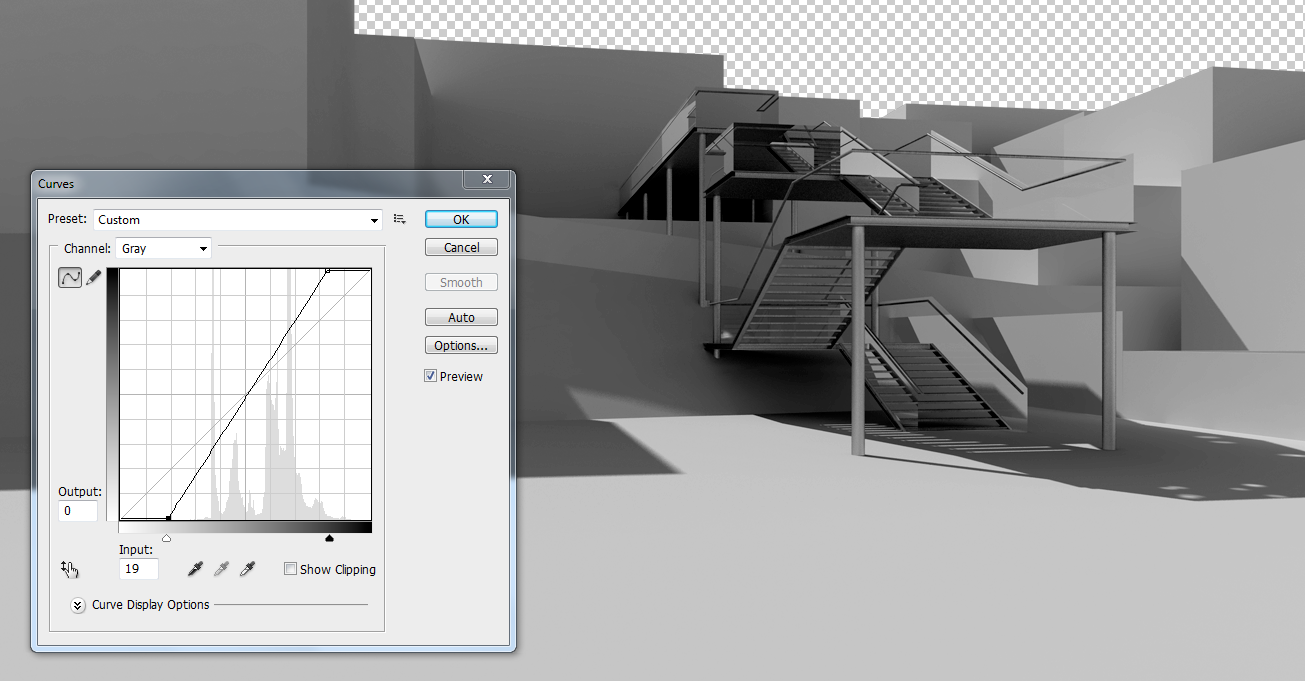
White and black point moved.
-
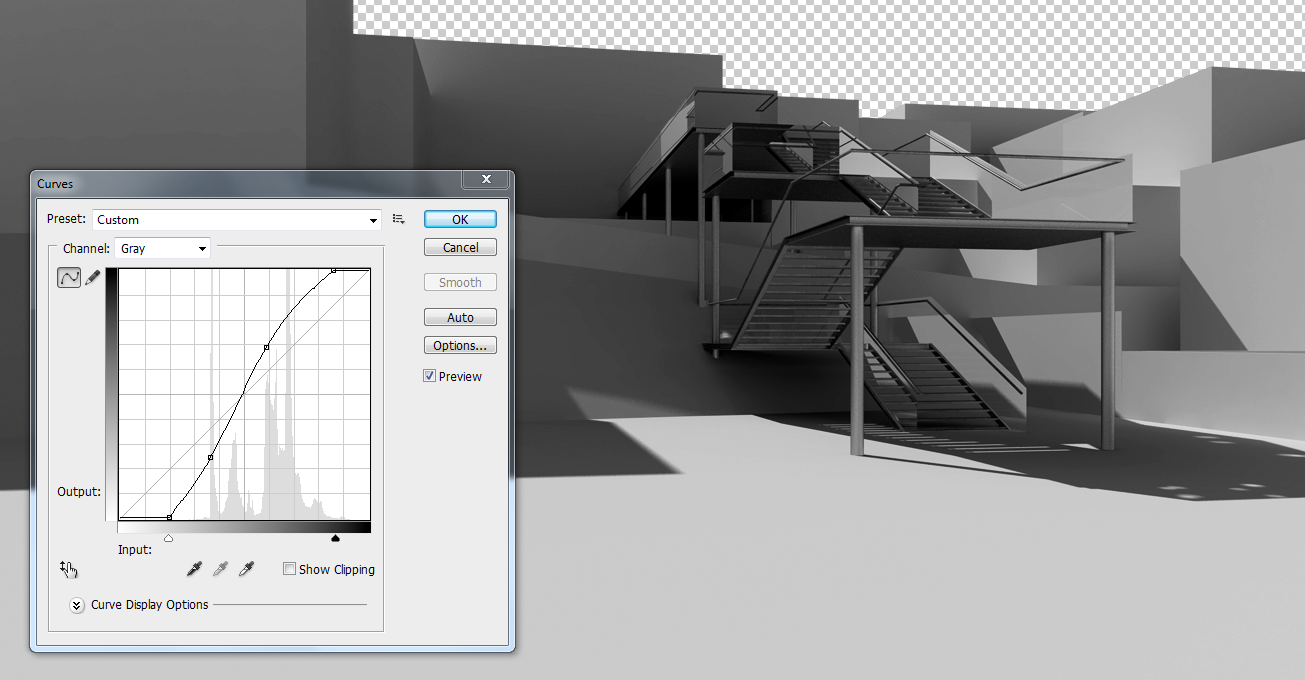
Anchor points added to the midtones.


- Image Size + Resolution
- Image size and resolution will be set in VRay but can easily be edited in Photoshop. For large sized renders, the resolution should be high - 150 dpi or higher. However this will increase the size of the render very easily.
- Working with Layers
- Just like layers in Rhino and Illustrator - layers are important to control organization in your work. Increased layers will be saved when the file is saved as a .psd (Photoshop file) but will be flattened for other image options (.jpg, .png, .tiff). You can also flatten the image in Photoshop to decrease file size. Some additional layer elements that are different in Photoshop:
- Every time an object is pasted, it creates a new layer
- Layers can be linked or merged by right clicking on them
Workflow
- Rendering a model + Post-processing the image
- This workflow introduces VRay by setting up a quick render of an exterior view of digital model+post process with PS control light, color and contrast and overlay AI linework.
Exercise
- Compositing Renders and 2d Linework
- Students will produce a composite exterior rendering of a 3d model of their studio project. An appropriate camera position will be established, a rendered image produced with proper sunlighting in VRay, adjusted in Photoshop, and finally merged with 2d linework in Illustrator. This 2d linework will display correct lineweights and hidden lines, and will be manipulated in order to accentuate elements of the design.
Resources
- VRay for Rhino Manual
- This guide is INCREDIBLY helpful and detailed for students wishing to learn more about VRay. Numerous image swatches help explain how different settings can affect your final image.
- Immediate Entourage
- Large, free collection of cropped images including people, trees, cars, and other random objects you may want to place into composed renders.
- Vyonx - Free resources
- Collection of free cutout trees, people, and textures.